Friday, April 22, 2016

To proseal or not to proseal

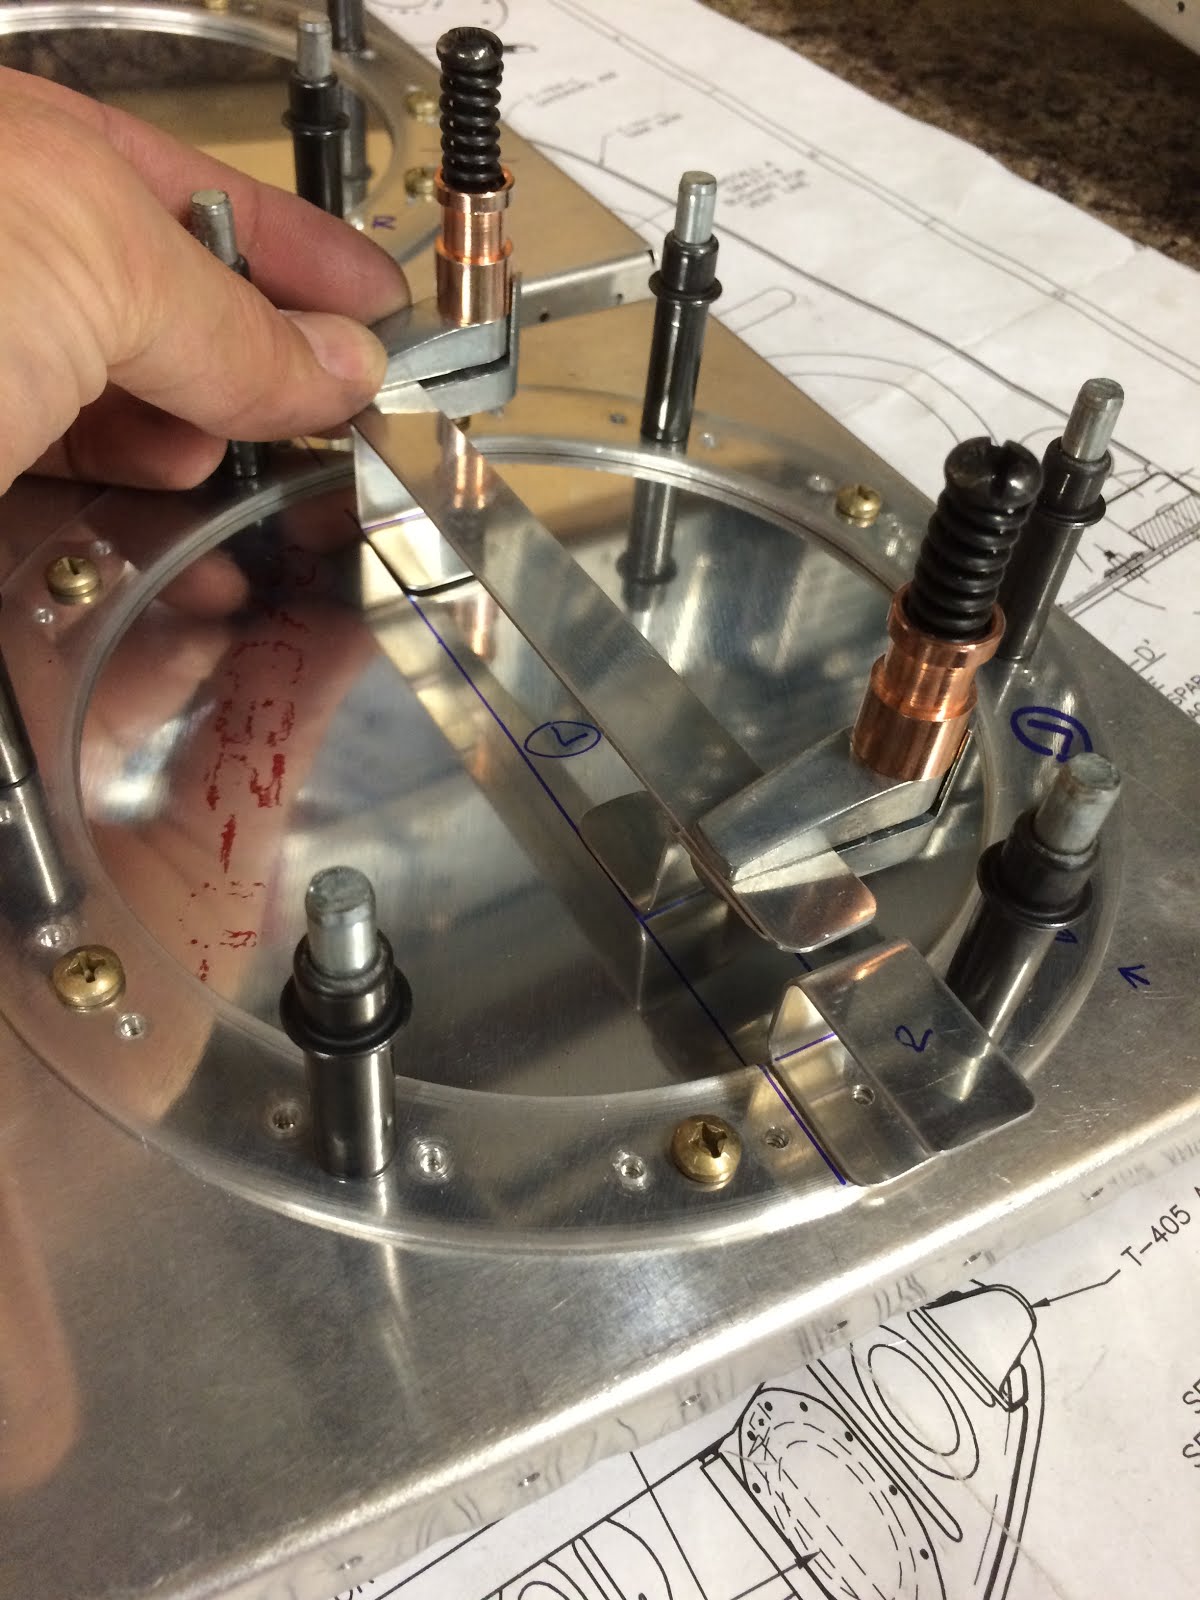
So the big question of the day is how much of the NAS1473-A08 nutplates and stiffner ring assembly should I proseal. The plans state that I don't have to proseal any of it. (Under 'Assembling the Fuel Tanks' 4th paragraph undet the heading 'Final preparations'). I notice though that many build logs use proseal and do everything.

The manual states that the gasket under the access plate will seal the rivets so there is no need to set them with sealant.

This makes me a bit uneasy. My tooling holes are awefully close to the edge of my stiffener ring/access cover. I plan to use seal-tite in lieu of the cork gasket...but I do want to run some proseal  between the rib and ring to make sure that the tooling hole is covered.

Question is....Do i need to proseal anything else?

Stall Warn System - 1.5 hours

I'm waiting on my hinge to finish the fuel tank trap door, so I decided to move back onto the stall warn system now that I have all the needed odd drill bit sizes.

I opened up the holes in the leading edge to #10 and then used a dremel with cutting disk to carefully cut the slot. Then I used a dremel with 600 grit on a mandrel to polish the opening.
 

Then I match drilled the mounting holes and countersunk the holes. I deburred the leading edge bracket and dimpled the holes. Took a little time to fiddle with the countersinks to get them right. All that I need to do is prime the parts and start assembling.


Thursday, April 21, 2016

Little bit of riveting on the tank mods - 2.5 hours

I cleaned the #2 ribs and the hole blanks really well with MEK. I was careful to ensure correct orientations of the blanks (always a pain when you just wanna get it done). I decided to dimple the parts and backrivet.

Then next I needed to countersink Rib #1 for the access plate nut plates. I decided to go oops rivets for those and not dimple.

I'm fairly certain that I don't need to proseal these when attaching the nutplates. The plans say don't do it. I am using the NAS1473-A08 nutplates...Seems like everyone seals them with proseal.....but I'm thinking I don't have to. Nobody seals the standard nutplate method. The seal around the access plate takes care of any potential leaks. Hmmm. Need to read up on this.

I machined countersunk the anti-hangup bracket and backriveted the assembly with AN426AD3 rivets. I will wait until I get into proseal before I rivet it to the access plate.

All that's left to do is fit up the inner anti-holdup bracket, the fuel vent line and locate the fuel sender on the baffle plate. Then I am ready to dive into proseal! 

Wednesday, April 20, 2016

More anti-hangup brackets and clips - 2 hours

I had my buddy Griffin join me in the garage. He was lots of fun to work with....He's turning into a great pup.

I've been thinking on how to bend the clips for the fuel vent. I found that one of my screwdrivers was the perfect diameter and used it to bend the clips. Not the easiest to do. I used 0.025" thick x 1/2" wide material. Little tough to get a tight curl around the screwdriver shaft. Slowly but surely I was able to get 2 that I was happy with. Another 2 less than perfect clips when in the garbage.

Since I was set up to drill the #40 holes, I turn my attention back to the anti-hangup brackets and drilled and cleco'd the rivet holes.


Tuesday, April 19, 2016

Anti-hangup brackets - 2 hours

Using the 1/2" wide x 0.032" thick strips that I cut yesterday. I went to work on fabricating the anti-hangup brackets that are used on the access plate. I wanted to make it usable and accessible (which the plans version isn't) if in the unlikely even I need to take the access plate off. Adopting a method used by the RV8 guys, I went for a spit design.
I needed to drill a mounting hole at the very bottom of the stiffener ring.

Then I cut and bent the brackets. I used scrap 0.025" strips to figure out the best method to bend all of the brackets. Nothing better than measure, mark, and bend with taped up hand seemers. Just with finger pressures, bends turned out nice. Had to make a few until I had the dimensions correct. But it turned out well.

Looks like it turned out pretty good. Happy with the result.


Monday, April 18, 2016

More tank fabrication - 2 hours

My first anti-rotation bracket attempt didn't sit well with me, there was just a small amount of play in it. I told myself that it would be just fine with a little proseal. But I just couldn't let it go. So I threw it out, and went to work on another one, The kit comes with 4 brackets, so I still have extras to work with. So i went to work, cut, file, file, check, file, check...and so on and so on. Nailed it!!!

Quite pleased with the fit. So now both L and R brackets are rock solid.
Then I started to fabricate 0.025" material for the trap door and for the fuel vent clips and for the anti-hangup bracket on rib #2. I also cut 0.032" material for the anti-hangup bracket on the access plate. I'm scratching my head on the 0.025" material for the trap door. Plans call for 0.020" material, but the kit does not come with scrap that thickness unless i want to cut into my trim tab or rudder skins. I decided to use 0.025"...can't possibly make too much of difference.


Sunday, April 17, 2016

Outboard T-410 reinforcement plates and aerobatic tank fabrication - 5 hours

After a few days break from the build I mustered up the nerve to put in a good day finally. I started with the easy stuff. Using the old T-410 plates I drilled the outboard T-410 reinforcement plates and fitted them to the outboard ribs.


Next step was to fabricate the blanks that cover off the large hole on the #2 ribs. To me a while to figure this out as the plans don't call for it, but I decided to do this as most RV8 blogs use this modification for their areobatic tanks. Helps keep fuel in the inner cell longer while doing aerobatics obviously. I choose 0.025" thick material and a 2" x 2" dimension. It allowed for good edge distances (although not critical in this non-structural part).

Of course trying to get the plates centered took some figuring. Not quick and easy....took me a while to check, check and re-check.


Next on my agenda was to fabricate the anti-rotation brackets for the flop tubes. Again the plans don't call for this, but I do believe it to be a good idea to help stabilize the flop tube and minimize the chance of the bulkhead AN fitting rotating while tightening. I cut and filed the T-715 brackets that come with the kit to fit the AN fittings. Took lots of time but I managed to grind away with the files.


After, Mike came over and we put a good much of work in on the S-51 horizontal stabilizer. A full plane building day!