Wednesday, March 30, 2016

Officially started flying lessons

Well, March 30, 2016 marks the official date that I have started flying lessons. I was looking to go up in an Extra like I had done before on a past trip, but I decided that it was time to get serious about starting my license. So, I had booked an into flight with Airworx in Las Vegas, based out of KVGT. The CFI for the first session was Aaron Root. I though him to be a great instructor right away. We did the walk around, talked a bit. Then we jumped into the Piper Cherokee and started going thru the preflight checklist. I started the engine, listened to the ATIS, Contact ground, and soon I was taxing out to the runway. Soon we were off to the southern practice area, with me in the left seat practicing level flight and turns. It was a challage that day as the weather and winds where all over the map being that the area is right next to the mountains.

I was immediatly hooked! So I booked another session April 1st. Back at it. Walk-around, Checklists, Taxi, Run-up, more checklists, take-off (by the CFI) elevating and decending turns, slow flying, powered stalls, Landing (by the CFI). And then followed with some ground school on aerodynamics. Beautiful!!

So its official..2.6 hours logged.


Sunday, March 13, 2016

More research on fuel tanks - Return Line

So...I figure after some advice I received yesterday, putting in a return line into the tanks is not such a bad idea. Even if its capped and never used. It least my options are open. I decided to give this a second thought. I did more research in the evening looking into my options.
So first off is figuring out the shopping list to install the return line. From my research it seems that 3/8" line is required in both tanks. Some folks extend the tube into the inner bays to help mitigate risk of bubbles. Robert Paisley @ EFII indicates they recommend at minimum 3" from the fuel pickup. In the middle of the round stamped stiffening feature in the root rib is a good spot - According to his posts on Vans Airforce.

I dove into the build logs and the forums to get a good idea of what people are doing.  I was starting to steer toward the fuel bungs as folks complain about the fittings turning when they are connecting them and breaking the seal on the proseal. This of course can be mitigated by using a bulkhead fitting, or as Robert Paisley @ EFII suggests using their hard mounted fuel bung eliminates this concern.

I emailed EFII according to their email address on the website as I do not see their bungs available through aircraft spruce. It bounced back as the recipient is not found. It's a bad email address.

So, after much thought. I have abandoned the idea of putting the return line into the tanks. The complexity of the extra return line plumbing and fuel selector coupled with the idea of bunching more holes in the tank has caused me to think scenarios through. I'm 100% certain that I will be proceeding with a FI system that will not require it.

As a side note...I am really wanting to figure out blocking the large opening in the rib #2 (this is in the middle of the rib, not the one on the bottom that is covered by the trap door). Looking at the RV7 build logs there does not seem to be much info on it. However there is a lot more info on the RV8 logs as folks with flop tubes are patching this hole.


Saturday, March 12, 2016

Flying in the RV7A

What a day for the RV experience! I was invited out to the local airport by a friend that I met via Van's Airforce. Darin is in the process of building an RV-14. So I had the opportunity to look on his build and setup. Truly incredible. The RV-14 kit is a step above. It's so interesting to see how the factory has taken care of all the little details. Does this take away from the build experiance....I didn't think so.  I applaud Vans for their efforts as they provide a full array to satisfy any builder. I secretly wish that I had given the RV14 a better look. Its just cool! Oh and the hanger....So much space to work in and perfectly clean. Ever see where they work on the Formula 1 cars...Lab clean! I thought I had a man cave in my basement....Nope!

Darin had pulled open his boxes of goodies. I was able to see first hand some of the quality parts and tools that are available. AeroLED's, Andair Fuel Selectors, pre-bent fuel lines. It was great to see some of the various parts. Really emphasises that paying a little extra for quality items is worth it.

There are many other planes that I was able to take a peak at. A carbon cub, and Lancair. Just so much better seeing them in person rather than looking at pictures.

I had an incredible opportunity to take a ride in an RV7A. Pilot Eugene was a wealth of knowledge and willing to share his advice. He showed me what worked for him, what didn't, what he would do differently. What I noticed was small little details that the average builder would miss or not think about until you were further along in the process. It was great to look over his RV as it explained so many questions I had. Cockpit layout was huge as I never had sat in an RV before. I am 6'3" tall and fit had always concerned me. But...My fears were quickly settled. I fit just fine. True I will need to go with the "almost an RV14" mod and adjust the placement of the rudder pedals which I had figured. But my head was nowhere close to touching the canopy and everything was an easy reach. And one other thing...The Dynon Skyview EFIS so nice!

I was thinking about a throttle quadrant, but I could see for me this was not going to work well. Push/Pull knobs and placement was very accessible and not obtrusive. I think a throttle quadrant would not be for me. Fire extinguisher was on the floor which was out of the way, but very accessible.

Eugene took my up for a quick flight to another local airport and back. We flew at 4400', did a touch and go, stall recovery practice, a low level flyby and a forced approach. He was kind enough to ask if I wanted to take the controls. Oh...I was nervous, but I gladly accepted. The controls are more sensitive than I thought (Might even be more sensitive than the Extra?). Took me by surprise. Not in a negative way, but similar to the feeling of when I first drove the Porsche. Precise in every detail. My first RV Grin!. I admit I did the rookie mistakes of getting a little high, and then getting a little low, A little off course, with a little over correction. Eugine was watchful and understanding. I do not have my license yet and my plan is to start this fall. This experience has solidified my resolve to keep forging ahead full speed.

A big thank-you to the guys who have welcomed me into their world and shared their love of aviation with me.


Thursday, March 10, 2016

Replaced the T-703 ribs - 3 hours

I decided to replace the T-703 ribs. When I had replaced the tank skins, and re-match drilled the ribs to the skins, I had a couple of holes on the T-703 ribs that were just a tad oblong. All the other ribs came out just fine, it was just a few holes on the inboard ribs that were not perfect. This is probably due to how tight the fit of these ribs are to the skins. So tough to get it to sit right.

So I decided to bit the bullet and redo the ribs. A small step back, but the correct choice in the end.

Again, The process was same as I did before. I adjusted the flanges for 90 degrees, filed the rough edges, fluted and straightened, cut the access holes and refitted to the skins. Took a long time to ensure that the fit was good and carefully match drilled. In the end, the ribs are great!

Wednesday, March 9, 2016

Legal Stuff - Critical

Please note:

This blog is for reference purposes only. It is a record of my personal experiences and thoughts which are based on very limited knowledge during my build process. All construction, details, hints, etc that are mentioned within this blog are based on my particular set of circumstances and are all based on my very poor ability to accurately covey situations and practices in writing. So ultimately....I could be very wrong, despite my attempts to be accurate. Please keep this in mind....What works for me, does not mean that's what you should do. ALWAYS refer to the VANS manual, drawings, published mil-spec practices etc for the build of your own aircraft. These are the correct and documented methods one should follow.

If you do choose to take into consideration any of my blog material I ask a few things. 1. Please do your own research and ALWAYS follow the drawings and manuals. When in doubt...Contact VANS Technical Support. 2. Please do not copy this material, both writing and pictures (unless written permission by myself is granted) 3. As long as the reference is properly credited, please feel free to link to this site instead.


Research of the tank access plate

Looking at the various build logs, there seems to be a good amount of deviation from the plans with respect to the nutplates used to secure the access plate and the screws. NAS 1473-A08 nutplates are encapsulated version of the K1000-08 nut plate. There are use to mitigate the risk if leaks prom the tank attachment points. I've checked Vans Airforce and my buddy Mike, and all seem to agree that they are expensive but really good. I think i'll put and order in to Wicks and have it delivered to Vegas while I am there in the next while.

For securing the access plate, sounds like the standard AN515-8R8 screws are too short for these and longer ones are needed. Some say go with a screw head other than phillips as they are easier to remove and less prone to strip. I also read that cadmium plating is recommended for bolts/screws instead of stainless steel. Not sure if this is in fact true or not, but i am looking at using NAS1801 hex head screws as an alternative. 

Tuesday, March 8, 2016

Layout of the tank inboard rib - 1 hour

This is something that I have been scratching my head over for a couple of days. How best to layout the stiffener ring and the tank bracket. The main concern I have is if I need to worry about edge distance to the tooling holes in the rib when I drill the new holes.

 I can rotate the stiffener ring so that the tooling hole is centered between the nutplate mounting holes, but then this affects how my anti-hangup guide attaches. I may need to research this more.

I also need to pay attention to how much clearance I have with the T-405 tank angle with respect to the rivets that will attach the skin. I think it is best that I locate the AN470AD4-7 rivets such that I have enough edge distance in case I have to grind down the tank angle to allow clearance for the skin rivets.

Next challenge is the fuel flop tube hole with respect to the other tooling hole in the inboard rib. Its quite close...hmm.

Monday, March 7, 2016

Cut the access holes in the inboard tank ribs - 1.5 hours

The next step is to cut the access holes in the inboard wing tank ribs. In order to do this, i needed to find the exact center of the hole. Not an easy feat. I decided to use the stiffener ring as a template to find the center. I transferred the screw holes onto the rib, and then using a ruler I drew a line from one hole to the opposite hole. This allowed me to find center

Next I used a punch, marked center, and then drilled a pilot hole to #40. Then opened that to #30. Now I was ready to use the fly cutter. I set it up on the drill press with a piece of scrap wood. Slowly i began to cut the hole. This really was a pain in the bottom as the fly cutter is not easy to use. Very nerve wracking as it is not stable and it seems very dangerous. After a while the holes did finally get cut and it ended up ok. The holes are nice and round, not the smoothest edge so a bunch of time was spent with files to take down the rough edges, then the 3M wheel came out, then scotchbrite.

Sunday, March 6, 2016

Matchdrilling the left wing tank (Again) Researching fuel return lines - 4 hours


Spent the morning working away on the left wing tank. The tanks is all cleco'd so I just need to match drill the holes and countersink the baffle rivet line.


I countersunk exactly the same as before.

I then drilled the drain flange. It took some time to figure out how to center the flange on the factory punched hole in the skin. After some trial and error. I found that the center punch worked perfect as its taper ensured the smaller drain flange hole sat perfectly in the middle of the larger factory hole.


P.S I know that the flange goes to the outside of the skin and not the inside as shown. Its just easier to work with it this way.


I spent the evening researching the details needed for the fuel tanks with respect to the flop tubes, fuel return lines, and fuel sender locations (with the flop tubes).

The burning question is do I need to install the fuel return line? The information is not exactly clear, and most build sites have the fuel return line. But the item that concerns me is what roadblocks will I run into placing the return line in through the root rib. Will I hit something?

So far, from what I can tell if I go Bendix or Precision fuel injection, no return line is needed. Since I plan on using an Aerosport Lycoming Clone (Which use the Precision FI) or a stock Lycoming (Which uses the Precision or Bendix). With the AFP system, a purge line/valve tees back into the flow line (before the selector valve), so you don't need return lines in the tanks.
 
ECI fuel injection uses the Return lines. Return lines if installed are typically placed away from the pickup to prevent 'frothing' in the tank which could get sucked up into the pickup and maybe introduce air into the line. Usually a couple bays over is fine.

Saturday, March 5, 2016

Matchdrilling the right wing tank - Again - 4 hours

Assembling the wing tanks was much easier this go around than compared with the last time. I cleco'd the couple leading edge holes first and then worked each side from front to back.

I was very pleased with the alignment. I used a #19 reamer to match drill the holes (again) and i was careful that the holes in the ribs and baffle are not oblong due to the second go. I then set the countersink cage and countersunk the skins exactly how I did it before. Aiming for a 0.162" diameter countersink.


All done with the right tank, so I began to cleco the left tank. All I need to do is match drill the tank and match drill all the stiffeners. I'm just about back to where I was.


Friday, March 4, 2016

Dimpling the new tank skins - 3 hours

I waited thinking that my #19 reamer was going to arrive, but it didn't. So...I guess ill have to go to plan B on the tank skin holes. I decided to use 400 grit sandpaper on the dremel and open the #20 holes to #19. Its quite a tedious process...took 2 hours to do all the holes themselves. I know that I am deviating slightly from my test holes by increasing to 400 grit, but I feel confident it will be ok. The abrasive wears down quickly anyway to its only 400 grid for the first hole or two, but then it smooths out.

I then used my dimple die and made sure that each hole was large enough for the pilot, and re polished holes as needed. The benefit to all this was that there were virtually no burrs using this method.

I sprayed the piece down with WD40 and lubed the dies. I started to dimple with my stomach in my throat. In the end. Every dimple was perfect! The dimples did have sharp edges though as the holes are so crisp. I'll have to do something about that

I used a maroon scotchbrite pad on the dremel and buffed each dimple.  

Wednesday, March 2, 2016

Testing dimpling 0.032" thick material for #8 screws - Day #2 - 3 hours

Well tonight, Good news and good news. The replacement wing tank skins arrived from Vans. And I gave it another shot on the old wing skins and all 42 test holes where successful.

Using the dremel. I wrap a small square of adhesive back 600 grid sandpaper on a mandrel that i made (Cut the brush end off of a dremel accessory). I then insert it in the hole that I've drilled and while turning on the dremel I move it in a circular motion to help ensure that I do not make an oblong hole.

 
Using the felt tip and polishing compound to debur edges. I found after a few holes that this method doesn't really do a great job to remove sharp edges of debur. I don't think that I will repeat this process on the new skins.


 One old wing skin dimpled like mad!!!! Lots of test dimples in this one. but I think I have found the secret. Now to apply it to the new skins.
 
How I'm checking for cracks


I was glad to see that the new skins arrived, but I do have some knots in my stomach as to my ability to dimple these holes. Not wanting them to sit in the box too long, I opened them up and set them on the bench.


If anything, I thought that I should at least start advancing them. I may feel shaky about dimpling, but I am confident that I can at least drill out the holes. So I de-vinyled the edges and dug out the drill.  

Drilled all holes to #20 slowly working my sizes up starting with a #30 bit. No I await the #19 reamer to arrive.


Tuesday, March 1, 2016

Testing dimpling 0.032" thick material for #8 screws - 3 hours

So I have been practicing for the last two evening trying to solve how to eliminate the cracks. I've been on the phone with Vans for their advice, talked with friends, etc. Not to mention laid awake a bit a night.
For me, it doesn't matter if the hole is #19, #18 and #17, it can crack. That's not to say that going up a size or two on your pilot hole doesn't relieve some pressure, but I found that it wasn't the complete answer.

Just for kicks I drilled some #18 and #17 holes to see how it would go. I deburred the holes and dimpled them. They cracked.


So, for me that kinda solved the hole size issue. I did notice that there was a difference in hole sizes after they were squeezed. Its a bigger pilot hole, and after squeezing, surprise surprise, the hole in the dimple was larger too. Seeing that it did not eliminate cracks...I resolved to focus on the #19 holes. What seemed to be the common denominator in all my cracked holes was how well/clean the holes were drilled and the condition of the deburing. I holes were good, the cracked dimple was 1 in 28. Holes that were not as clean I got 1 in 10 cracked. It's easy to be sloppy with the drill in opening up the holes and its very easy to debur too much. My 3-flute deburring tool does not do a nice job when looking under a magnifying glass. The one hole debur tool is better, but its not perfect. 

I carefully drilled all the tank skin holes (39 test holes) up to #19. I started #25, #22, #20, then #19 (This process gave me brain damage the whole way...its not a great way to enlarge holes this way) Once I was done I then used a small piece is 600 grit sandpaper on my Dremel, (Just a small piece wrapped on the mandrel. I carefully polished the holes (It took a long time to prep the holes) but they looked great.

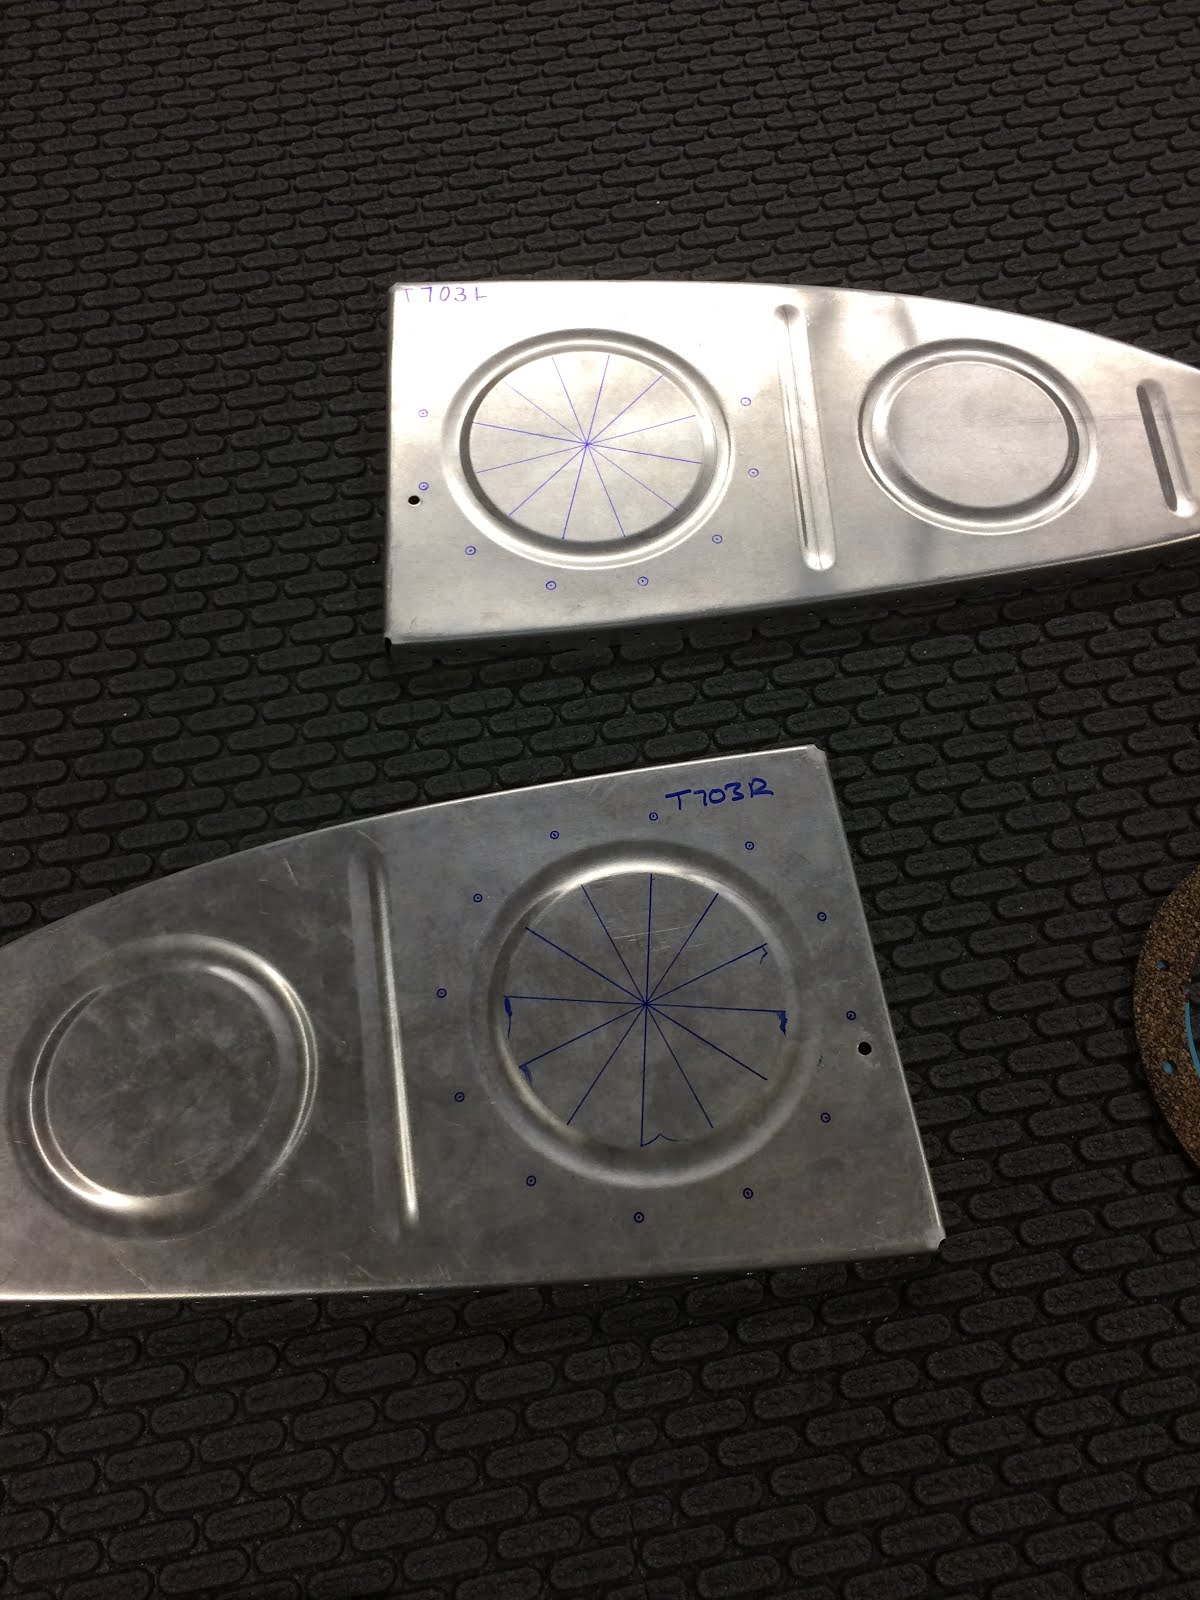
Here is what a marginal hole looks like. This is likely to crack. 


This is a #19 hole that was final polished with the 600 grit sandpaper.


 At the suggestion of a friend to lube the dies, I sprayed WD40 on the work and the dies and started squeezing. All 39 holes made beautiful dimples and no cracks!


For me this was a bit of a win. I feel confident that I am on the right track, but I still want to perfect the process. I'm still waiting for a #19 reamer to arrive and I may abandon the deburing tool completely. As you can see from the pic its not a perfectly clean edge on the dimple, they are some very tiny jags on the edge. I may use the Dremel felt and polishing compound to debur the edges instead.
 I am one step closer to solving this.