
Thursday, December 31, 2015
Completed priming wing ribs - 7 hours
Worked hard to get the priming completed for the ribs. All done just in time for company to come over later in the evening.

Wednesday, December 30, 2015
Completed drilling Ribs for wiring, started priming - 6 hours
I went back to the drawing board with the wing wiring. A bunch of time was spent last night researching on the internet to ensure my wing wiring would be ok. This morning, I headed out into the garage to open up the tool holes in the right wing ribs (1 thru 10) this will likely be spare or contain alternate auto pilot or OAT wiring.

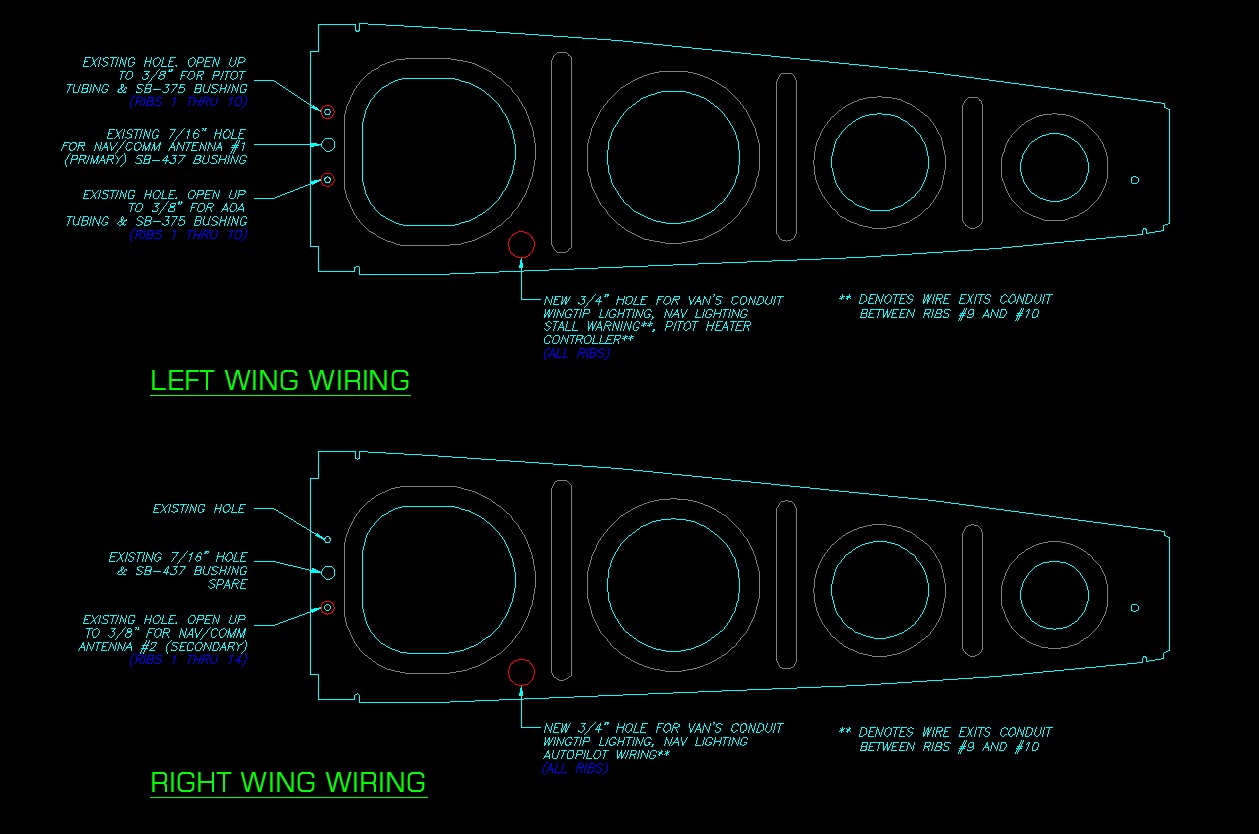
Here is the completed layout.

I then set up and began the priming process. I set up the tubs and washed each rib in soapy water, scuffed with scotch brite. Rinsed. Dried. Wipe with degreaser. Wipe with MEK. Prime. Labor intensive but I am pleased with the results. Managed to get nearly the right wing ribs done.

Monday, December 28, 2015
Drilled ribs for wiring/plumbing and match drilled to Spars - 9 hours
Woke up this morning with a cup of coffee planted in front of the computer, still reviewing the potential wiring needs of the wings. I will need a OAT probe, but that can be located in the right wing which I already have holes in the ribs I can use. I have a bunch of reading to do on remote magnetometers. I see Dynon has just released one earlier this year.
First order of business was to make extra sure that all the ribs were sorted and marked for the correct layout.

Then I transferred the tooling holes to the W-710-R rib on the left wing side. This tooling hole will be opened up to 3/8" to allow for the AOA/Pitot lines.

Next was to mark and drill the outboard end ribs of the wings to allow for the mounting brackets to be used to mount the assembly in the wing stand. I cut a small rectangle of aluminum and drilled a 3/16" hole. This hole lines up with the existing tooling hole. Then I measured 3" over and drilled a #40 hole. This is the pilot hole for the other 3/16" mounting hole which I then drilled. Worked like a charm! The template I created will be useful for the mounting angle when I build it.

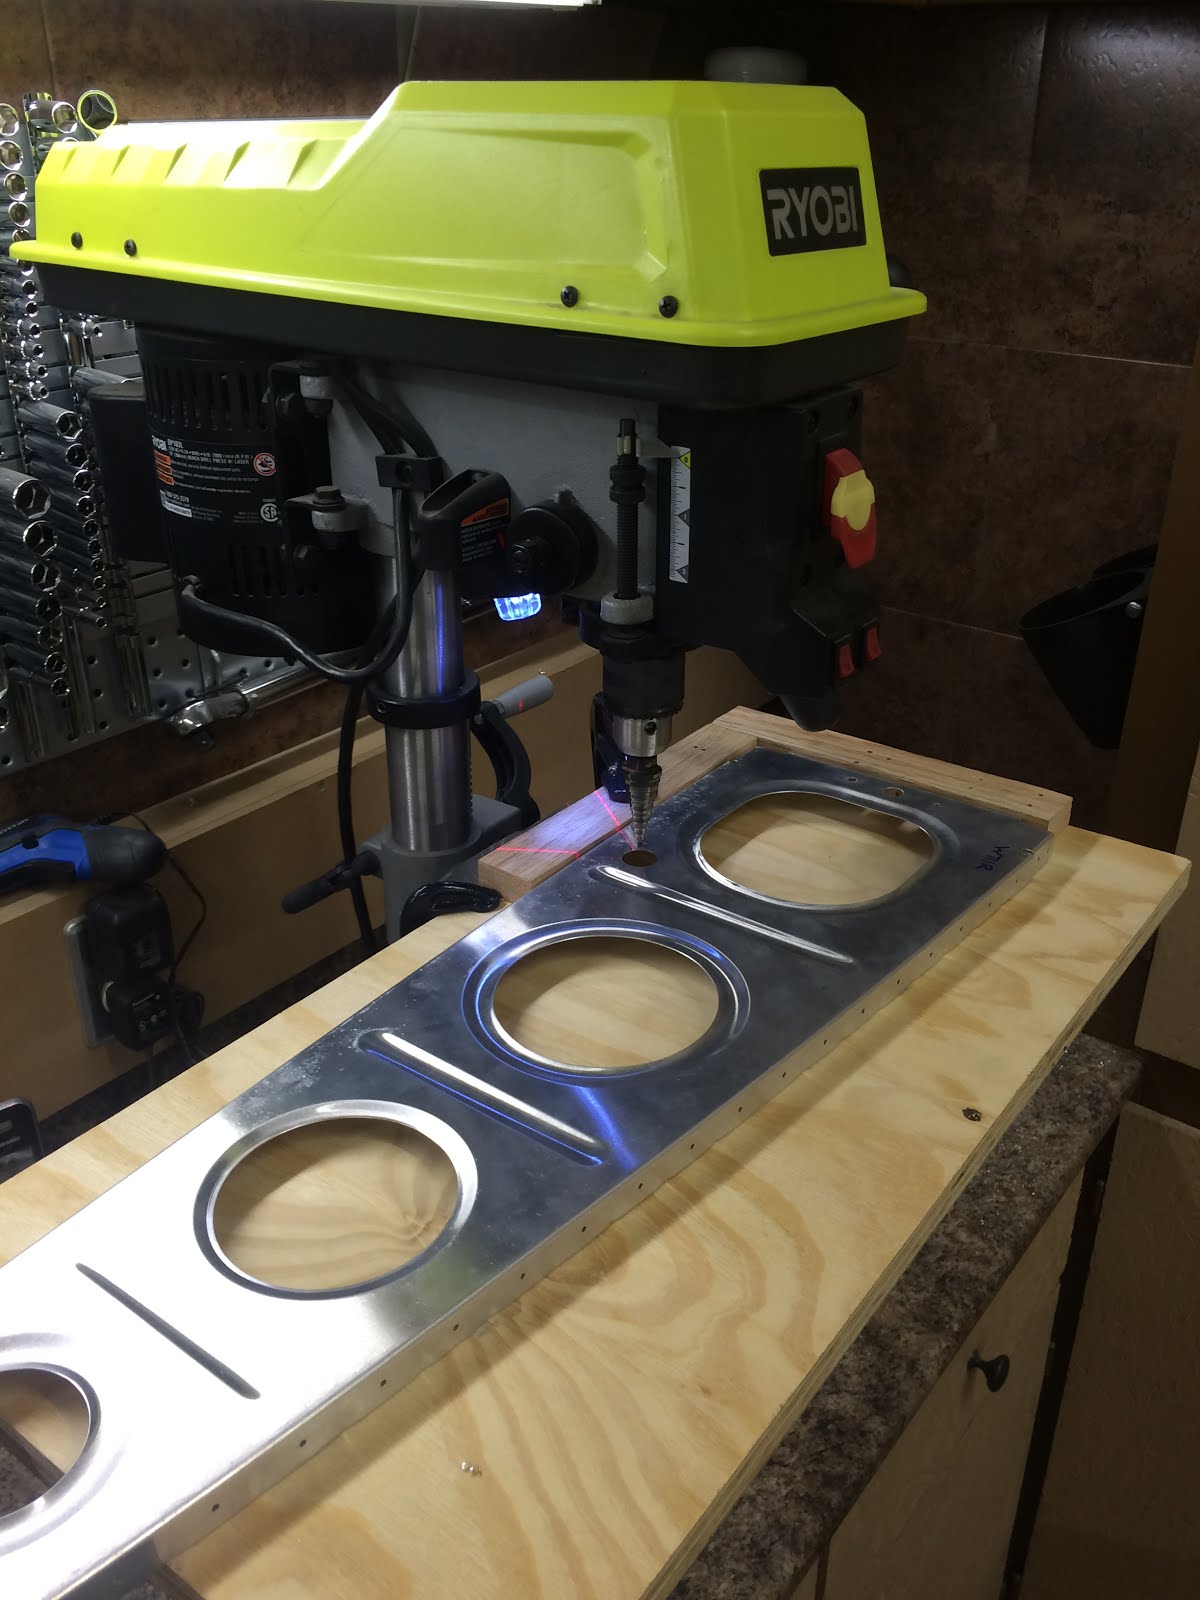
To locate the 3/4" conduit hole in the ribs, I built a jig. The jig allows a rib to be slipped in and out when clamped in a drill press. I placed a smaller piece of plywood as a cover to help as a drill guide for a #40 pilot hole. Once each rib was drilled, I opened the holes with unibits in the drill press until each hole was 3/4". Then I opened up the tooling holes on the left wing ribs to 3/8" to allow for the pitot and AOA lines.


I then set up the main and rear spars and match drilled the ribs.
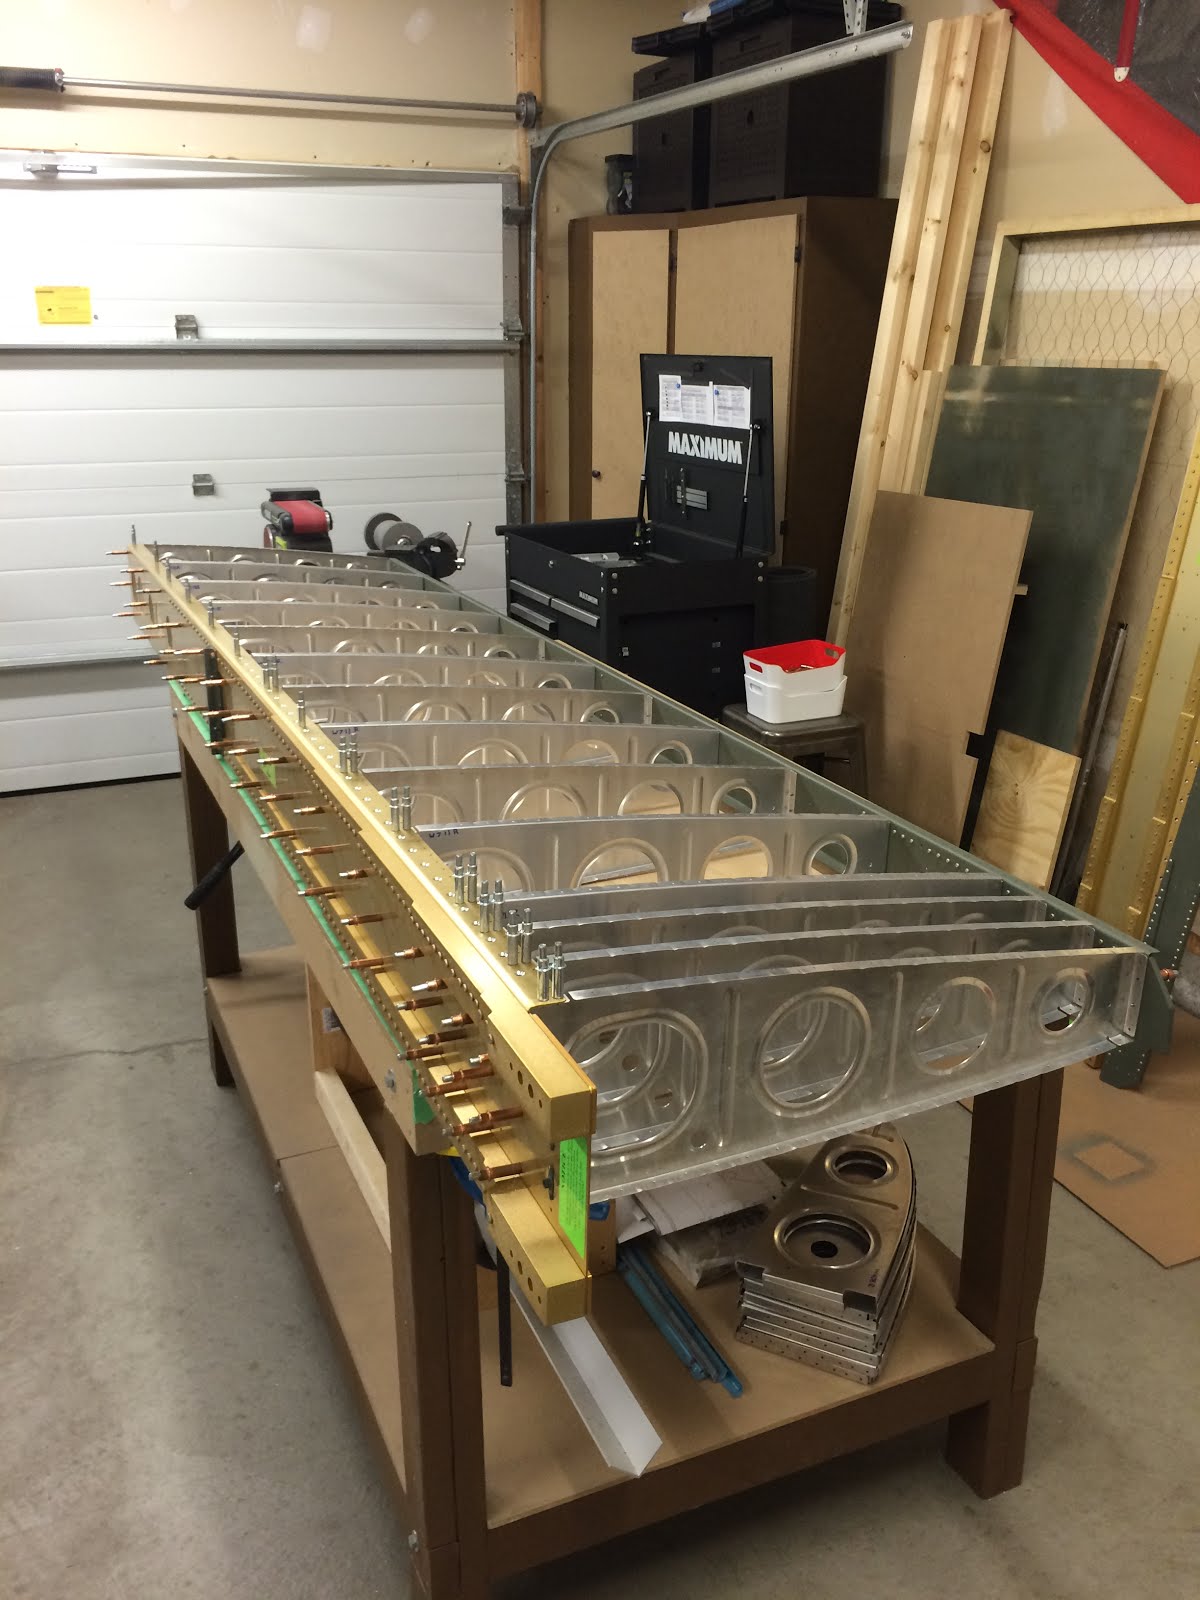
I was sure to get one of these shots. It's tradition!
Sunday, December 27, 2015
Completed wing rib prep - 8 Hours
Another stellar day on the project, I fluted all of the wing ribs. The leading edge and tank ribs where a tad tricky, but the wing ribs themselves were pretty easy. The only ribs that I didn't flute was the W-708 ribs. I will need to locate the holes in the ribs in order to find the proper area to flute.


Once the fluting was done, I grabbed the dremel tool and finished deburring the nooks and crannies of the wing ribs. I used a 1" square cut from Maroon Scotchbrite and screwed it to the mandrel on the dremel. Worked like a charm!

After that was done, I ran over to Home Depot and picked up a few supplies to build the wing cradle.

Figuring out Wing wiring
Now to figure out the holes to make in all the wing ribs. I have been researching this for a while and I have a pretty good idea of what I need to do, but I think I'm going to post on Van's Airforce just to make sure that what I plan will work just fine.
Here's what I plan to have:
Left Wing - AerosunVX Landing Lights and Pulsar Nav Lights, Dynon Heated AOA Pitot, Wingtip NAV antenna, Vans Stall warning.
Right Wing - AerosunVX Landing Lights and Pulsar Nav Lights, Dynon Autopilot Servo.

Revision #2 updates:
Moved pitot heat, autopilot, stall warning to 3/4" Conduits. Opens up the original 7/16" holes for potential NAV/Comm antenna's (or other wiring i.e. Remote Magnetometer)
Saturday, December 26, 2015
Deburring and straightening wing ribs - 12 hours
Huge day on the plane, however not a whole lot of forward progress. I worked purely on deburring all the wings ribs and bending the flanges to 90 degrees.
First I broke all the edges and holes with files. Overall the ribs were in good shape but some had shear marks that needed to be taken out. So every rib god a good once over with files. Then every nook and cranny had a once over with a file of some type.

Then a cleaned up all the edges (Except for the nooks and crannies) with the Scotchbrite wheel on the die grinder for the holes, and the bench grinder for all the other edges.

I then set up the straightener and dove in. I used a square to check 90deg instead of placing the rib against a 90deg surface as I found it was much easier to tell what was square, and what wasn't.


The wing ribs themselves are in pretty good shape, but all the leading edge ribs needed lot's of work.
Very labor intensive, and my hands are sore. But I'm crusing along!
Thursday, December 24, 2015
Preparing to work on wing ribs - 7 hours
I managed to get a healthy amount of time in on the build, but unfortunately it was spent on building the home made tool to straighten ribs that everyone seems to use on the build logs. I ran and picked up more primer, a small torque wrench and a bunch of supplies at home depot to build the tool. It took about 5 hours in total to build the tool and clean up the saw dust.

I then started to write part numbers on the ribs and remove the stickers. Some stickers came off really well, but some required some good ol' fingernails and goof-off.

Subscribe to:
Posts (Atom)