Showing posts with label Fuel system. Show all posts

Saturday, January 22, 2022

Installed the top brake line spacers and fitted the forward fuselage - 4.5 hours

OMG. Work this week was insane and I don’t think it’s going to let up. Today I have some time to work on the build…So lets do this.

The proseal used on the bottom fuel line spacers took some time to set up but seems to be good now. I then used Dow 3145 RVT in the inside of the spacers to cushion the lines. Then installed the top halves of the spacers. 


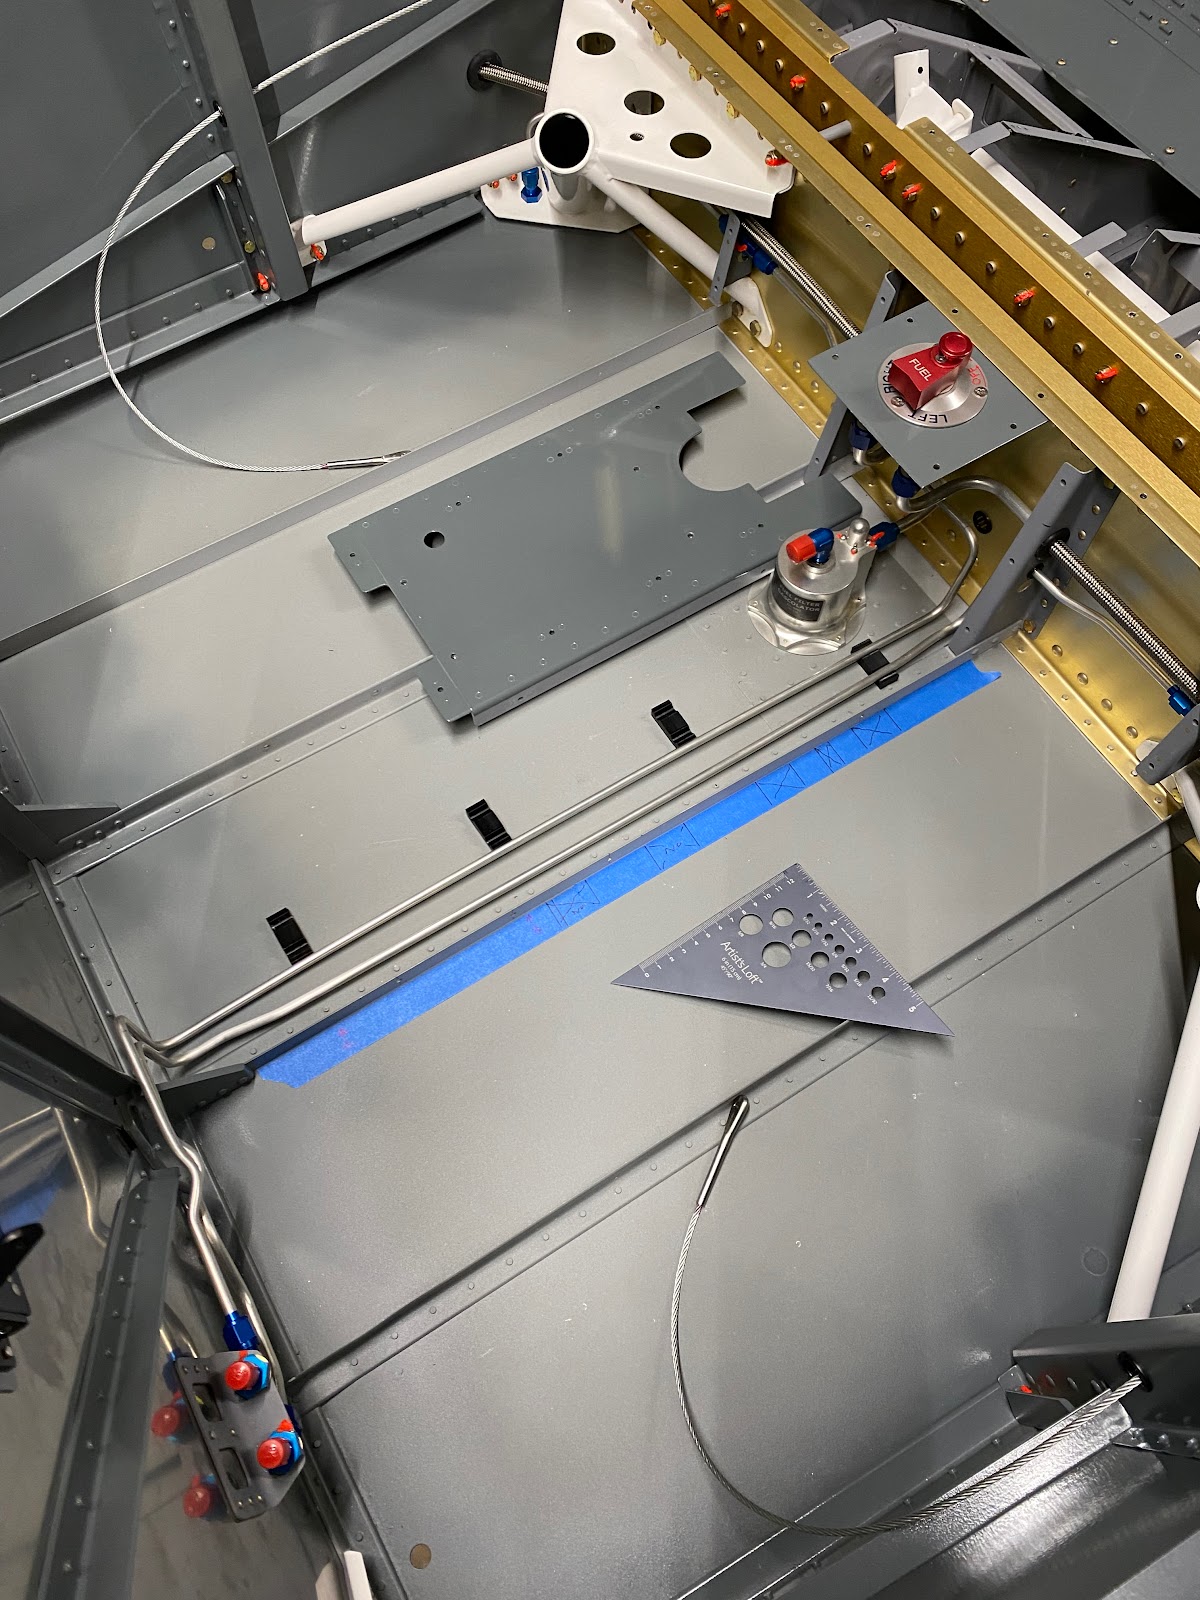
Next I installed the center tunnel cover and then the fuel pump. The fit is excellent.


The fuel pump cover was installed…looking good.


I really need to get the front instrument panel installed. This is something that I really have been dragging my heels on. On my initial fitting things the fit wasn’t great but admittedly I haven’t really spent much time on it. 


First I need to concentrate on getting the F-7108A Forward Fuselage Rib installed and drilled to the firewall. This sounds much easier than it is. The holes in the rib and the bulkhead are not prepunched from the factory. This means a bit of head scratching and drawing many reference lines.  I can go ahead and set the rivet holes in the Rib. I used the adjacent ribs as a guide for the top and bottom holes. Then used the fan spacer to set the remaining holes. (I used the drawings to drill a total of 6 holes in the rib)


Next I need to get the fitment of the F-7105A/B Sub-panel right. This area really doesn’t fit well as it currently sits. I noticed that the drawings show a line and when I’ve checked with other build logs, I see a bend on these pieces which I obviously not on the factory pieces. Sure enough….These pieces need to be bent 


So, draw a line. Use a piece of oak and bend. Getting the right amount of angle takes some head scratching but I figured out. (Don’t ask the amount….I didn’t write it down). I drew up a guide in AutoCAD and printed it out.  Bend made!


Now the fitment of the parts is so much better. Now its time to prep to drill the final holes from the center rib through to the firewall. 


Sunday, January 16, 2022

Installed brake line spacers and the flap actuator - 3.5 hours

 I started to install the brake line spacers that I had 3D printed. It takes some time to lay things out. I need to ensure that the spacers do not interfere with any of the many nutplates and screws. Lots of head scratching on this task.


I also need to use the drill press and drill mounting screw holes to clamp the lines. Originally, I was going to just proseal the lines on. But I do want the ability to change lines out easily if needed, so small screws are the way to go. I raided my pinball parts stash and found very small machine screws that will work well! A little bit proseal is mixed and the bottom half of the spacers are installed.

While I wait on that, I decided to move on to the cabin area flap actuator. I just want to get the cabin put together. Easy enough I put the mounting bolt in to the assembly. And the cotter pin is set. 


 A few more screws and the flap actuator are installed. 


Work is getting soo busy I am going to have to put the build on hold for a while. It’s bitter-sweet as it’s good to be busy, but I really need to keep building. 

Friday, December 3, 2021

Received the TS Flightlines Custom fuel lines - 1/2 hour

 Today I received the custom fuel lines from Tom @ TS flightlines. I had ordered them Nov 20th so they came reasonably quick (for Canada). At first I was scared they may have been damaged as the box arrived a bit crushed.

I was relieved when I opened the box and found the cables in perfect condition. I am so happy to receive these.I don't have time to get these into the plane as work is so busy. But come the holidays I will get on it.


Saturday, September 25, 2021

Installing the fuel selector and gascolator. Installed landing gear bolts - 5 hours

 Now the interior painting is complete. I can start the process of starting to install interior cabin components permanently. First I chose to install the fuel selector and the Aerolab gascolator. 

To install the gascolator to the cabin floor, I used blue thread-lock on the #6 screws. 


 Now came the big task of drilling and installing the AN3 bolts for all of the landing gear weldments. This ends up being a tedious process. Having to drill up from #40 to #30, to #21, finally reaming to 3/16". Lets not talk about trying to remove all the shavings that like to stick between the layers of the aluminum. 


Sunday, July 4, 2021

Finishing the tunnel cover mounts - 3.5 hours

 A bit of detailed work today to finish off the tunnel cover/fuel pump mount. With the pump in its final fit configuration, I need to drill the mounting holes into the tunnel cover. Getting this right took some time and some precise work.


Next all of the mounting holes needed to be drilled for the nutplates. And there is an amount of them. I also need to make a hole in the cover to allow the fuel pump wiring to rise up through the tunnel cover. This is basically guess work at this point to figure where the hole should be. A larger hole was made in the stiffener than the tunnel cover. I will eventually install a snap bushing. 


Saturday, July 3, 2021

Fixing the fuel line - 1 hour

 So when drilling the top most (left) hole in the fuel selector cover (to attach the dog house) the drill bit just nicked the fuel line. It wasn’t horrible, but I decided to make a new one. The fuel line and the mounting hole are perfectly aligned and installation of a screw in this hole will be an issue. So to start off, I decided to make a brand new fuel line (Gascolator to pump) to ensure that the line was perfect. Next, I needed to put a slight jog in the top most run to ensure that the future screw would not interfere. 

My thumbs are really sore. That 3/8” line is not easy to work with, without leverage. But I’m happy with the result.


Thursday, July 1, 2021

Final fitting work on the doghouse cover - 2 hours

 So today was a small job of cleaning up all the edges of the dog house cover and rounding out the corners. This also allowed me to double check the final fit of all the internal components to make sure that I had adequate clearance. I completed drilling the doghouse cover to the tunnel and to the fuel selector cover.


The fit overall is excellent however, I notice that I will have a conflict between one of the mounting screws and the fuel selector cover. At present installation of the screw will press into the fuel line running from the gascolator to the fuel pump. I will need to make some adjustments in the line to ensure proper clearances.

Wednesday, June 30, 2021

Final fitting the fuel pump cover - 2 hours

Managed another quick build session tonight. I need to complete the sides of the fuel pump cover. I clamped the assembly to the table and then began marking and drilling the remaining rivet holes. The top of the cover needs to be parallel with the bottom of the flange. The forward end of the cover is basically set...as long as the front is vertical. The assembly is clamped into place and I can then start drilling rivet holes.


Once that was done, I can then trim down the sides to fit the top of the cover. All I need to do now is final fitting and drill to the center tunnel cover. This is easy to do as I still have all of my reference lines in place. I started from the rear and moved forward. Drilling all holes, 3/32" first, 1/8" and then #19 last. 


Monday, June 28, 2021

More fuel pump cover fabrication - 3.5 hours

 With the top cover position established. I now can figure out how I want the cover to fit over the pump and where I want the cover to end. I measured and marked out all of the bend points, cut relieve notches and then made all of the bends.  A simple description but it was more tedious then that, I just don't want to mess this up. By the end of it, I was really happy with how the top cover was sitting and now I just need to start fitting the side covers.

I clamped them on, and started using a level to get things straight but soon found that a level is not going to work correctly as the centre tunnel is angled slightly and I want the cover to sit parallel with the pump. I'll stop here and come back to it when I can think it over a bit more.