Showing posts with label Center Section. Show all posts

Wednesday, January 12, 2022

Fitting the forward elevator pushrod - 4 hours

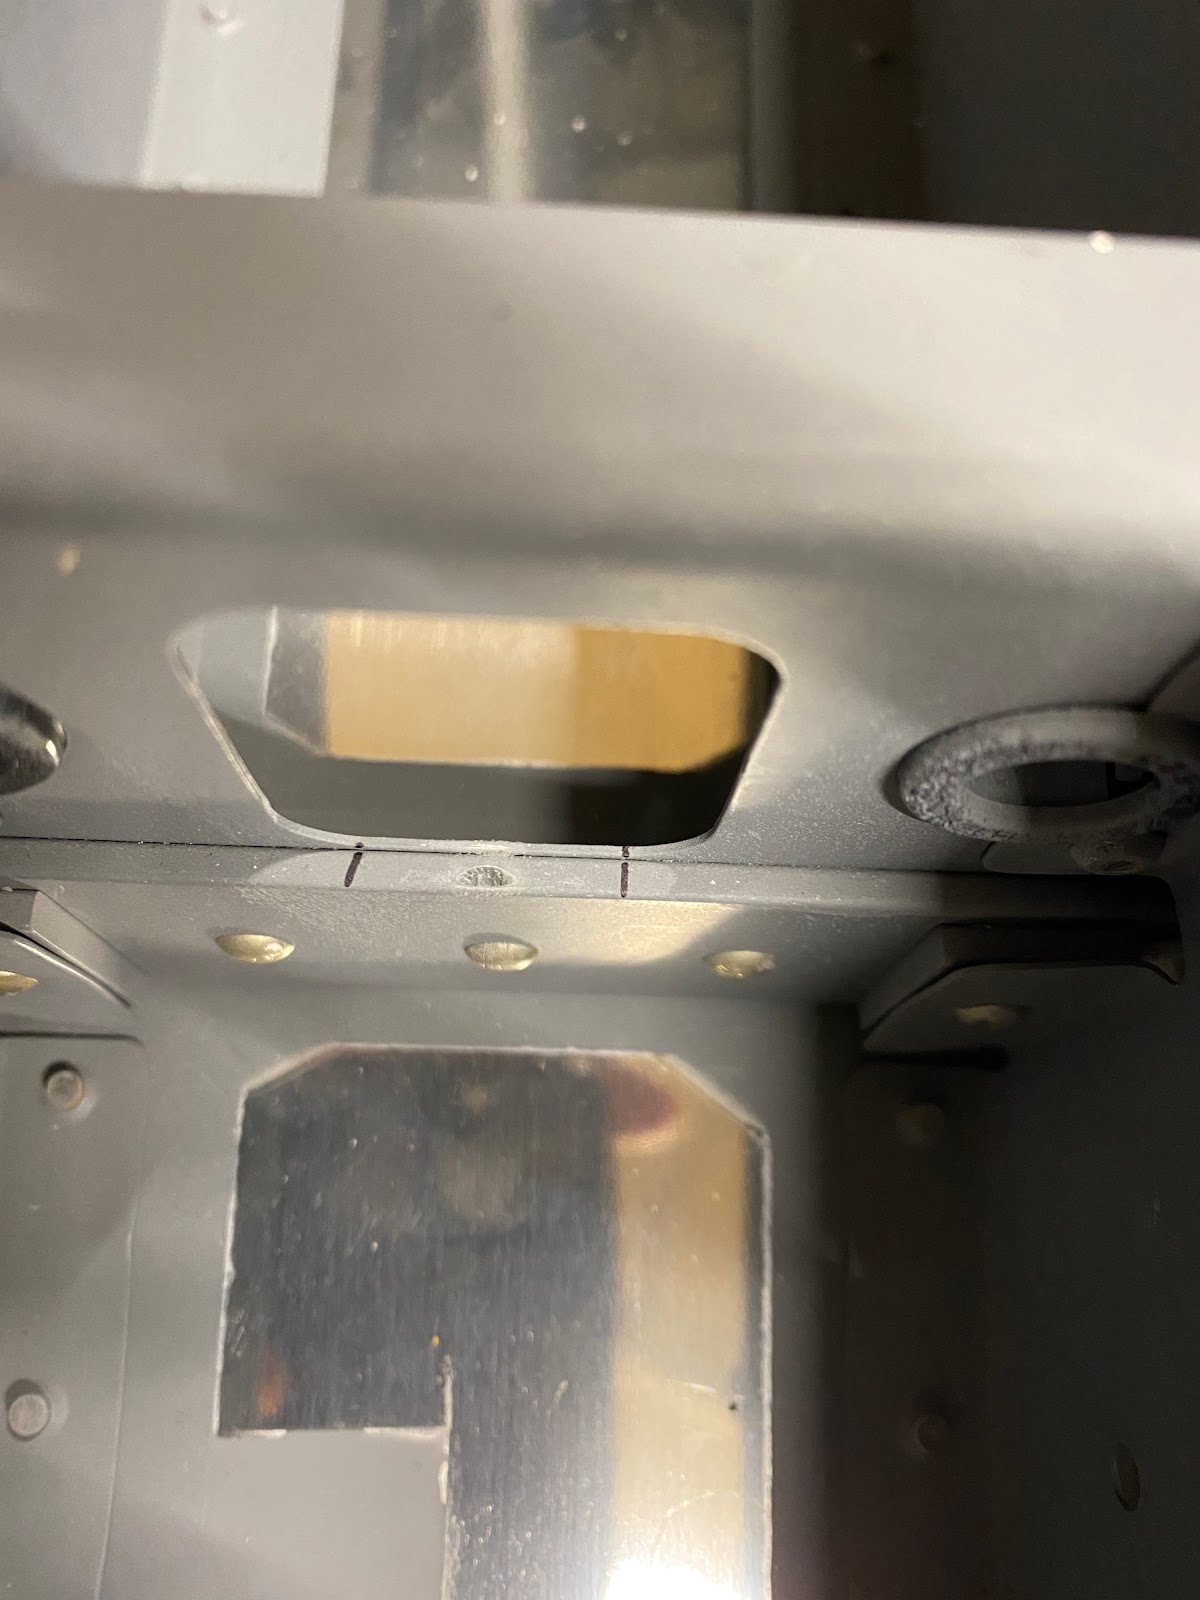
 Tonight was a bit of a grind…No pun intended. The pushrod connecting the control sticks to the bellcrank  interferes with the F-705 Bulkhead. More particularly the F-705B center section bar. Although this seems to be a very common issue with other builds, I called Vans just to make sure I was ok. Yup…I need to shave the stiffener enough to clear the pushrod. 

So now the tricky part. How to remove just enough material? Well slow and steady wins the race, I installed the pushrod and then was able to mark out the extents of the pushrod. Then I sketched a scallop. Using a dremel with a sanding drum, I carefully removed material. Then I used a rough grit sandpaper wrapped around the pushrod and moved the piece back and forth through the range of motion. The rough grit clearly marks the remaining interference. I then can work on the required area. It’s a bit time consuming, but the process worked very well and in the end….I have a perfect amount of clearance. Nice and tight….only a little material is removed. 


Saturday, November 28, 2020

Final fitting of the landing gear weldments - 6 hours

 After reading up on the forums and blogs, Now is a good time to check fitment of the landing gear weldments with the centre spar (F-704) . Once I assemble the fuse making adjustments to the landing gear become much more difficult.

First I drilled out the rivets for the three nutplates in the forward spar ends. I noticed on initial fitment, that these will get in the way later. Once the weldments are permanently installed, it will be super easy to install the nutplates....again 


Now begins a very very slow process of fitting the weldments to the center section. The instructions specifically indicate that holes may be filed a bit open to allow the bolts to fit. The process is slow since I test fit, remove, file, test fit, remove, file, over and over again until all bolts fit.

I am extremely careful to not file the close tolerance bolt holes if i can avoid it. So I started with the placing those bolts first securely and then working/fitting all the other holes.


Once I was happy with the weldment fit, I was ready to assemble the F-704 center spar to the center section in preparation to fit the fuse all back together.

Sunday, November 22, 2020

Installing the seat belt anchors - 1.5 hour

Small build night tonight. But a little bit is better than nothing right?

I spent an hour installing the seat belt anchors in the center section. Took a bit longer than it should purely because one of the anchors on the passenger side needed to be trimmed to fit the seat rib. Guess that the fit has changed a tiny fit between drilling and final riveting. 

I used a spacer to help align the anchors. I didn't want to wreck a perfectly good nut so I used a ton of washers so I didn't engage the nylon lock portion.   lol


Saturday, September 26, 2020

Even more armrest work - 2 hours

Now that I have the armrest angles all marked out, I began the tedious process of drilling and opening up the lightening holes. I started at #40 holes, then systematically opened them to 1/4". The weight now drops to 163 grams so too bad from the original being over 200 grams.  


Tuesday, September 22, 2020

More arm rest work - 2 hours

I managed a little bit of time tonight on the build. I started off by countersinking the angles to allow for the dimples in the armrest. Also, I need to start thinking about holes for reducing weight. I dug out the fan spacer and decided I would mark centre between each rivet hole to allow for removing material.


Sunday, September 20, 2020

A laundry list of items

 I've basically finished the items noted in the instructions up to the point where it says "Riveting the forward side skins". The instructions note that " There is a laundry list of small task that must be completed. You may have done some already. If not, complete them now" The instructions are rather vague on what these might be. But I've already started a to-do list some time ago on all the things I need to still finish off.

Here is my laundry list of items (in no particular order):

 With everything still cleco'd together
  • Finish match drilling the fuse (center section/aft section. seat ribs, etc, etc)
  • Open up the #30 holes to 3/16" for the front wing attach bracket.
  • Drill landing gear weldments to the side fuselage.
  • Open fuel vent hole in side skin/gear web to 1".
  • Open brake line holes in bottom skin to 5/8" (Align with gear weldment). 
  • Open fuel vent holes in bottom skin to 7/16"
With everything taken apart
  • Drill the 5/8" rudder cable holes in the F-902 and F-724 bulkheads. 
  • Drill the static line holes in the F-724 bulkhead.
  • Finish strengthening and drilling the armrests.
  • Finish rough-in of the side steps (I'm contemplating on when to do this...now, or when I flip the fuselage....I hate working upside down).
  • Finish installing the 6 rivets in the firewall.
  • Complete the edge roll to the bottom skins/side skins.
  • Finish drilling the holes attaching the tabs of F-724 and F902 bulkheads to the longerons.
  • Prep the baggage are panels, etc for nutplates (All panels are removeable).
  • Debur, edge prep, countersink etc. 
  • Prime
  • Install the nutplates as called for in the plans and also for the baggage area removable panels.

 Well....time to dive into it.

The first item of business I dove into was to finish match drilling everything. I started at the center of the seat ribs and worked outwards.


There is just a ton of cleco's 


Next, I decided to tackle strengthening the arm rests. Yes, it wasn't on my primary to do list, but I think it will be a fun one to do. Material selection was a tough choice. Lots of opinions out there. I want good strength but not with too much a weight penalty. I opted to use 3/4"x3/4"x1/8" thick angle. About the heaviest material out there! Ha Ha. But I do intend to try to cut it down and drill lightening holes to help with the weight. So the angle to start with weights just over 200 grams each side. 

Now I clamped the angle to the work table and used a router with a small radius round over bit to put a radius on the vertex of the angle. Does the aluminum dull the router bit....Yeah probably. Does it do an awesome job, heck yeah!.

With the edge finished, the part nests nicely into armrest. Weight is now reduced to 195 grams. Next, I want to trim the flange of the angle that sits proud of the armrest.This takes a bit of time and work to get trimmed and smooth, but the result is fantastic.

Weight now drops to 173 grams

I used the fan spacer and drilled the angles to the arm rests.


Saturday, September 19, 2020

Finished the F-724 luggage bulkheads - 6 hours

 To make the new tabs/flanges for the F-724 bulkheads. I had drawn a template out and then used it to cut some aluminum pieces in 0.025" scrap. Same thickness as the bulkhead. Then I made a wooden bending template using the F-724 as a guide. The bends are at a bit of an angle.

Next I had cut off the old tab/flanges on the bulkhead and clamped the new pieces into place. I took some time to ensure a good fit. I clecoed all of the luggage panels into place to ensure everything was were it should be.

Once I verified a good fit, I was ready to drill the tabs via the bottom floor skin. The placement turned out perfect and it was apparent I can easily trim down the new tab.
Next I had marked a vertical reference line making it easier to adjust and locate the holes that I need to drill to set the proper height of the new tab.
Haha, oh dear. I solved one edge distance problem on the bulkhead to have another pop-up. Not a whole lot I can do with this one. There seems to be a few of these coming up on the fuselage lately (The top most hole in the side skin attaching to the firewall).
I drew reference lines and centre lines on the new tabs and used the rivet spacer to transfer rivet holes. (I used the spacing of the rivet line that attaches the side skin to the F-724 bulkhead).

Next, I worked on locating the hole on the top tab of the bulkhead. Not much material to work with here. Edge distances are met. I used the dimensions noted in the plans. I've heard other builders have used an AN3 rivet here instead of the AN4 rivet just to minimize any edge distance problems. I figure why not...I can always drill it out and go to a larger hole/rivet down the road if needed.
I clecoed the assembly back in place, got things lined up and used the 90deg drill to finish the #30 holes into the bulkhead.


Sunday, September 13, 2020

Fitting the baggage bulkheads - 4 hours

 I was curious this last while about just how straight the fuse was. When working on the forward fuse and crawling in there doing all the building I've bumped the fuse a number of times. So I set up the laser level on the garage door to shoot a center line. Well...To my surprise and delight it was spot on, so its a piece of mind that I can forge ahead confidently. 


 Now I need to fit the baggage compartment bulkheads. I started in on fluting the curved section of the F-722 bulkheads and then the F- 723 bulkheads. Then I was ready to cleco them in place. 


First step I drew a reference line on the tab of the bulkhead that meets with the longeron. I'll need to start figuring out the correct placement of that rivet once I have the bulkhead removed. 

Next I had a good look at the flange/tab that is to mat with the F-623 rib. Lots of builders talk about a gap here and sure enough, I too have a gap but nothing that a 0.063" shim won't take care of.


Before I started to cut a shim, I marked the rivet holes from the bottom skin onto the flange of the bulkhead. Yup, same as many other builders I too have a questionable edge distance on the inboard rib. 

This snafu was in the back of my mind reading other build logs. So it was an easy decision for me to choose making a new flange rather than just use a shim. A new flange with solve both the shim and the edge distance issue.


Sunday, December 22, 2019

Trimming the F-623 ribs for the side steps - 2 hours

Small day in the garage today. I need to finish trimming the F-623 rib for the side step on the left side of the plane. Process was the same as the right side. Went slow, checked, checked and rechecked. I'm really happy with the fit.


Monday, December 16, 2019

Trimming the F-623 ribs for the side steps - 3 hours

Tonight was a lot of head scratching on how to fit the side step tubes and scallop the F-623 ribs.  I wanted to make sure that the F-776 floor skin was sitting flush with the top of the F-770 side skin. I used a toothpick in the relief hole to hold it up.

At first I started to eye ball it and sketch the scallop. Lots of un-clecoing and re-clecoing, checking and re-checking. The plans have the best suggestion using a straight edge to mark the edges of the holes....then you just work out the scallop depth from there. Not easy, but just work slowly at it.
I used a sharpie marker in the scallop, and then would fit the step. I'd rotate the step a number of times which would remove the sharpie from the high points on the rib. I'd know exactly where to trim the material down.


I managed to get the scalloping perfect for the right side step.

In the end, an excellent fit.

I just need to trim the 1 1/2" tube down but I'll save all that adjustment work for later.


Sunday, December 15, 2019

Cutting the steps into the F-770 skins - 4 hours

Now the plans have you cut 1 1/2" diameter holes into the F-770 side skins for the optional step kit. Yes, I did choose to install the step kit. (P.S. I was relieved to see that Van's has reinforced the step kits as the earlier generation units had a tendency to crack at welds, at certain locations).

Next I really battled with did I want to cut these 1 1/2" holes now before the conical bend? I want to get that conical bend over with, however for the life of me, I just couldn't figure a way to cut the hole cleanly/easily after the skin was bent. Decision made....Ill cut first, bend later. Fingers crossed.

I drilled the pilot hole up to 1/4" then used a 1 1/2" hole saw on the drill (in reverse). Makes for a much cleaner cut and doesn't want to grab and mar the aluminum.

Seeing that I was going to work well...I de-vinyled before I continued drilling.


I managed to get both sides done and re-cleco'd the side skins back on.