Saturday, July 29, 2023

Disaster strikes on the left F-7105B sub panel - 1.5 hour

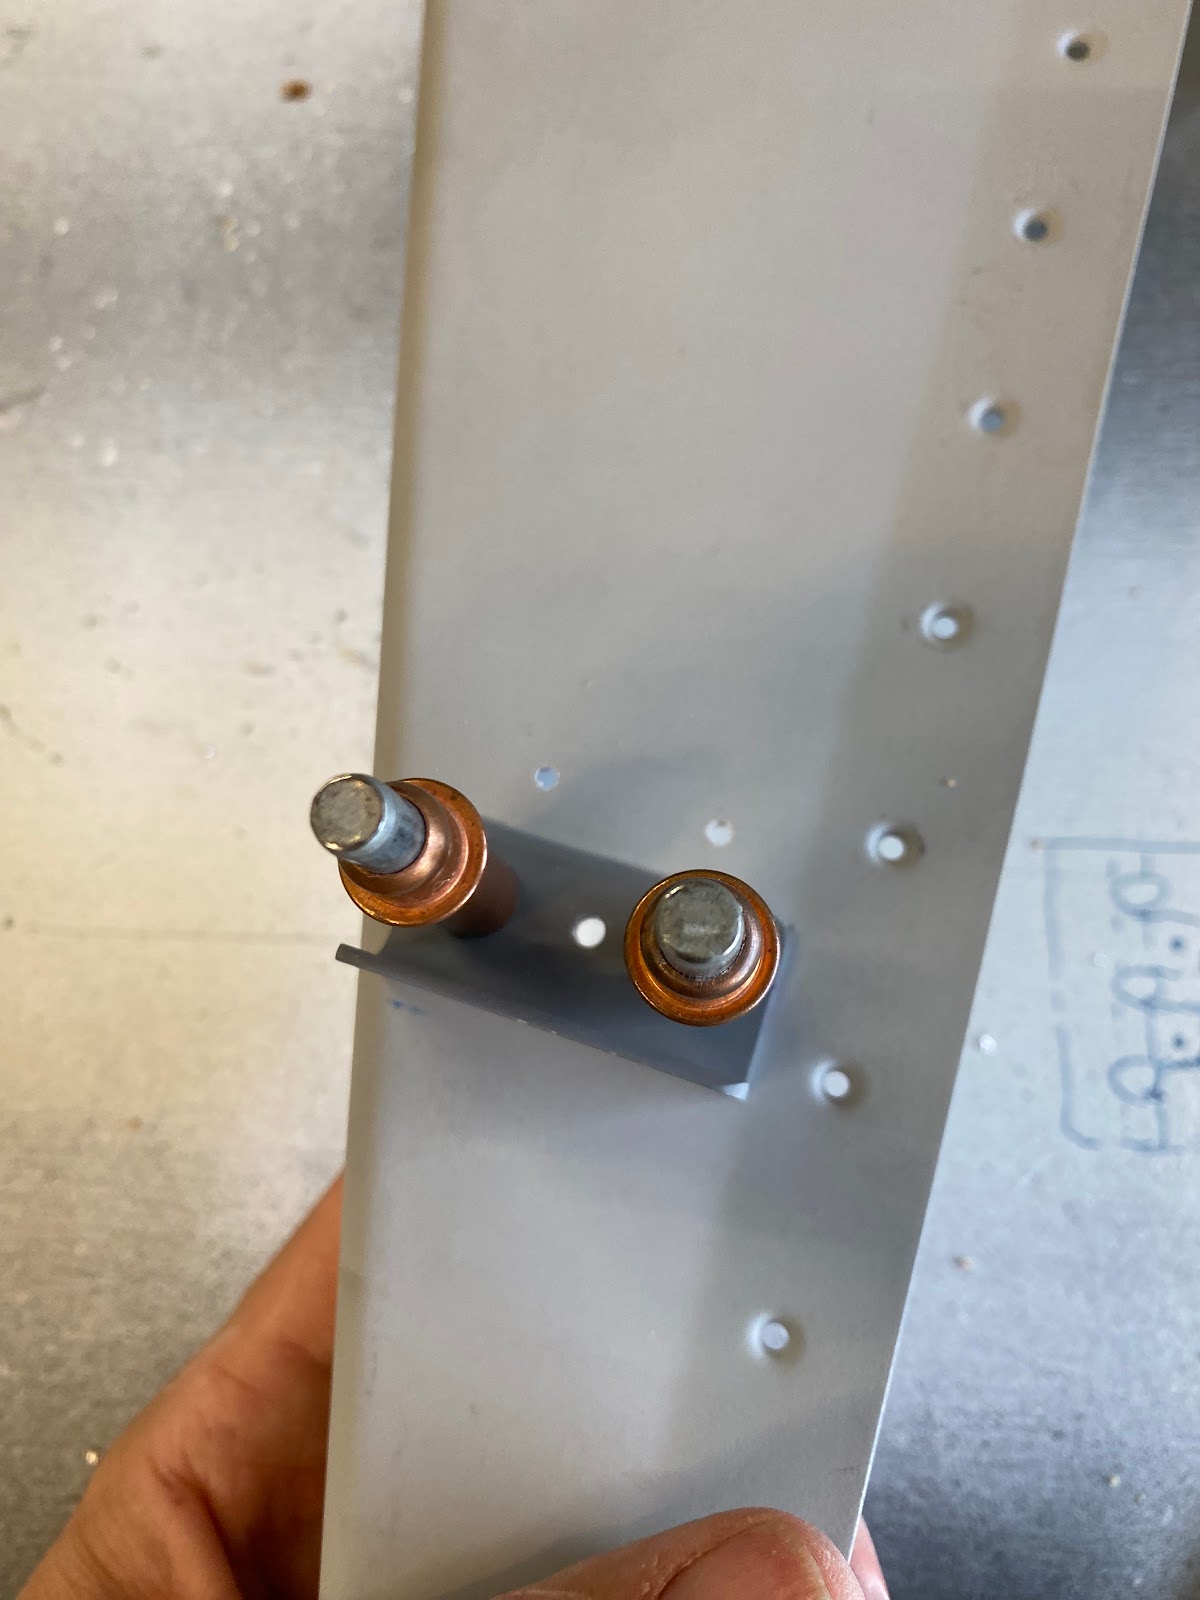
Next step to finish the riveting of the subpanels, was to install the six AN4704-4 rivets to the fuselage rib. Unfortunately the access in this area is horrible for both the pneumatic gun and for bucking bars. The angle of the fuselage side skin makes things poor for the gun, and the lip on the fuselage rib makes it difficult for the bucking bar. I ended up using the double offset rivet set and the results were disastrous. 

The first rivet was ok, but not great. The second was about the same. The third was terribly slumped. Not any good at all. I have to remove these! Standard rivets are just going to be awfully difficult to set correctly for me.


After inspection, the two top left holes are in good shape, the bottom left is not usable. The 3 on the right are perfect and untouched. Now, how to figure out an acceptable fix? There is no question that I will order a new F-7105B-L sub panel. After consulting with some knowledgeable friends, we decided that replacing the F-902-L fuselage bulkhead is not the most wise. The fix we settled on was to clean and salvage the fuse bulkhead. Install a new sub-panel and fabricate a 0.032" patch to fit behind. Essentially sandwich the fuse bulkhead between the patch and the new sub-panel. Of course I will abandon the idea of using solid rivets here due to the high risk of damaging the parts...again. I will have to use cherry max rivets here.  

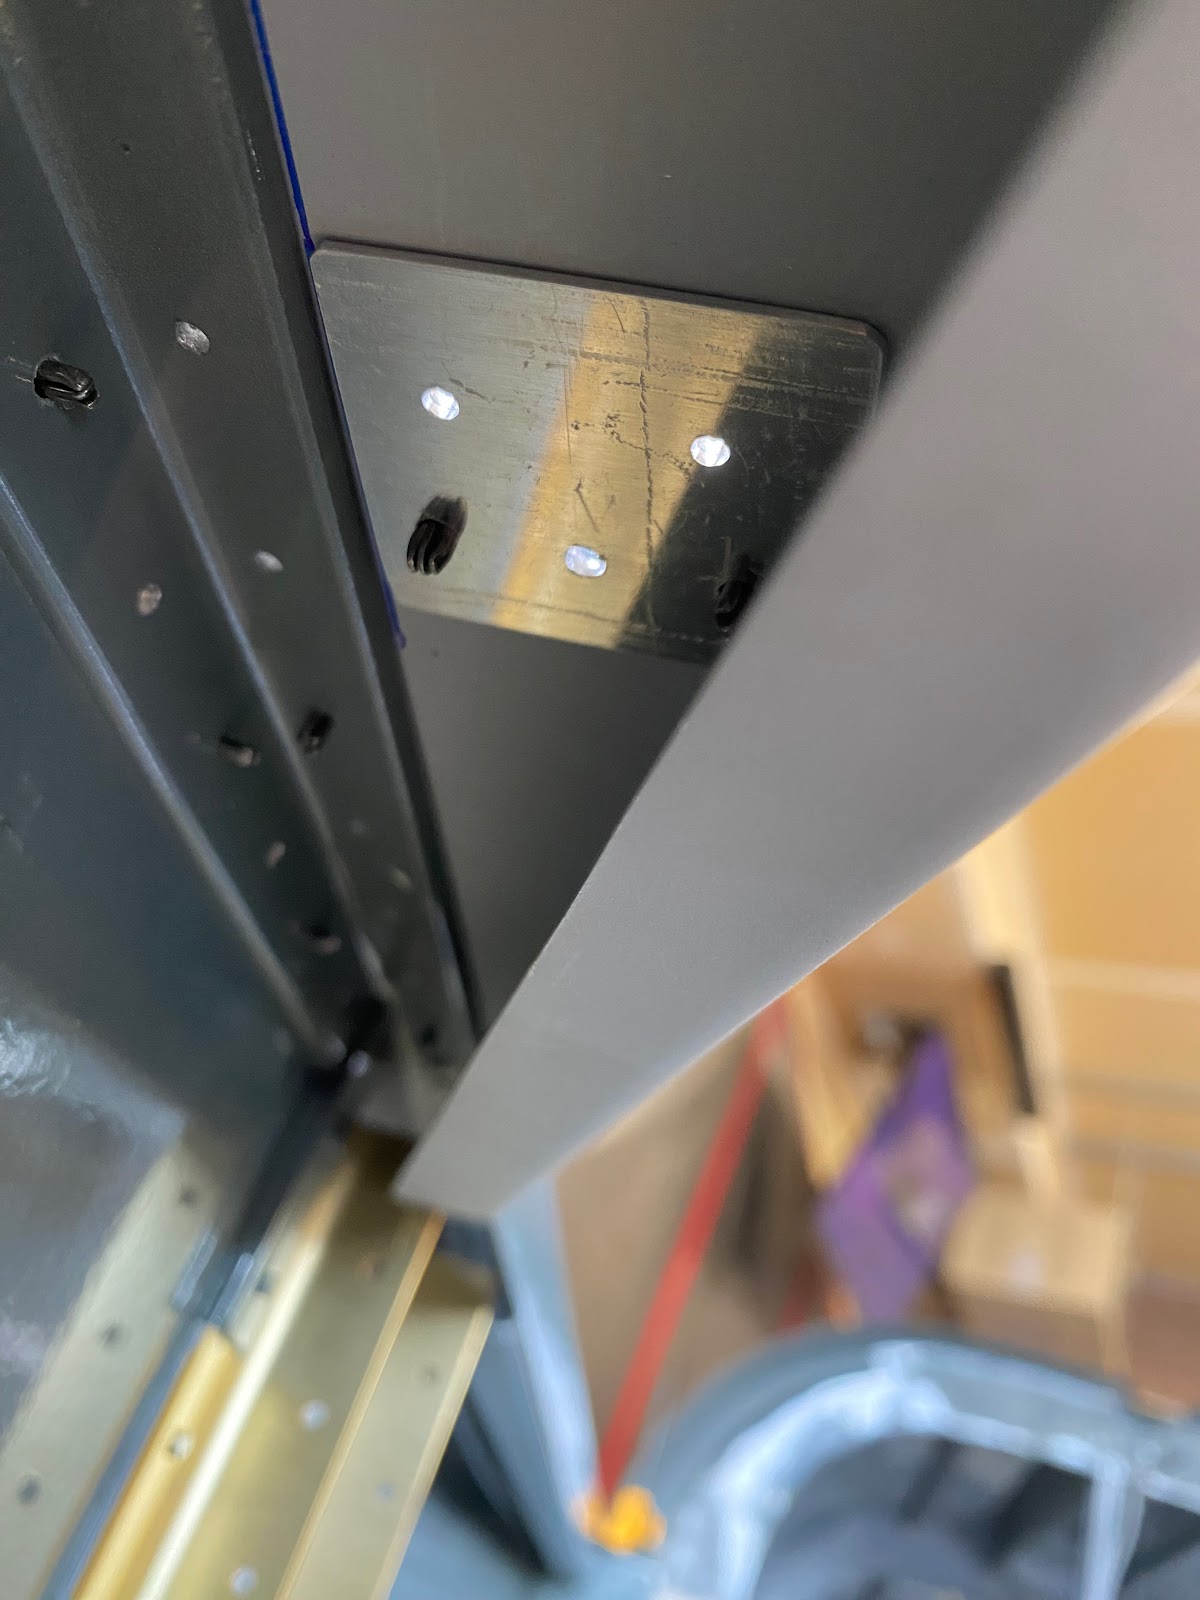
I used the dremmel and I deburred the holes with scotch brite. I used a round file on the large oblong hole to take out any sharp edges, as well I polished it with 800 grit sandpaper on the dremmel. I do not want any cracks forming from this spot. 

Next, I cleaned and prepped the areas to spot prime.


Tuesday, July 25, 2023

Started riviting the F-7105B sub-panels to the Fwd Canopy Decks - 1.5 hours

 Excited to finally get these pieces together, I started with clecoing the F-7105B sub-panels to the fuselage assembly. The easiest rivets to attack straight away are the AN4704-4 rivets that attach the Sub-Panels to the Fwd Canopy Decks.  


Sunday, July 23, 2023

Priming the forward canopy deck parts - 6 hours

 Big day in the garage today. To start I cleaned and spot primed the fwd canopy decks to cover the newly installed rivets


Next, I took some time to debur, file and clear all edges and nooks/crannies of the forward canopy deck parts. 


 I set up the garage for a priming run which takes a while to set up and the process itself is a lot of work. Soap wash and scrub with scotch-brite, rinse, acid etch, rinse, MEK wipe, prime!


Saturday, July 22, 2023

Installing the right F-721 fwd canopy deck - 2 hours

 I managed to squeak out a small work session today. I riveted the right F-721 fwd canopy deck to the fuselage.


 As well, I needed to dimple the holes for the vent support brackets in the fuselage side skins. I used the pop rivet dimple dies for this. While they do the job, they don’t do the best job at making a crisp dimple. On the other hand…ever try to drill accurate holes when they are already dimpled?…haha can’t be done. I will live with these being so so dimples.


 Last small item, I riveted the 4 nutplates onto the fwd canopy decks.


Thursday, July 20, 2023

More brake line fitting - 3 hours

 I went back to Mopac and purchased 2-14" lines for the park brake to pedals, and 2-36" lines for the pedal to pedal connection. 


Do there is no doubt that the 14" lines are the correct choice over the 16" lines. However I am a bit concerned with the length of the 36" lines. They look right, and run nicely to the other pedal with gentle sweeping bends, however when moving the pedals back and forth, I see that I am getting some rubbing of the lines on the brake pedal tubes. To help combat this, I designed and 3D printed brake line clips to help separate lines. After installing them, they certainly do much to keep lines from rubbing together, however I'm still having some issue with the right pedal. I just need a little more slack in the lines. I might need to go back to 38" lines. 


Wednesday, July 19, 2023

Started installation of flexible brake lines - 1.5 hours

 Before I get the front deck into place, I want to ensure that I have all of the brake lines on the rudder pedals sorted out. The local auto race shop Mopac, which is similar to Summit Racing in the US sells stainless braided PTFE brake lines.  

I ended up purchasing 2-16" lines for the park brake to pedals. And 2-38" Lines to run from pilot pedal to co-pilot pedal. On initial fit, both look a tad long.


Perhaps I should go to the next size down line 14" and 36" respectively.


 One item that I did, was to route the brake lines through the lightening hole in the brake pedal brace. I 3D printed a type of 2-piece interlocking grommet/line holder out of black PLA. It took a revision or 2 to get it right. Holds the lines nicely in place.


Sunday, July 16, 2023

Installing the left F-721A fwd canopy deck - 3 hours

 Well, this part of the build has taken some time to finally get to. Riveting the F-721A forward canopy decks to the longerons. Some builders choose to get these installed early in the canopy deck fitup. I however left it to the bitter end. (I suppose I don't like things becoming permanent unless they need to be).

Riveting these on is fairly easy when working forwards then aft. The tricky part comes in as you get to the last (aft) two rivets. Accessibility becomes very tight and in order to buck these I had to use a very long, but very slim tungsten bucking bar.


Saturday, July 15, 2023

Re-frabricating the Fwd Fuselage rib assembly - 5 hours

 Upon part inspection I'm just not pleased with my Fwg Fuselage rib assembly. A few holes for the F-7108A rib and the F-7108B angle are not to my liking. I have some rivet holes that holes that are just a bit too open making the rivet fit sloopy. As well as the holes for the AN3 bolts on the canopy brace were not perfectly square in the angle. Likely cause I reamed these by hand in place. Fortunately, the holes in the canopy brace are perfect as I did my final ream on the drill press. 

I had re-ordered a new F-7108A and spent the entire day re-fabricating the entire F-7108 fed fuselage rib assembly. Re-drilled the F-7108A rib to the firewall, I made a new F-7108B Angle and F-7109 Plate.


Tuesday, July 4, 2023

Making a doubler for the F-721D attach angle - 2 hours

 I just cant bring myself to riveting the attached angle on to sloppy holes, and I also dont want to risk re-drilling new parts through existing holes on the longerons. So after discussing options with a fellow builder (Mike with the Stewart S-51 and F1 Rocket) I figured it best to simply fabricate a doubler for the F-721D attach angle. I pulled out some 0.040" scrap and sketched out a quick shape. I then used the proper right side attach angle to drill new crisp #30 rivet holes. Then using an edge distance of around 0.25" I located two #40 holes to attach the doubler to the forward canopy deck. On initial fit, I see that I have to trim a small angle to clear the inside radius of the canopy deck. Also I need to trim the doubler to clear the longeron.

Once happy with the fit, I committed to drilling the two #40 holes in the forward canopy deck. 

Re-clecoed the forward canopy deck into the fuselage and verified fit. 

I am pleased with how it turned out (not pleased that I had to do it in the first place). I then acid etched the doubler and primed it. After a few hours dry time on the primer, I then riveted the doubler and the F-721D attach angle to the canopy deck. 


Monday, July 3, 2023

Prepping front deck parts and a small boo-boo - 3 hours

 I began the process of prepping and de-bring all of the front deck parts for priming. 


 As I was working through the pieces, checking that all edges are filed, and all holes are reamed and deburred. I have to final ream the attach clips on the forward canopy decks. Simple enough, but it turns out I had inadvertently clecoed the left attach angle to the right forward canopy deck and ran the #30 ream through it. I noticed it straight away but not after I got the ream through it....I had ob-longed the holes on the right forward canopy deck.   


I'm scratching my head as what to do with this. Normally I would redo the canopy deck but this isn't a structural piece at all. All it does is help hold the instrument panel. And a new canopy deck will be very difficult to redo as I really really do not want to run a drill bit through the holes all ready drilled in the longerons. That part is structural!


Sunday, July 2, 2023

Installed F-6118 rudder pedal brace - 1 hour

 Short day in the garage today. I installed the F-6118 rudder pedal brace.


 As well I also installed the rivet for the top flange of the F-902 bulkheads (These are AN470AD3 to preserve the proper edge distance as the AD4 will blow all edge distances in this super tight area)


Saturday, July 1, 2023

Small fixups and installing the brake pedal assembly - 5 hours

 Before I can start prepping the front canopy deck for assembly. I need to put a bit of work into the cabin area and brakes. I did not finish this area off originally as all of the drilling of the front deck results in a bunch of metal filings I didn't want all over the fuel system and brake system. 


 I removed the center cover to expose the forward brake lines. During the original installation, I didnt get one of the plastic retainers installed as I was short 1 half. So, I took care of it. 


 Now...The issue I was having with my brake pedestal install last year is that I had an amount of play in the WD-655L/R brake weldments that would (in work case scenerio) allow the two master brake cylinders to rub against each other. To combat this, I need to install a small washer in the F-6116 bearing blocks to limit the amount of potential movement I can get between the two weldments. 

Last year I had cut a few 1 1/4" dia x 1/4" thick discs out of HDPE plastic. I just need to trim them down to proper size. Using the 3D printer once again, I made a template/guide so I can trim the white HDPE to a tight press fit in the bearing block. One 1/4" spacer is installed in opposite ends for each F-6116 weldment.


Next, I need to install eight AN fittings in the master cylinders. As per the Van's Instructions, I am using a small amount of tite-seal on the NPT threads to help seal them. 

Before the brake assembly is installed. I need to finish final installation of the park brake and the park brake lines.
 

Now I am ready to permanently install the brake pedal assembly. And I can also confirm the 1/4" spacers work perfectly as it prevents any lateral movement in the assembly causing the master cylinders to touch together.