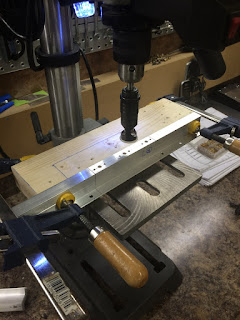
Looking at the countersinking of the z-brackets, I am always concerned with properly supporting the material and the countersink cage so not to cut too deep. I have ruined too many parts but accidentally countersinking too deep all because part of the countersink cage was not properly supported. The solution was to set up a sort of jig on the drill press. I clamped the inboard z-brackets on either side of the z-bracket I was countersinking on a scrap piece of 2x4. I set the countersink depth for a NAS1097 'OOPS' rivet. Those two attachment holes at each end are fairly close to the edge and I wanted to reduce the amount of material being removed there, so after some research on oops rivets on Vans Airforce, I decided that the use was acceptable in this application. Again....This setup worked extremely well.

The next step was to round the sharp 90degree outside corners of the flange (not the web). I used the sanding station with 400 grit paper to get the rough cut done and finished all edges on the fine 3M wheel. Then each piece was washed with dawn soap and scotchbrite, rinsed, wax and grease remover, MEK'd, re-labelled with sharpie and then primed. I also primed the stall warning stiffner.

