Showing posts with label Side steps. Show all posts

Sunday, October 31, 2021

Touch-up proseal on side steps - 2 hours

 I need to touch up the proseal on the side steps. I do not want water to sit on the top of the side step flange, so the best solution is to have a good fillet of proseal on the top and sides of the side step. I don't enjoy working with proseal so lets just get this over with.


 I applied a health fillet of proseal around the side step. As well I used a syringe to get proseal tucked into the corners. 


 A bit of proseal as well along the bottom skin of the wing area.


 Then I bunch of cleanup with a rag and MEK. Yuck I hate this stuff.


Since I have a little time on my hands. I also installed all of the ends on the control rods and push tubes. I torqued all of the Jam nuts.

 UPDATE - Don't bother installing the control rod ends and jam nuts on the F-789 pushrod. In order to fit the rod into the fuse they must be removed and installed once the pushrod is slid into place.


Monday, September 27, 2021

Installed the side steps - 4 hours

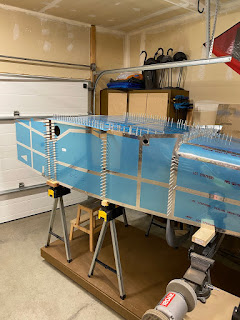
 I arranged for my buddy mike to come over and give me a hand bucking the side step rivets. This is best done with two people in my opinion. I installed the steps and then made an outline of the flange on the fuselage. I then buffed the mating area with 3M scotchbrite to help with adhesion.


Before Mike came over...I mixed up some proseal (Oh dear god I hate proseal). And then I applied it to the side step flanges and then installed with clecos. Mike arrived and we went to work riveting. Its messy and stinky work but we got it done. 


I will need to mix up more pro-seal eventually to properly fillet/chamfer the flanges and fill in some gaps under the side step/fuselage. I will add that to the to-do list. After mike left...I could then install the bolts in the UHMW block-step supports. Its never fun installing bolts in these as technically torque bolts in the plastic support blocks. 


Thursday, April 29, 2021

Finished drilling the bolt holes for the side steps - 2 hours

 My pneumatic 90deg drill from ATS arrived. Seeing how much 90deg drilling I will be doing in the next while I needed to pull the trigger on buying one of these. I didn’t waste time getting the step mounting blocks drilled to the baggage rib. The drill does an excellent job. 


 Now for the stressful part....drilling the mounting block to the side step. The reason why it’s stressful is getting the bolt hole in the correct location since the baggage ribs tend to bow a bit, and the only way to get them straight is to install the baggage floor. But I cannot drill with the floors on. So I ended up taking a bunch of measurements with the floors on...took the floor off, clamped some braces on the rib and verified  measurements. Closed my eyes and started the drill location to give me a marker. Next I removed the assembly and then reassembled on the drill press. Drilled one hole on one side, flipped the assembly 180deg and drilled the opposite hole. The result is that the bolt fit is tight and perfect.  A tedious process, but its done well.


Sunday, April 25, 2021

Nearly finished the External Step installation - 6 hours

 Jumped into the build today wanting to finish the step installation. I have to work on the couple of odd rivet lines. One of the existing AD3 rivets gets drilled out and replaced with the new AD4 rivet, that's simple enough. The other rivet above it is a bit more tricky. Ultimately it need's to be lowered as its current placement puts it too close to an existing AN3 rivet. 


Before I start drilling, I decided to shape and bend the mounting plate first. It is a task I'm kinda dreading so while it is early in the day might as well get to it. I shaped the aft end of the mounting plate in a fairly rudimentary style. The recent gusset enhancement made by Vans limits how much I can trim on the back corner. 

Grabbing various hammers, I slowly hammered the corner of the plate and bent it to the shape of the fuselage. Takes some trial and error but eventually it fits fairly good. 


Now to fit and drill those last couple of rivet holes...You can see the one rivet hole that I lowered. In the end I don't think its out of place...it's a "character" rivet.


Next I need to fit the F-6125 step support blocks. As usual fabricating drilling templates makes for quick, easy and accurate drilling on these. Using the template, I started all holes as #40 and then proceeded with drilling incrementally (#40, #30, #21) to finish with #12. 


The blocks fit very well, but I need a proper air 90deg angle drill to finish the install. My small angle drill kit won't work as the drill head is too large. 


Friday, April 23, 2021

Started the External side step installation - 6 hours

 I've been avoiding installing the side steps for a while now. I can't really explain why, I suppose I thought it was going to be difficult and frustrating. Fortunately its much better than I thought it was going to be. 

I started off by marking out the rivet dimensions as per the plans. I do need to adjust the one rivet line to suit the F-724 bulkhead rivet line (as noted in the instructions).


I notice that I have to remove some material on the end of the tube to get the mounting plate to fit better. I also noticed that the inside of the welds on the backside of the mounting plate was also interfering with the fit. I will need open up the mounting hole, and trim the tube length. Fortunately trimming the end of the tube is really easy. It's a square cut (not angled) and its short work for an angle grinder. 


Soon I noticed that the inside of the mounting flange was making some marks on the fuselage side skin. Ultimately its caused by the front-side weld "bleeding" through to the backside of the plate and its a bit rough. 

Taking a non-ferrous wheel on the drill, I cleaned things up.


Next, I need to transfer the existing rivet lines onto the mounting plate. 

Its fitting really well. 

I finished the build session by drilling some of the top and forward #30 holes in order to mount the steps, however I am careful not to drill the aft holes yet. I will need to bend that lower aft corner of the mounting plate to fit the fuselage before I can drill those holes. I have quite a gap to close there. 


Sunday, December 22, 2019

Trimming the F-623 ribs for the side steps - 2 hours

Small day in the garage today. I need to finish trimming the F-623 rib for the side step on the left side of the plane. Process was the same as the right side. Went slow, checked, checked and rechecked. I'm really happy with the fit.


Monday, December 16, 2019

Trimming the F-623 ribs for the side steps - 3 hours

Tonight was a lot of head scratching on how to fit the side step tubes and scallop the F-623 ribs.  I wanted to make sure that the F-776 floor skin was sitting flush with the top of the F-770 side skin. I used a toothpick in the relief hole to hold it up.

At first I started to eye ball it and sketch the scallop. Lots of un-clecoing and re-clecoing, checking and re-checking. The plans have the best suggestion using a straight edge to mark the edges of the holes....then you just work out the scallop depth from there. Not easy, but just work slowly at it.
I used a sharpie marker in the scallop, and then would fit the step. I'd rotate the step a number of times which would remove the sharpie from the high points on the rib. I'd know exactly where to trim the material down.


I managed to get the scalloping perfect for the right side step.

In the end, an excellent fit.

I just need to trim the 1 1/2" tube down but I'll save all that adjustment work for later.


Sunday, December 15, 2019

Cutting the steps into the F-770 skins - 4 hours

Now the plans have you cut 1 1/2" diameter holes into the F-770 side skins for the optional step kit. Yes, I did choose to install the step kit. (P.S. I was relieved to see that Van's has reinforced the step kits as the earlier generation units had a tendency to crack at welds, at certain locations).

Next I really battled with did I want to cut these 1 1/2" holes now before the conical bend? I want to get that conical bend over with, however for the life of me, I just couldn't figure a way to cut the hole cleanly/easily after the skin was bent. Decision made....Ill cut first, bend later. Fingers crossed.

I drilled the pilot hole up to 1/4" then used a 1 1/2" hole saw on the drill (in reverse). Makes for a much cleaner cut and doesn't want to grab and mar the aluminum.

Seeing that I was going to work well...I de-vinyled before I continued drilling.


I managed to get both sides done and re-cleco'd the side skins back on.