Showing posts with label Elevator. Show all posts

Wednesday, January 12, 2022

Fitting the forward elevator pushrod - 4 hours

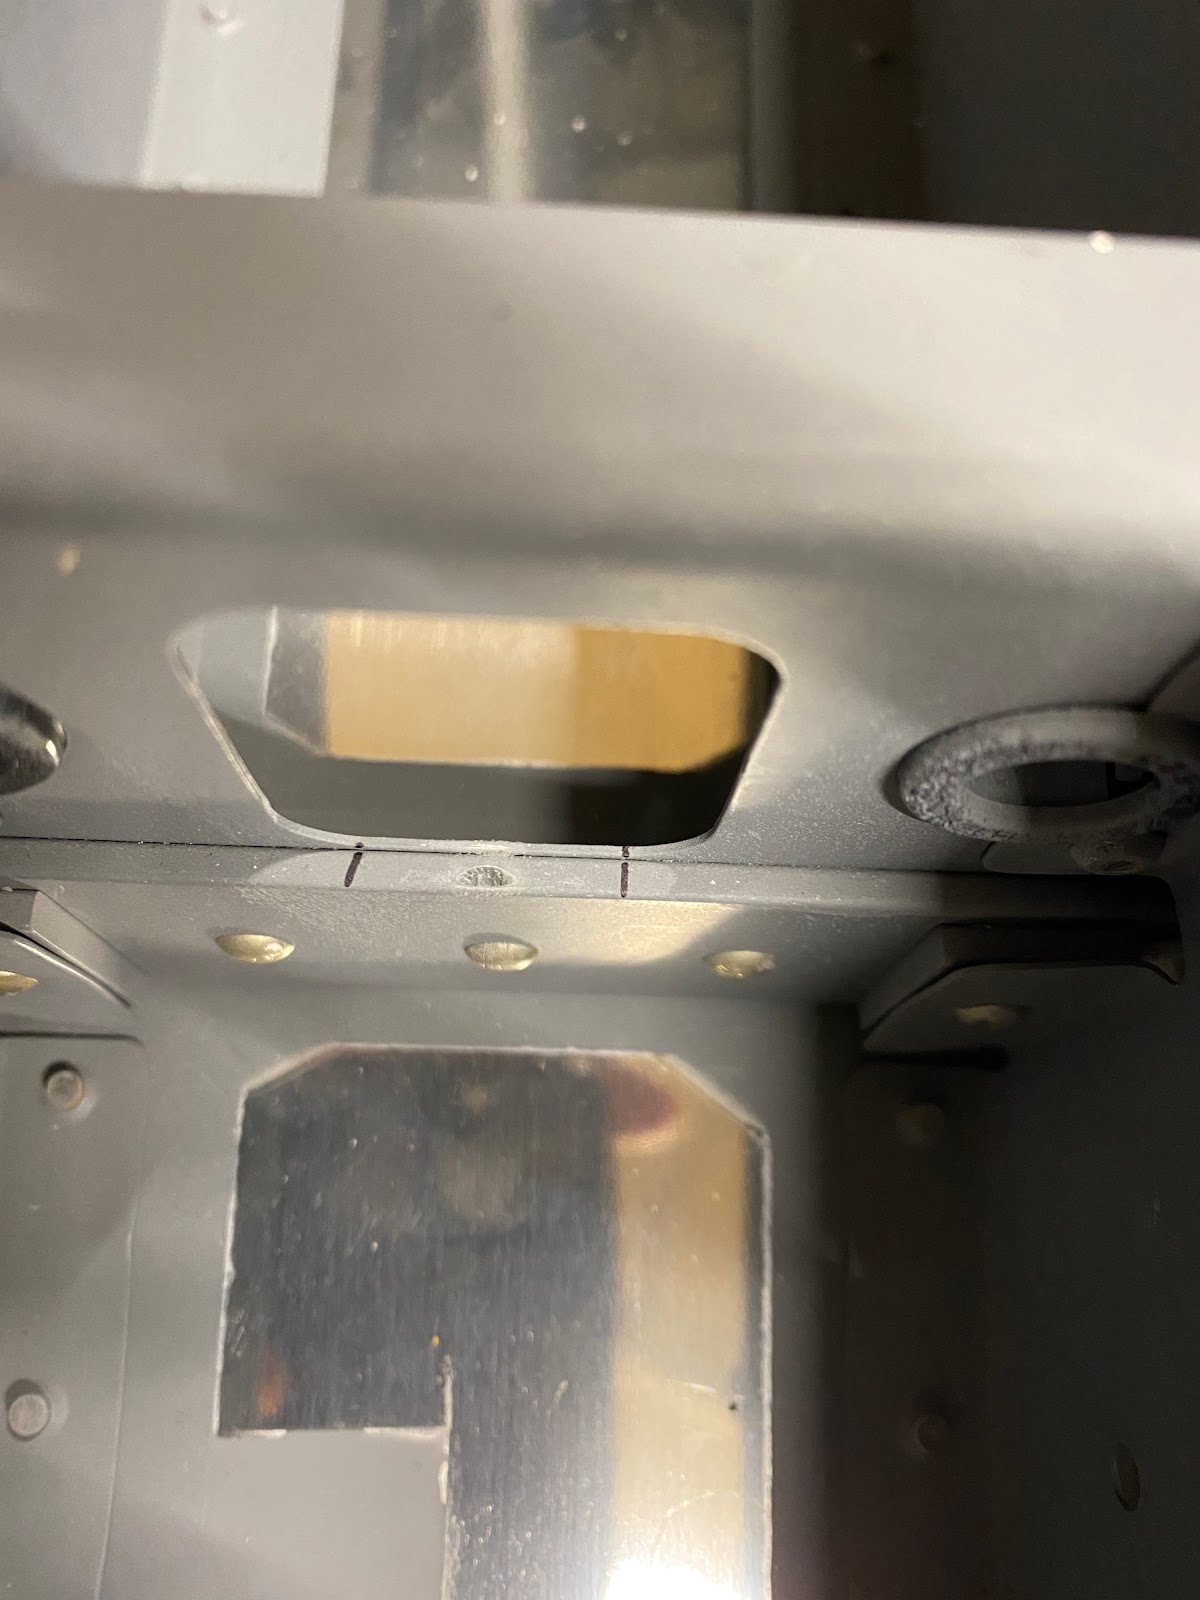
 Tonight was a bit of a grind…No pun intended. The pushrod connecting the control sticks to the bellcrank  interferes with the F-705 Bulkhead. More particularly the F-705B center section bar. Although this seems to be a very common issue with other builds, I called Vans just to make sure I was ok. Yup…I need to shave the stiffener enough to clear the pushrod. 

So now the tricky part. How to remove just enough material? Well slow and steady wins the race, I installed the pushrod and then was able to mark out the extents of the pushrod. Then I sketched a scallop. Using a dremel with a sanding drum, I carefully removed material. Then I used a rough grit sandpaper wrapped around the pushrod and moved the piece back and forth through the range of motion. The rough grit clearly marks the remaining interference. I then can work on the required area. It’s a bit time consuming, but the process worked very well and in the end….I have a perfect amount of clearance. Nice and tight….only a little material is removed. 


Sunday, October 24, 2021

More fabrication of the pushrods - 3 hours

 Todays build was not that long. Just the logistics of this particular build, need to finish this aft pushrod in order to finalize the forward elevator pushrod. 

The manual has you confirm correct position of the pushrod in that the bottom bellcrank bolt is entered in the opening (using a socket) when the elevators are perfectly neutral/aligned with the horizontal stabilizer. Once this was set. I made my reference lines, measurements and began cutting the pushrod accordingly. Van’s dimension is extremely close to spot on. 


I then could drill the aft end of the pushrod for rivets. Now….priming the inside of that tube was an incredible pain. My quart can of 1K primer that I used on the wing tubes was rock solid cause it sat so long. All I have now is 2K epoxy primer. I mixed up a small amount and dumped it into the tube and worked it back and forth. WOW is that stuff heavy. It’s so thick inside trying to do it this way. Eventually I abandoned this idea and cleaned the entire tube out with MEK and a rag, pushing it through a few times with a long stick.

Instead I used the self etching rattle can primer. Using the included narrow nozzle and spraying down the tube from each end. Not 100% prefect. But at least its not super heavy. 

I could then install the primed ends into the tube and rivet. 

 
Once riveted and a bit more primer. I gave a final paint coat later on in the evening.


Saturday, October 23, 2021

Started fabrication of the elevator pushrods - 3 hours

 I need to fabricate the two elevator pushrods. I cheat a bit with figuring out my rivet spacing by drafting what I need in AutoCAD. Drawing the diameter of the pushrods, then getting the circumference. That makes it really easy to print out a piece of paper with the needed rivet dimensions on it. That is then transcribed to the one end of each pushrod and I’m ready to drill.


Now comes the fun part. I want to make sure Van’s dimensions on the control rods are correct before I cut and drill the other end of the pushrods. The only way to do that is to install the rods and then take measurements. I managed to get everything installed and set up for the aft elevator pushrod. Looking good.


I’ll call it a night and start in when I’m fresh in the morning.

Monday, October 18, 2021

Finished drilling the elevator horns - 3 hours

After talking to Vans Tech support. I will take some time to move the existing pilot hole I drilled further in. Realistically I can move the pilot hole 1/64" (0.015625"). That would allow a final edge distance of 0.320" on the opposite control horn. 

 I drew a 3/16" hole using a circle template on the existing pilot hole that I can use as a guide to help me "move" the pilot hole inboard.


 After a lot of time, carefully filing the pilot hole and checking with various increasing # drill bit shanks. I successfully moved the pilot hole down and I am left with a #14 hole. Using an oak block clamped in between the horns, I used a #14 drill bit by hand and turned a pilot hole in the opposite horn. Sure enough...I have now a marker for the hole that measures 0.0320". Not perfect...but a darn good recovery. 

Then I very carefully reamed both holes to 3/16" and the AN3 bolt fit is tight. 


Sunday, October 17, 2021

Drilling the elevator horns - 1.5 hours

I need to drill the elevator horns for the pushrod. My horns are fairly aligned, but I would say the left side horn is the one further back. So I marked the hole according to the dimensions on the drawings.

I started drilling the hole first to #40, then up to #30. Then I made my spacer block and drilled in a drill press to get a good drill jig. Placing this in between the horns, I marked the next hole by twisting the drill with my hands.

This is when I noticed a whoops. 


Turns out the other horn is a tad lower than the other one. And surprise, surprise the tallest one is the one I chose to drill. Making the other hole with less edge distance than the other 

To be exact the measurement on the other horn will be about 0.305" as opposed to 0.375" as stated on the plans. Better call Vans.

When I called Van's Tech support Monday morning, we went through a few options of what I can do. Even adjusting the "height" of the elevators was an option if the pivot point isn't drilled. I asked about welding. Vans response is it's possible. But the disadvantage there is that the power coating needs to be removed for welding and a new coating be applied. Very important on these weldments as they can easily start to rust. Ultimately tech support felt I was going to be just fine with my particular issue. Although I didn't have 2x edge distance (0.375") I was better than 1.5x edge distance (0.28125") and it was still very safe.

 Personal note: I can take a file and walk that pilot hole down, allowing my new pilot hole to gain a few thousands in edge distance. Theoretically if I do it perfect I can move the pilot hole 1/32" (0.03125")....realistically I'll likely be able to move the hole 1/64" (0.015625"). That would allow a final edge distance of 0.320"

Thursday, October 22, 2015

Finishing up the last few rivets on the elevators and rudder, And installing rod bearings - 4 hours


I had ordered a bunch of MK-319-BS rivets from vans to finish off the really difficult rivets nearest the trailing edges of the rudder and elevators. I had called vans previously to see if I could use a MK-319-BS rivet instead of a CS4-4 rivet by that really tricky spot beside the rudder control horn. Van's support said that it shouldn't be a problem as the MK-319-BS is a more structural rivet than the CS4-4.


I then installed the rod end bearings in the rudder and elevator. I used a small amount of Boelube as suggested on Van's Airforce to help. Some of the rod bearings do take a bit of work to get in there. I really took my time to set the rod bearings to the proper dimensions. I had used my handy rod bearing tool that I made a number of days ago. Worked like a charm.