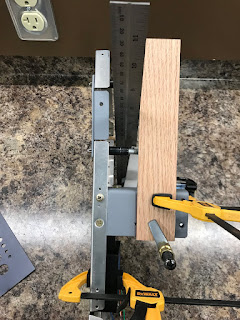
I set up the aileron trim motor and installed the linkages.

I then connected the wiring to allow my to operate the trim motor as per the instructions and found/marked the centre position. I soon found out how poor my wire strippers are on aircraft tefzel wiring, so after some reading I soon found out that I will need to buy some proper (expensive) wire strippers. I will have to wait for payday to order those and I after this, I wont be doing any wiring for some time. So I'll suffer with the poor wire stripper for now.

I then set up the assembly to find the centre alignment line. This I took my time on and went back and forth a bit, but I managed to settle on an alignment. I clamped the assembly and drilled the mounting holes.


I have a lot of questions on how that trim motor should sit on the bead in the rib. The instructions say to allow the motor to distort the bead. Which raises more questions then it answers. How much distortion is ok? A bead in the rib is used to increase the rigidness of the rib, so distorting it will reduce that. If I flatten a portion of the bead, is that ok? If i build spacers, will the trim motor interfere with the aileron pushrod? Unfortunately when googling it, there is not a whole lot off build logs that delve into this area. I posted a question on the Van's Facebook group and after a bunch of responses I sort of wished I didn't.
Let's just say, in the end, I think for my build I will make a spacer to allow me to mount the trim motor and not affect the bead. When measuring the depth of the bead, it only is 1/16" so the spacer I make can be from 0.063" material. (I'd prefer to make a proper spacer, rather than use washers). I'll put this on my future order list and make this space at a later time.
Next I dimpled the baggage floors.

Unfortunately on the left baggage floor I forgot to prep the factory/pre-drilled #19 holes on the one side and when I dimpled them, the holes cracked. (If you dive back into when I did the fuel tanks, I figured out how to dimple #8 screws without cracks - garetsrv.blogspot.com/2016/03/) So I need to replace the left Baggage floor.

I moved on to the F-776 bottom skin. Quite a lot of hole and edge de-burring. But I finished the evening by dimpling the #40 holes on the DRDT. I will dimple the most forward holes (F-704 forward spar) with the pneumatic squeezer. I also choose not to dimple the holes for the F-623 corner ribs as I still have to cleco those pieces for fitting and drilling the side skins. At the end of the night, here's what it all looked like.


