Thursday, September 10, 2015

Completed a few rivets on the Rudder Control Horn and checked over pieces - 2 hours


I checked over everything (The HS, VS, Elevators, Rudder) to make sure that all was good and I have missed nothing. There was the control horn on the rudder that I didn't quite finish off so I tacked those rivets. I managed to get the majority of them with solid rivets, however there is just the one rivet that I just can get with the longeron  yoke that I have. The nutplate inside the control horn is just in the way. I think i'll hold off on this rivet to the very end. I imagine someone at the local EAA chapter has a longeron yoke that will work.


Finally I have done everything I can, so now to book the Canadian pre-cover inspection ($435 plus mileage...Ouch!)

Wednesday, September 9, 2015

Trim tab near complete - 3.5 hours

Probably the most time that I've spent messing around with one little piece. It took a whole lot of head scratching to figure out how to dimple some of the holes in the trim tab. I was a bit concerned that I was not going to be able to dimple the control horn without the dimple dies interfering with the side. It looks awfully close. I still have the other set of control horns from the kit (I used the second set that came with the electric trim) and I test dimpled those. Perfect! No interference from the dimple dies. So I dimpled the control horns.I was a bit concerned about the edge distance on the last hole as I trimmed it a bit for a flush fit with the trim tab...it checked out alright.


The last hole that needed to be done was the aft most control horn hole. It is extremely tight to the tab.

Nothing I could think of would fit. The tight space dimple dies I have won't fit. I was set on the fact that I may have to grind down one of my dimple dies. I asked a friend for help too.

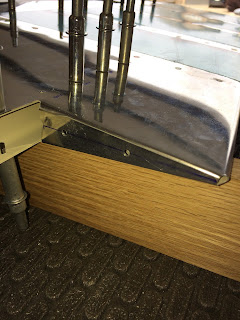
I read on the vans airforce forum about a suggestion to make your own dimple die by drilling a hole and then countersinking the hole. That got me thinking.... I thought about using the oak block that I had from bending the tabs. What if I stuck the block back in, drilled the #40 hole, and then countersunk the block.  Well I did just that! Then using the rivet gun with the die holder rivet set, I set the pressure on low and gave it a couple shots. bingo it worked. Not the sharpest dimple but completely acceptable.


Then I set out riveting the trim tab. Probably one of the most tedious and frustrating riveting sessions. Had to be a contortionist with the squeezer and constantly change yokes and flat dies to get the right fit. Ended up drilling out about 8 rivets all together. Very difficult to get the AD3-3.5 rivets to set straight with all that going on with the trim tab. I needed 8 hands holding things. Ended up having to install a oops rivet in the aft most hole of the control horn. Just too darn tricky to get one to set proper in that hole. (Did I mention that I am becoming a master at drilling out rivets!)

Getting good at setting AD4 rivets...AD3 rivets are a bit more challenging. Seems they are easier to slump to one side.

Tuesday, September 8, 2015

Priming the trim tab - 1.5 hours

Well I received an email from Van's support saying not to worry about the oops dimple on the left elevator. He said to file out the crack, use a rivet in the hole were is was supposed to go, and he suggested I add a rivet between the two. So all is good. When I place a rivet one oblong hole, it is barely noticeable.

I spend an hour priming the trim tab parts. After a few hours drying time, I spent about a half an hour dimpling most of the trim tab pieces.


Monday, September 7, 2015

Trim tab work and getting the elevators ready for pre-close inspection - 3 hours


I have to admit I am quite defeated about yesterdays mess up. Seems I shine in the tough stuff and mess up the really easy stuff. The saving grace is that it is in a non-structural area and any cosmetic issue can be mitigated. Perhaps I can be clever with polyester filler? I'll wait for Van's response....
After reading on the forums...I don't think I am the only one to have a oops dimple.
So I soldered on and got back to it. I began to research the holes and dimpling that is required for the various blind rivets. It's really tough to find solid information and I looked for about an hour (Research time not included in build time BTW). What I determined is this. MK-319-BS rivets use the #40 dimple....but require 7/64" hole as per the plans...however this results in a very tight fit. The general consensus is that a #33 drill bit is preferred. So I guess I drill/dimple for #40 and then drill out the hole to accept the MK-319-BS rivet. There is even less info on MSP-42 rivets. Again. The rivet diameter is 1/8" but this results in a hole that is very tight. Need a slightly larger drill bit. #30 is 0.2185" dia.
I marked out the elevator tabs and drilled two holes for the MSP-42 rivets (I used the 1/8" bit but ever so slightly reamed the holes. There is still a tight fit for the rivets. I then completed dimpling the elevator skins.

I am a bit stumped on how to rivet the elevators so that I can still have the Canadian pre-close inspection performed. After much thought. I finally decided to rivet the counter balance skins to elevator skins with the two rivets as the instructions/plans suggest. This way the inspector can clearly see anything before closing up and it will be much easier to fix something if he needs it done.
Also it will be easier to apply RTV at the trailing edge when it's still open. (I still have to squeeze the trailing edges a bit as my elevator skins are a tad underbent) I want to do this when the RTV is wet and I am ready to close the elevators.
With the help of the neighbors boy - Jayden (A future EAA member??) we riveted the elevators to the counter balance skins.

Then I jumped back onto the trim tab and machine countersunk the top of E-607PP. I must say that It is extremely difficult to machine these pieces as it seems I have to counter sink deeper than I want to. If I countersink so that a rivet sit flush in the hole, the dimpled material that's nested to the hole sits proud of the hole by a few thousandths. So I countersunk a bit more so that the nested dimples aren't so proud.

Sunday, September 6, 2015

Fitting the trim tab - 6 hours


Another big day. I picked up by marking the material on the tab that needed to be removed. It amounts to about 1/16" maybe less. About the width of my dremel cut off wheel. I performed some delicate surgery and it was a success. I noticed that I had scuffed the skin when bending the long tab over so I scuffed the area up and re-primed the tab. Also by using the double sided 3m tape on the wood block, I had removed a little bit of primer in the trim tab. I scuffed and touched up those areas as well. 


While I was waiting for the primer to dry I moved on to the trim tab and the hinge. I match drilled the horn and I cut the hinge so the layout/orientation is exactly as the plans show. JUST enough hinge...Just. 


I then took a lunch break.
After a few hours of giving the primer time to dry, I then folded the last tab over. Perfection!


I then set off to work on the alignment of the trim tab and the hinge. This took a fair amount of time at least 1 1/2hours to set up. I used painters tape, clamps, etc. I used scrap material to ensure that I maintained the 3/32" clearance between the elevator and the trim tab. I fiddled with it a bunch...made sure that it was perfectly aligned along the trailing edge. i marked each hole as a reference guide. I then removed the hinge pin and clamped the one side of the hinge to the elevator. I very carefully started to match drill the holes and cleco as I went. I put everything back together....checked alignment again, and then repeated the process for the trim tab side of the hinge. Perfect!


It was getting late but I was on a roll so I decided to start dimpling the skins....I just did a few and then WHAM. I made a whoops!!! Oh crap! I was a little rambunctious with the pneumatic squeezer and mis-dimpled the aft-most hole for the CS4 that attaches the fiberglass tip. (It was a tricky spot do to the tight area) I sent Van's an email to see what options I have....CRAP!


Saturday, September 5, 2015

Bending trim tabs - 5 hours


A big day for working on the elevators. With the help of a friend we built a small bender. Using the 1/8" dia dowel I proceeded to bend the trim. I repeated the same process as the elevator skins...taping a dowel inside and placing the skin up against the hinges and then very slowly bent the skin. It turned out perfect. Since I ordered a second trim a while ago...I did the second. Just in case. 


I then bent the tabs. I cut a wood block (~10 deg) to fit exactly in the profile I wanted. I then rounded the edges of the block with the belt sander to ensure that the folded aluminum had about the 1/8" dia corner. (The aluminum could crack if the bend is too sharp). 

I followed the exact method described in the instructions and the result was good. I did the second trim tab and this time it was near perfection. Be careful with the wood block as it can put a slight crease where the edge hits the aluminum. By the way...the rivet gun with the flush set works perfect. A low, low setting is good. I should point out that it is very important that the block on top is not located over the trailing edge....the result is that it can put a small dimple into your trailing edge if you do.


I then started to bend the tabs on the elevator but stopped when I noticed that I needed to trim a very small amount off the tab so it won't dig into the skin when bent.  


Friday, September 4, 2015

Completed the elevator ribs/skeleton - 1.5 hours


So with a finger that was feeling alright. I dove back into working completing the elevator frames. I cleco'd and then riveted the elevator horns onto the elevator spars. I am extremely pleased with how the rivets turned out.