Sunday, August 16, 2020

Installed the rudder pedals - 2 hours

Didn't manage to spend a whole lot of time in the garage today, however it was most defiantly a full plane day. Today was an EAA Meetup out in Wetaskawin.

My buddy Mike came over and we headed out to the EAA meet and someones hanger. Fortunate for me there was some really nice F1 rockets out there that I was able to drool over.


As well, I got to take a good look at some other planes as well as a beautifully painted RV7. Also one of the members has a RV10 that I got a good peak at and he was able to give me some advice on avionics and engine choices which I appreciated

Oh...A Stearman!

So needless to say I didn't get a long build session in today but I was certainly motivated to get going when I got home.
I started in by removing the Bearing blocks to the F-719 stiffeners. I clamped the assembly to the bench and used the hand drill to start the holes. I finished the holes on the drill press using a reamer.


When all was done...I installed the rudder pedals into the fuselage.


Saturday, August 15, 2020

Installing brake master cylinders - 2.5 hours

Another day spend messing with the rudder pedals. This time I have set up the rudder pedals on the table so that I could install the master cylinders for the brakes. I am very pleased with how well the AN3-56 bolts tuned out. Very smooth motion on the brakes.

It took me some time to figure out how I wanted the Grove master cylinders set up. Being that they are adjustable, I spent some time messing with the turnbuckle until I was happy. Next I used one of my short bits from my 90deg drill and used that to mark the 3/16" hole that needs to be drilled in the brake pedal horn.

I then removed the brake pedals, and disassembled them. The drill bit makes a nice arc "scratch" that I can easy find centre on. Then I drilled them to 3/16". I reassembled everything and it works great!

Tuesday, August 11, 2020

More rudder pedal work - 2.5 hours

I've been giving a lot of thought as to how to drill these angles, I finally decided that the way I was going to do it is on the drill press, on an angle.

I scanned in the rudder pedal into AutoCAD to find the angle geometery of the pedal. Using this information I was able to create a template that I could use as a setup for the drill press...to drill the correct angle.

It is a tedious process but I managed to clamp each F-6115C angle to a wood block and then open up the #30 holes step by step to a 3/16" reamed hole. The result once the assembly is cleco'd together is that the holes lined up fairly well....very small adjustments needed to make the bolts fit very well.


I then started trimming the 45deg angles at the bottom of the pedals.


Monday, August 10, 2020

More work on the rudder pedals - 1 hour

I've ordered the long AN3-56 bolts for the rudder pedals rather than use the short individual bolts from Van's. I hope that I can maximize on the smoothness of the break action by making this modification. (I really hope so because the bolts are not cheap...~$17 each).

So I used the F-6117A side plates to mark and drill the pilot holes for the AN3 bolts in the angles. I've been giving some thought as to how best to drill these as the holes need to be slightly angled to allow proper alignment of those long AN3 bolts. To help prepare this, I drilled the #30 pilot holes using the 12" bit to help get that proper alignment going.

I have a round file that exactly a #30 diameter so I used that to help get the correct alignment.

I am going to have to give some more thought on how to get these holes drilled so they align properly.

Sunday, August 9, 2020

Worked on rudder pedals - 8.5 hours

Since I am still waiting for my new F-902 bulkheads (sent snail mail). I jumped to the next section of the build being the rudder/brake pedals. It was a good build session, managed to put in a few hours today however the progress was slow as working with the plastic is tedious.

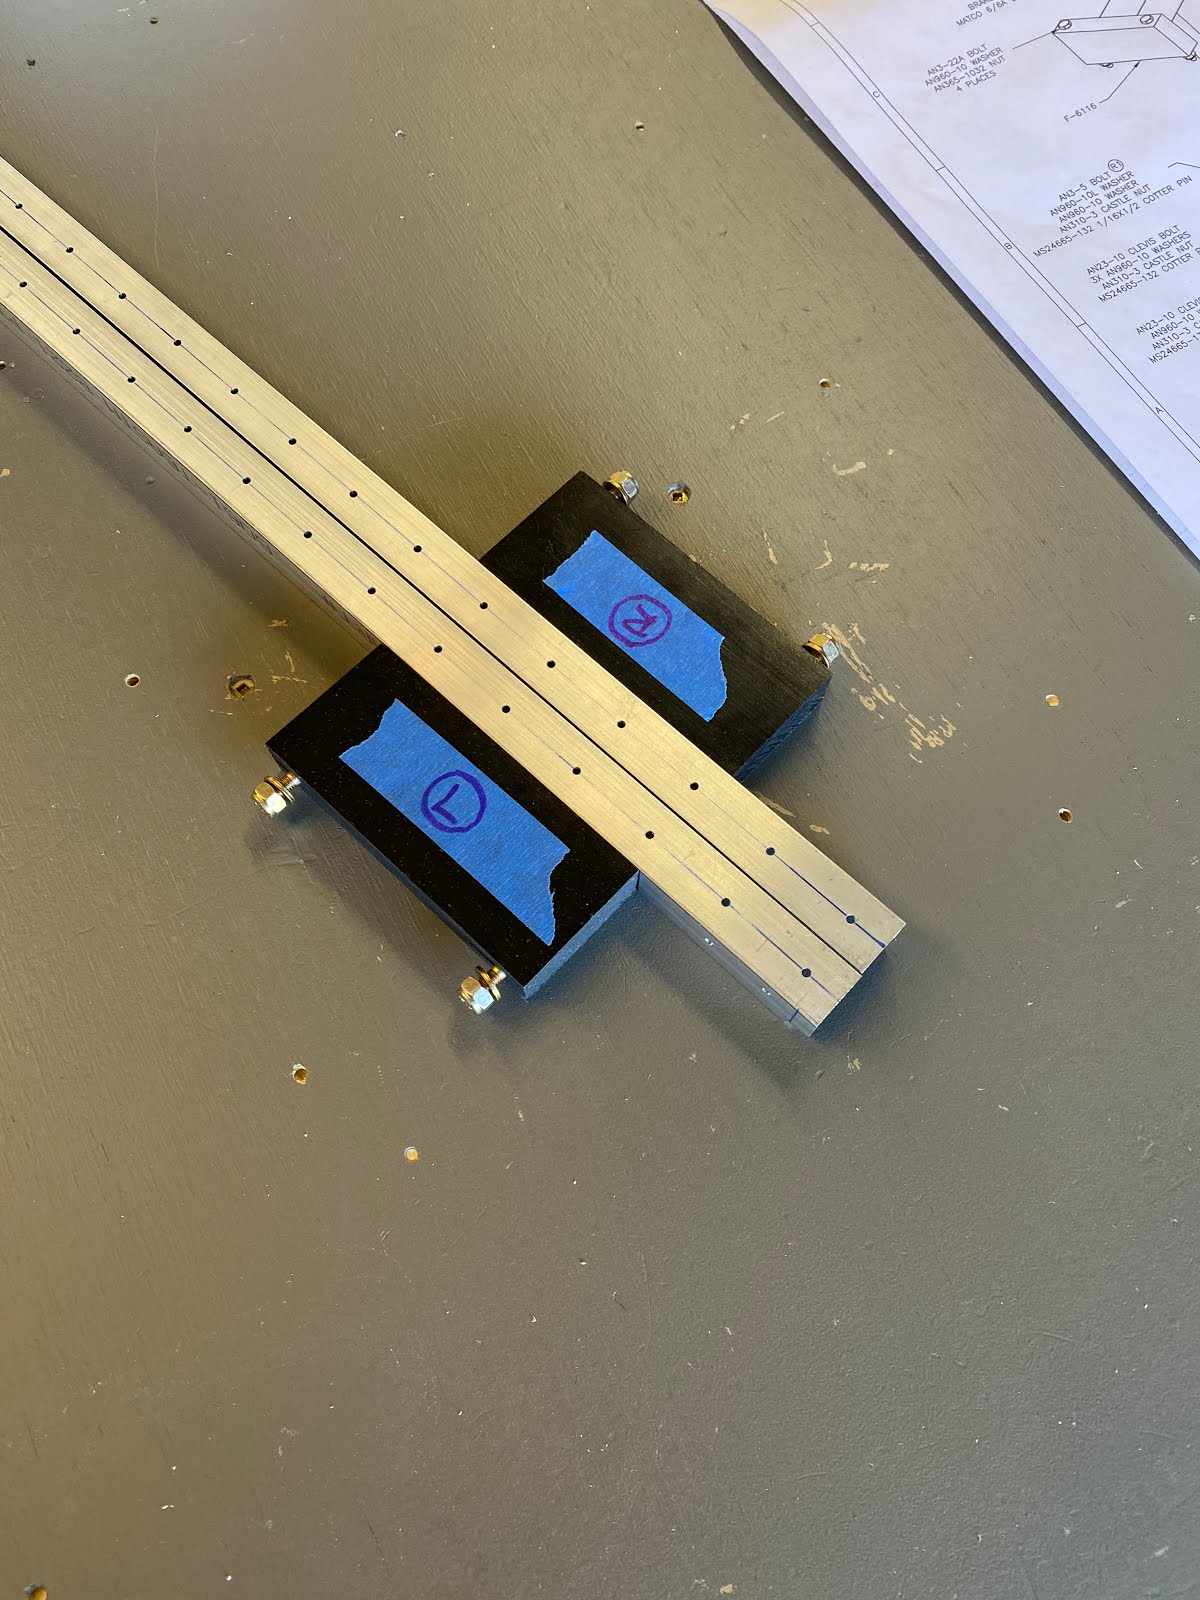
From what I have learned about drilling the flap blocks, I am more prepared to drill these pedal blocks. First step is that I made a template out of aluminum and placed #40 pilot holes in the correct location.

These get clamped to the top, and then the bottom of the plastic block allowing me to use the palm drill to correctly place a #40 starter hole....This starter hole is just a few thousandths deep and is  meant to just mark the top of the plastic as a guide for drilling on the drill press.

Once I have the holes "Marked" I then set-up the drill press. Making sure the platform/drill bit is all square. I used 2"x 2" oak blocks to clamp everything down to the drill press platform. Now, comes the tedious part. Once happy with the drill press alignment. I drilled the holes with #40 jobber bit but only half-way through. Then I flip the block over and do the same - drill halfway through. I use the jobber bit as its shorter, more stiff, and less likely to wander when drilling through thick plastic. Drilling halfway reduces the potential for wander.

I worked through #40, #30, #2, #15 this way...Only halfway through and flipping it to do the other side. Each time I am able to check that the holes align perfectly when looking through the hole.


I then finished the holes using a #10 bit set rather loose in the drill jig but drilling all the way through this time. The result is excellent...I have a good "pilot" hole that allows the #10 bit to track all the way through and not wander.

Next tedious (scary part) that I was dreading was to cut the F-6115 center pedal block. I finally decided that cutting these on the bandsaw was the way to go, but I am nervous about it as I have a cheap Ryobi band-saw and the blade isn't that rigid. So I clamped a large oak block to the band saw as a guide.

The result is really good. Uhhh, big worry off my mind that it all went well.

I moved on to cleaning up the rudder pedals and fabricated the F-6117C angles for the pedals.

Saturday, August 8, 2020

Constructed the Van's Aircraft Sign

Decided to take put aside the airplane build and I just messed around with putting the Van's Aircraft sign box together.Turned out really nice and now I can put it on display in my office at work.


Friday, August 7, 2020

Started to install the F-7101 gear webs - 6 hours

I started the build session with making the new spacers our of 0.032" material. Easy to do as I have perfect templates with thicker material.


I then used AD426 rivets and scotch tape to hold/alight the spacers on the gear web so I could cleco in the F-902 bulkheads.

With everything set, I was ready to drill.


Spacers looked great!

The right side of the aircraft came out really good, but for some reason left side wasn't sitting correctly when I drilled. I noticed something was off when I tried to disassemble. Yup, sure enough, the alignment is all sort of off.  I believe I didn't have the keeper cleco in the left side gear web correctly and as a result I misdrilled the F-902 bulkhead. Darn...I gotta order that new part.

I decided that it's best I just prep the gear webs for final drilling to ensure a great fit. I spent some time really trying to get a good radius on the 0.063 material so it will nest well with the F-717 longerons.

Then I drilled the top line of the gear attach webs. It least this turned out well.