Wednesday, January 2, 2019

Still working on F-705 Bulkhead - 6 hours


Everything is rolling along nicely with the Bulkhead. I did some research into when I should incorporate the "Almost an RV14" seat mod from Antisplat Aero. Looks like everyone says during the build is a great time, seem I just don't need to rivet on the F-705F channel. I can just cleco it on for now and then replace it withe the seat mod when I get it.

I need to drill the F-705H spacers in the rear spar fork. I scratched my head a bit about the best way to do this. I opted to eyeball it and drew a center line down the middle of the spacer. I then slipped it in the fork, lined it up and clamped it.


I then took my drill and very lightly started the hole to see if I was perfectly on center. Yup, all is good.

I drilled a little more by hand to start a proper pilot hole and finished the job on the drill press.

Next I marked out on the rear spar fork where the ends needed to be cut. I cut both F-705C and F-705B on a level platform on the bandsaw. I then found a level plane and finished the cut on the sanding station.

Perfectly aligned. I did check my measurement of the F-705B length and I am just a tad shy of the 45 3/32", I'm more closer to 45" maybe 45 1/32". I suppose by ensuring I had good 1/2" edge distance with that inboard hole, and then measuring out the 12 1/2" I may have tightened things up just a tad. Realistically we are only talking about 1/32" out on the ends.


Looking a Section H-H on drawing 38 I have a bit of wiggle room with that bolt location. I will be really good if most folks have to trim up the ends of the rear spar fork when they fit the wings. However if it is an area that most have trouble with it being short with anyway, I might find my options a bit more limited. I better check around to see what people have done during wing fitment.

Update Jan 4/18: I checked with Vans about the dimensions. Most ideal is to maintain 3/4" clearance (as noted in Section H-H) on all 4 sides. This dimension is not only from the end of the spar fork (that meets the wing) to the bolt, but also from the outboard end of the wing rear spar to the bolt. Vans noted that the rear spar should touch the spacer, so as long as the dimension from the spacer to the end of the spar fork is no less than 1.25" (5/8" min x 2) I am all good. 1.5" is optimal (3/4" x 2) and I sit at 1 9/16" so I am better than Optimal. 


I would be best to make a exact template of my rear spar to confirm the exact trimming dimensions of the rear spar. I'm a bit leery of those shown on Drawing 38. I don't want to trim too much of the rear spar.


Now I'm ready to trim down the F-605C doublers. 

Next step I am drilling the left side of the F-634 seat belt anchors. I marked out the location and set up a jig on the drill press. This way all of the left side seat anchors are drilled the same.

I had some spare .187" aluminum angle left over so I cut a spacer out of that to help get the best setup for drilling the right side of the anchors.

I bolted the spacer in between the anchors and fitted it to the assembly. Once I was happy with the square if the installation. I clamped everything down and back drilled the right anchor for a pilot hole. I then dissembled, and finished the right side anchors on the drill press. 

Super happy with how nice it turned out.


Tuesday, January 1, 2019

Started work on the F-705 bulkhead - 5 hours

Managed a good long day in the garage this evening. I went to work on the F-705 bulkhead. I started with cutting the F-705H spacers.


These managed to come out really well. I found it funny to try and chamfer to the tiny dimension of 1/64"

Next I drew center lines down the F-705B center section bar, and established dead center.


Once that was perfect. I put a cleco in the middle hole and then tried to center the line in the holes on the end. In retrospect this method made it extremely easy to get it all aligned perfectly. 


I then match drilled each hole using the drill press.
Now came the more tricky part. fitting the F-605C doubles. I wanted to make sure that I did not end up with the edge distance issues. So I measured 1/2" off the center and drew a line as a guide for the doublers.

I took a bit of time and clamped all the pieces together to ensure everything was straight.

I then back drilled pilot holes in the doubler, disassembled the clamps and finished drilling the holes in the F-605C doubler on the drill press. Perfect edge distance.

I then marked out the 12 1/2" dimension for the doubler and using a square transferred the line to the F-705B cross bar below. Ready to cut.


Monday, December 31, 2018

Finished the F-704 Center Section - 3 hours

Small day today just finishing up the center section and getting it ready to put away. I decided not to grind down the F-704 center section sides for the wiring holes and instead opted to grind down the plastic bushing instead just as the instructions state. They actually turned out extremely well.


I then ran over to home depot and picked up some 2x2 oak blocks to make my center section spacers. I little bit of set up on the table say with some scrap wood and I dialed in the proper width of 1.438"


Once that was done I needed to open up the holes for the spacer bolts in the aft F-704E center section. I found it odd that the back section holes were a smaller size than the forward section.


Done and ready to store until I install on the forward fuselage.


Sunday, December 30, 2018

Riveted the F-704 center section - 6 hours


I started the day riveting on the nut plates to the F-782B and F-783B supports. I used the NAS1097 rivets as the supports are thin material. I also installed the nut plates on the F-704M stiffeners however I used the AN426AD3 rivets on those as the material is much thicker.

Next I began to rivet the supports on the center section. I haven't bucked rivets with a bar in quite some time so I was a tad nervous about this.

I used a 2x4 clamped to the workbench as a bar support. The rivets turned out extremely well, and I soon regained my confidence with bucking.


All done the supports.

Next I needed to rivet the center section sides. I was concerned about the side moving with riveting so I greased up all 4 close tolerance bolts and inserted them into the center section. I then cleco'd all the holes and then began to squeeze the rivets.

After a few, I just found squeezing them a pain, so I opted back to the gun and bar. The riveting went extremely well and quick. Drilled out only 2 rivets I think. I have to say I am beginning to really love bucking (Thanks to the endless bucking of the wing skins....a person gets really good at it).

Center section riveting all done.


Saturday, December 29, 2018

Worked on the F-782A & F-783B brackets - 4.5 hours

I started late in the day but managed to get a decent amount of work done on the center section. I started off with completing the nutplates on the top of the center section. I used NAS1097 rivets for these.

Next, I opened up all the holes for the fuel lines and brake lines.

I then broke the edges, scrubbed with scotchbrite, degrease, MEK and primed.

As I was waiting for the primer to dry, I made the F-904J spacers. They come pre-cut to nearly the perfect size back in the wing kit. Fortunately I had labelled their use previously and they were easy to dig out. I had chucked them in the drill press and polished them to proper size.

Easy peasy.


Friday, December 28, 2018

Assembled control sticks and fabricated F-704M stiffner - 5 hours

Now that the touch-up paint is dry I assembled the control sticks. I used my Aeroshell 22 synthetic grease on the bushings/control pivots. Movement is excellent.
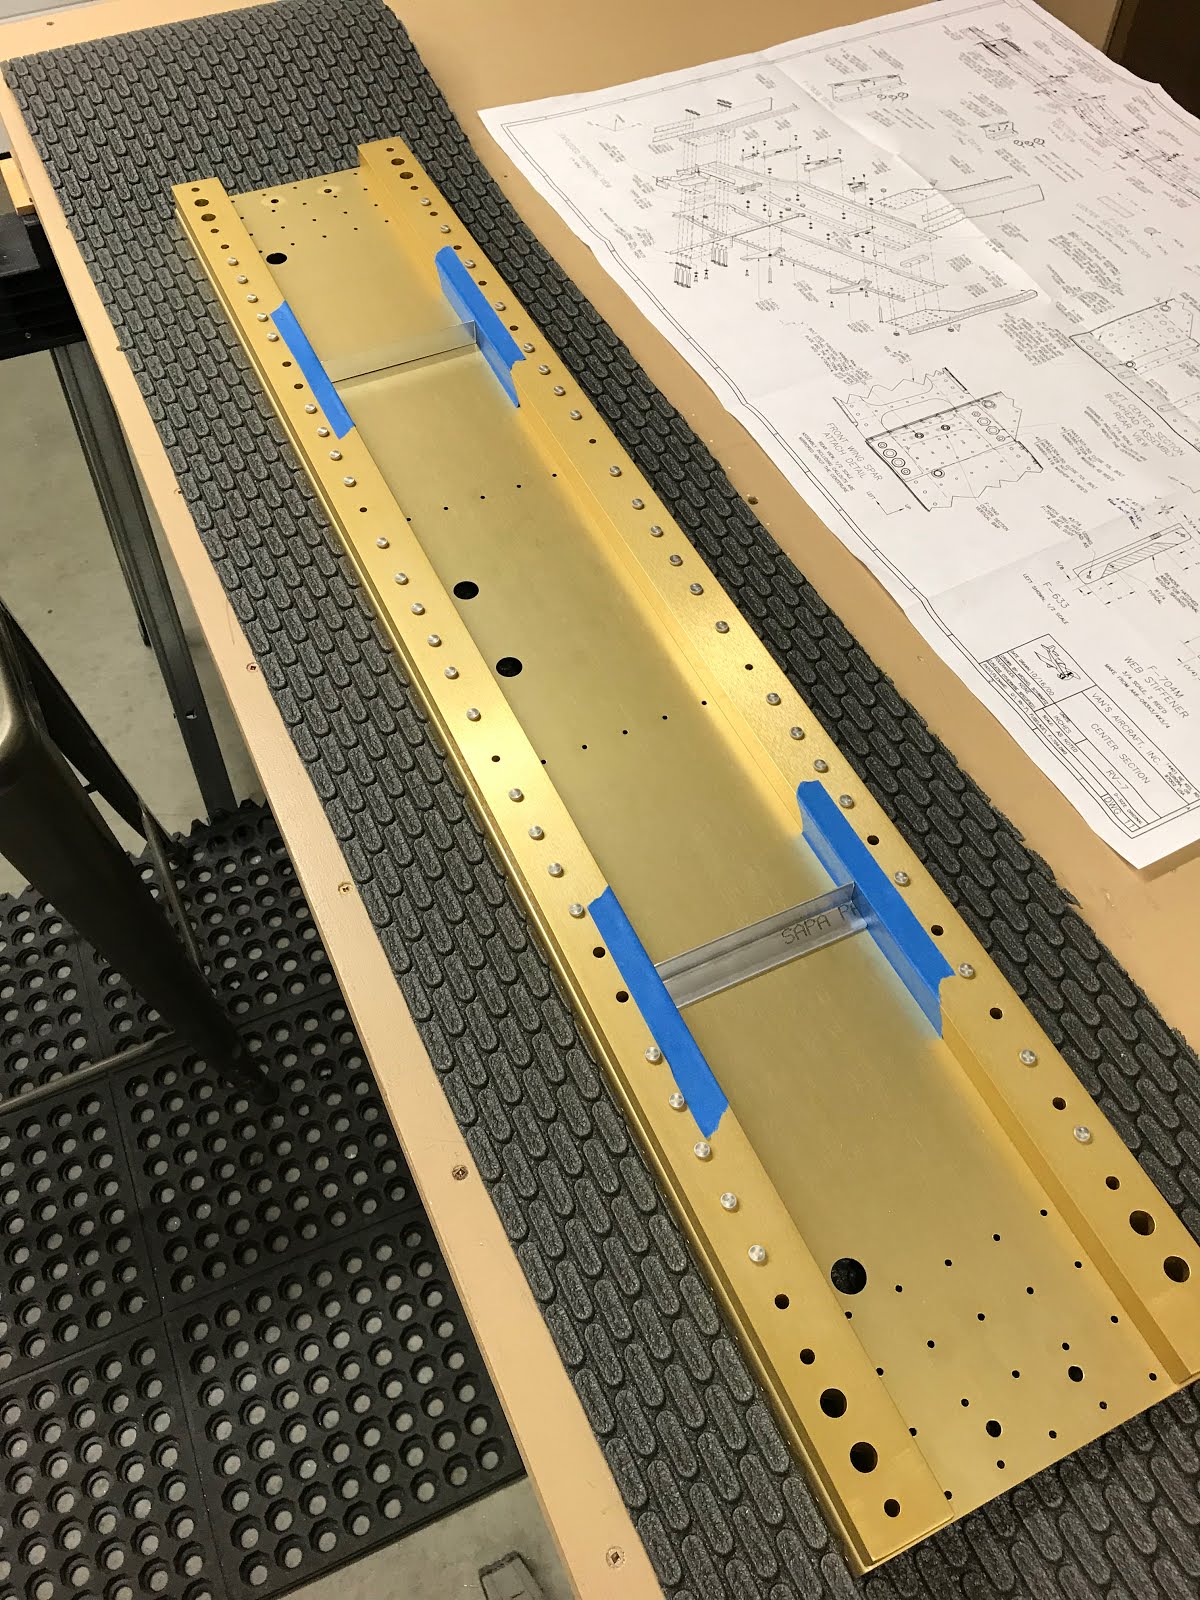

Next step that the plans have you do is install the nutplates on the top of the center section. I have opted long ago the clean and prime all of the nutplates. Yes, this is a tedious task, but its what I have chosen based on my reading. I cleaned and primed 20 K1000-08 nut plates. While the primer was drying, I decided to fabricate the F-704M stiffeners. I cut the angles to approximate size and then ground the edges to exactly 4 5/8". This is fairly critical as they stiffeners sit very tight in the center section as I have found. 

I then marked center lines on the pieces so I could line up the holes. I then used masking tape on the center section to ensure that the stiffener would be centered in the web.

Next I had lined everything up and clamped the pieces to the web. I then carefully drilled a pilot hole in the bottom most piece. I disassembled the piece and checked my pilot hole for correct dimensions and then fished drilling on the drill press. Then I reassembled so I could match drill the other holes.

I repeated the process for the top most hole, checking again for correct dimensions and alignment. Drilling again on the drill press before re-assembly.

All the rest of the holes were drilled on the drill press.

Probably the most time consuming process but it is perfect. Next step I fitted the F-782B & 783B pieces and match drilled to the center section.
 
I then completed the nutplate holes on the F-704M stiffeners.