Monday, July 13, 2020

Opening up the holes in floor skin - 2 hours

I used a dremel tool to open up the rough-cut holes in the bottom skin. I was careful not to cut too much. I want to ensure that it fits perfectly and that I don't cut too much.


In order to be sure, I will need to work on trimming the F-776 and F-704 centre section flange first.

Sunday, July 12, 2020

Fitting the Landing Gear Weldments - 3 hours

I've taken a bit of time away from the build in order to finish replacing my deck. I've replaced the pressure treated boards with Trex decking. I thought it would take me a weekend, but in reality it took me a couple of weeks. Seems Trex is a bit more tedious to install than I though but it is totally worth it!!

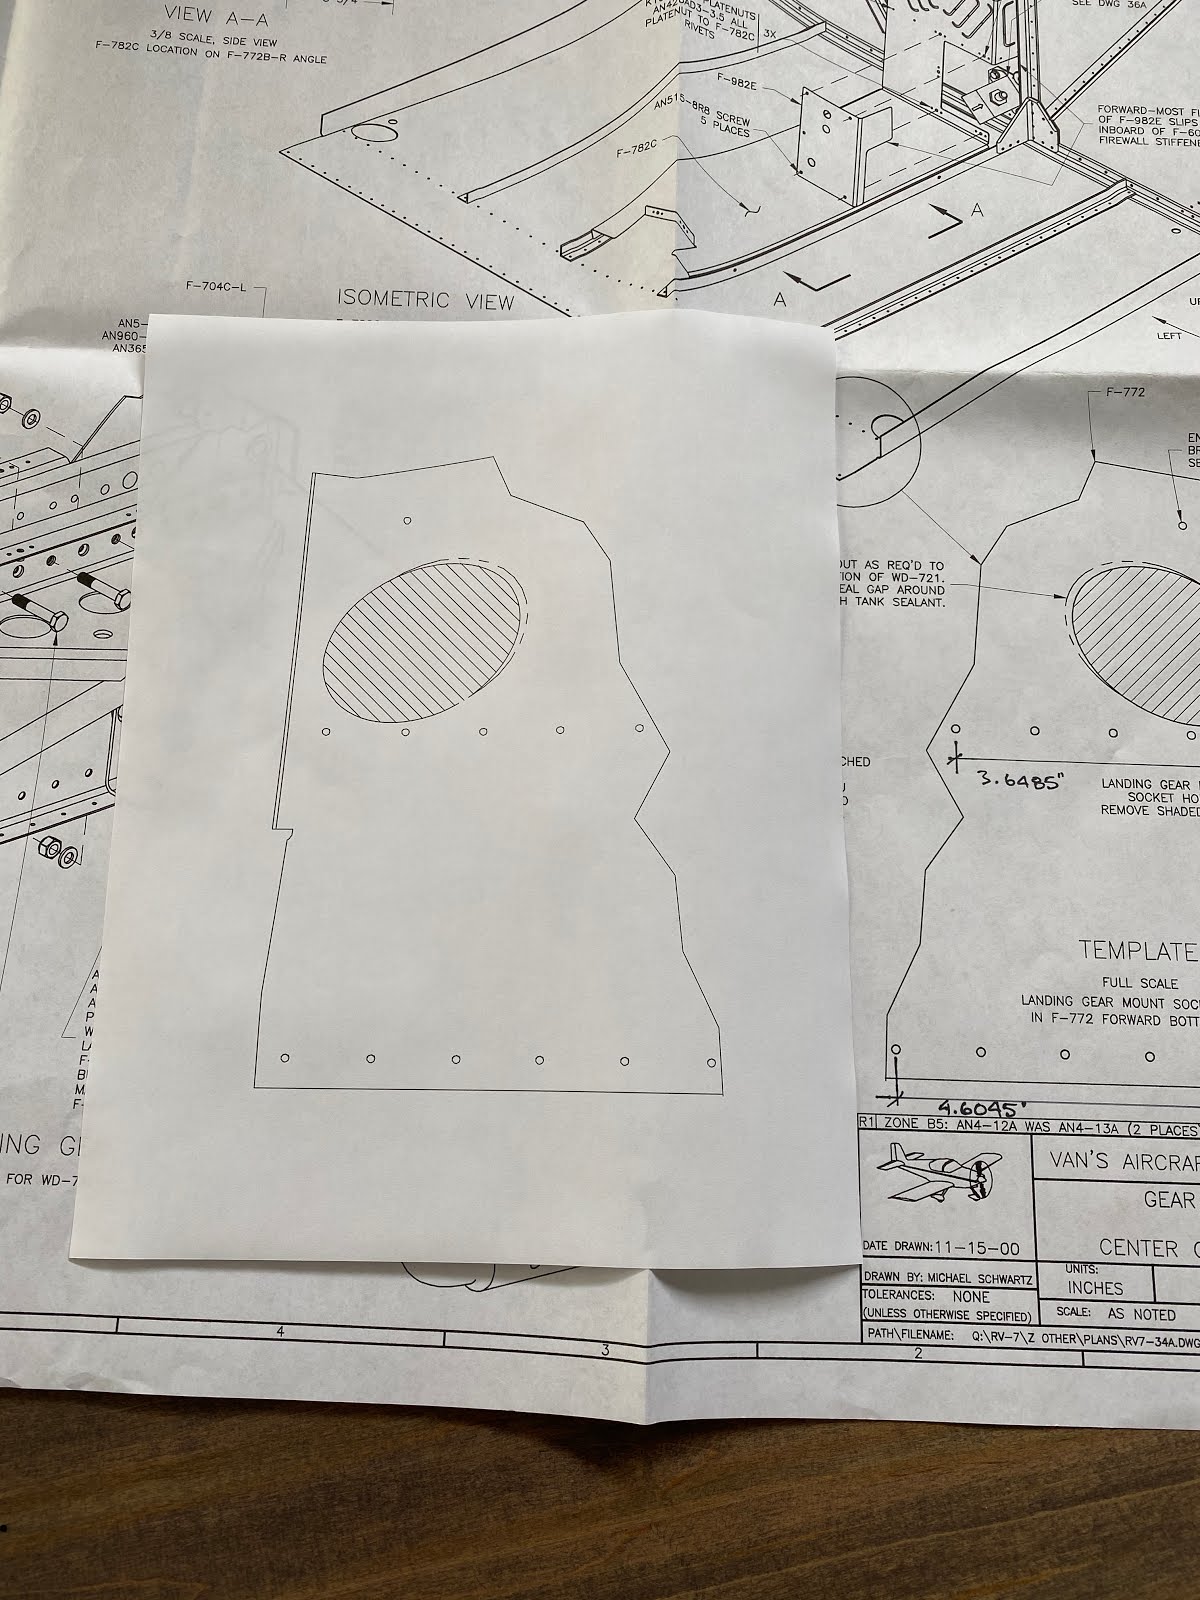
So to start back in on the build. I need to begin fitting the landing gear weldments to the frame. But I need to start by cutting holes in the F-772 bottom skin. Not wanting to cut the plans all up. I've scanned the original drawing into AutoCAD and gave myself a template that I could print out on 8 1/2"x11" paper. I also can easily make it left and right.


I traced the holes onto the skin, and then used a drill bit to get things started.


Thursday, June 18, 2020

Finished matchdrilling the firewall - 2 hours

So now that I have the word from Van’s that the edge distance at the top of the fire wall is not an issue. I was ready to start match drilling the firewall to the fuselage. I started drilling all the holes along the bottom of the fuse (top from my perspective). Then I started drilling the sides starting at the longerons as per the plans.


The edge distance at the top most hole ends up super close to the edge of the relief in the flange. Eeesh!


 The edge distance on the corner weldments are really good. The blue line represents minimum edge distance (to center of the hole) so lots of room to work with here.


Wednesday, June 17, 2020

Still messing with the firewall fitment - 6 hours

After quite a number of small build sessions in the evenings, lots of fitting and checking, trimming the longeron(s) and repeat the process. But I seem to have everything figured out. Its taken quite a lot of time to get things to fit right. Tip: the best method I found was to start fitting the longerons to the firewall using the AD4 rivets first.....Then cleco the side skins to the longeron. It doesn't work well if you cleco first and then try to slip the rivets in. Its a very tight fit for everything.

The last little item before drilling the firewall that I notice is that I have one hole each side that has a questionable edge distance issue.

Edge distance issue at the top most hole of F-770 side skin


I've put up a post out on the Van's forums to see what the consensus is as not many people note this item on their build-logs, and I couldn't find any other pictures of this area on other builds. Looks like I might be the first one?

Called Van's the next morning and the advice on my particular edge distance issue was to build-on. Technical support was extremely helpful offering additional advice on recommended cowling attachment. I won't dive into the details for the blog but we had talked about sky-bolt fasteners and a good practice is to tighten up spacing of them along the bottom. Once again, Van's is 10/10 for service and support! 

Here's some misc. pics of me messing with the fit over the last couple days so you can see the fit.


Monday, June 15, 2020

More fitting the firewall and fitting floor stiffners - 4 hours

I started off by removing the firewall and moving the centerline on the F-601M-1 angle/stiffener aft by about 1/32". This allows the forward face of the firewall to sit exactly 5/8" aft of the side and bottom skin edge.


I refit the firewall to the fuselage and then carefully drilled the outermost holes and clecoed them.

I now checked the required 5/8" distance along the sides and towards the op of the firewall and it looks like I am going to do some work to get things sitting correct. The sides of the firewall are bowed a slight bit and is not sitting well/in-line with the side skins. I  will have to remove the firewall and "massage the side flanges" to get a better fit. I also see that I have to trim just a small amount of longeron to get the proper 5/8" distances.

I'm putting that on the side for now, and I opted to check how the floor stiffeners fit. I first marked edge distances on all sides of the angles so I can easily identify trouble spots.


I then used the edge distances to help forward/aft placement of the angles


I was able to see how the angles interfere at the firewall. I could then easily mark and trim the floor stiffener to fit around the firewall angles.


An excellent fit!

Sunday, June 14, 2020

Fitting the firewall - 2 hours


Again, another short day in the garage today. I drew a line halfway on the F-601M-1 firewall angle. Then I managed to get the firewall supported via the wife’s ironing board and I got the firewall temporally clamped into place. First I lined up the second line of holes in the F-772 bottom skin with the centerline I had just drawn. 
 
I then started to measure the firewall and the measurement was a bit larger than 5/8” (just proud by about 1/32”). This seems to be in line with all other build logs out there. Looks like I will need to make some slight adjustments. 
 

Saturday, June 13, 2020

Trimmed the Longerons for the Firewall - 2 hours

A short day in the garage today. Very much a plane day, but just not productive. I drove out to the airport this morning and took the Cessna out for a spin. Was great to get out but my radio work is rusty.  Ugh.

After picking up some lunch I started working in the garage and measured out the 3/4” that I need to trim the longerons back. Doing a little research on what people did doesn’t reveal a whole lot on info. Not many people seem to talk about it. I ended up drawing reference lines 3/4” back from the edge of the side skin.


Then I used a square to transfer these lines onto the longeron.

One thing to note is that I purposely left my longerons extra long from what the plans said, fully intent on cutting them down. As you can see, I really left a lot of material.

 After clamping a block of wood as protection, I used my dremel and a cut off wheel to cut the longerons. In the process....I lost my dremel. Yup...It got too hot and died. So now I have to run to the store and buy another one. Darn!
After getting the new dremel, I finished cutting the angles, then went to work with the files and cleaned up the ends to the line.

I test fit the firewall, and it appears that I could even go another 1/64th of 1/32” more with a file...I’ll take a better look at it tomorrow when I can get a proper temporary support under the firewall.