Sunday, May 15, 2016

Creating a new anti-hangup braket - 3 hours

I am zapped of all energy from the weekend. Had a house party on Saturday, and it was three days of prep and cooking, followed by a late evening.

I managed to gather enough strength to began fabrication on another anti-hangup bracket. I had to cut more 0.025" material at 1/2" thick. I cut a paper template and tried again. This time,Ii referenced another build log and twisted the bracket so that it ended up slightly back from the original position.


This way is a bit more challenging to fit but I made it work with using the holes that I had drilled before. Just really had to go slow and work at it. No quick work here. The result was excellent.

Only one small item that I noticed. At one point of the fittings, it had a tenancy to grab a little on the stiffener. I'll have to take a better look at this with Mike.

Thats enough for today. I'm spent!

Tuesday, May 10, 2016

Testing the inner anti-hangup - 1 hour

When looking over all the build log photo's of the fuel tanks, I noticed that most folks didn't have a inner anti-hangup bracket like mine. It occurred to me that I did not test the full movement of the fuel pickup. It was bothering me, to I re-cleco'd the assembly just to check. Well wouldn't you know. There was an issue with the anti-hangup bracket. At one point the sharp edge of the bracket makes contact with the rubber ring on the pick up. Well...My fear was realized. Back to the drawing board.


I will have to create another setup.

Monday, May 9, 2016

Setting the countersink depth for the tank filler flange - 1 hour

One small job to do is to countersink the tank filler flange. Not much to it other than to start the tedious process of setting the countersink cage depth. I had dimpled a piece of scrap with the tank dimple dies and then I would compare them with the countersink depth. I took some time, but I am finally at a point where I am happy with the depth.

Sunday, May 8, 2016

Final fitting fuel sender and completed Left tank fabrication - 5 hours

I had planned to set the fuel float sender 4" outboard of the 2nd rib, however it looked just a bit too far out. When referencing the plans Van's locates it quite close to rib #2. I made the choice to play the center of the hole 3.25" outboard of rib #2 center line.

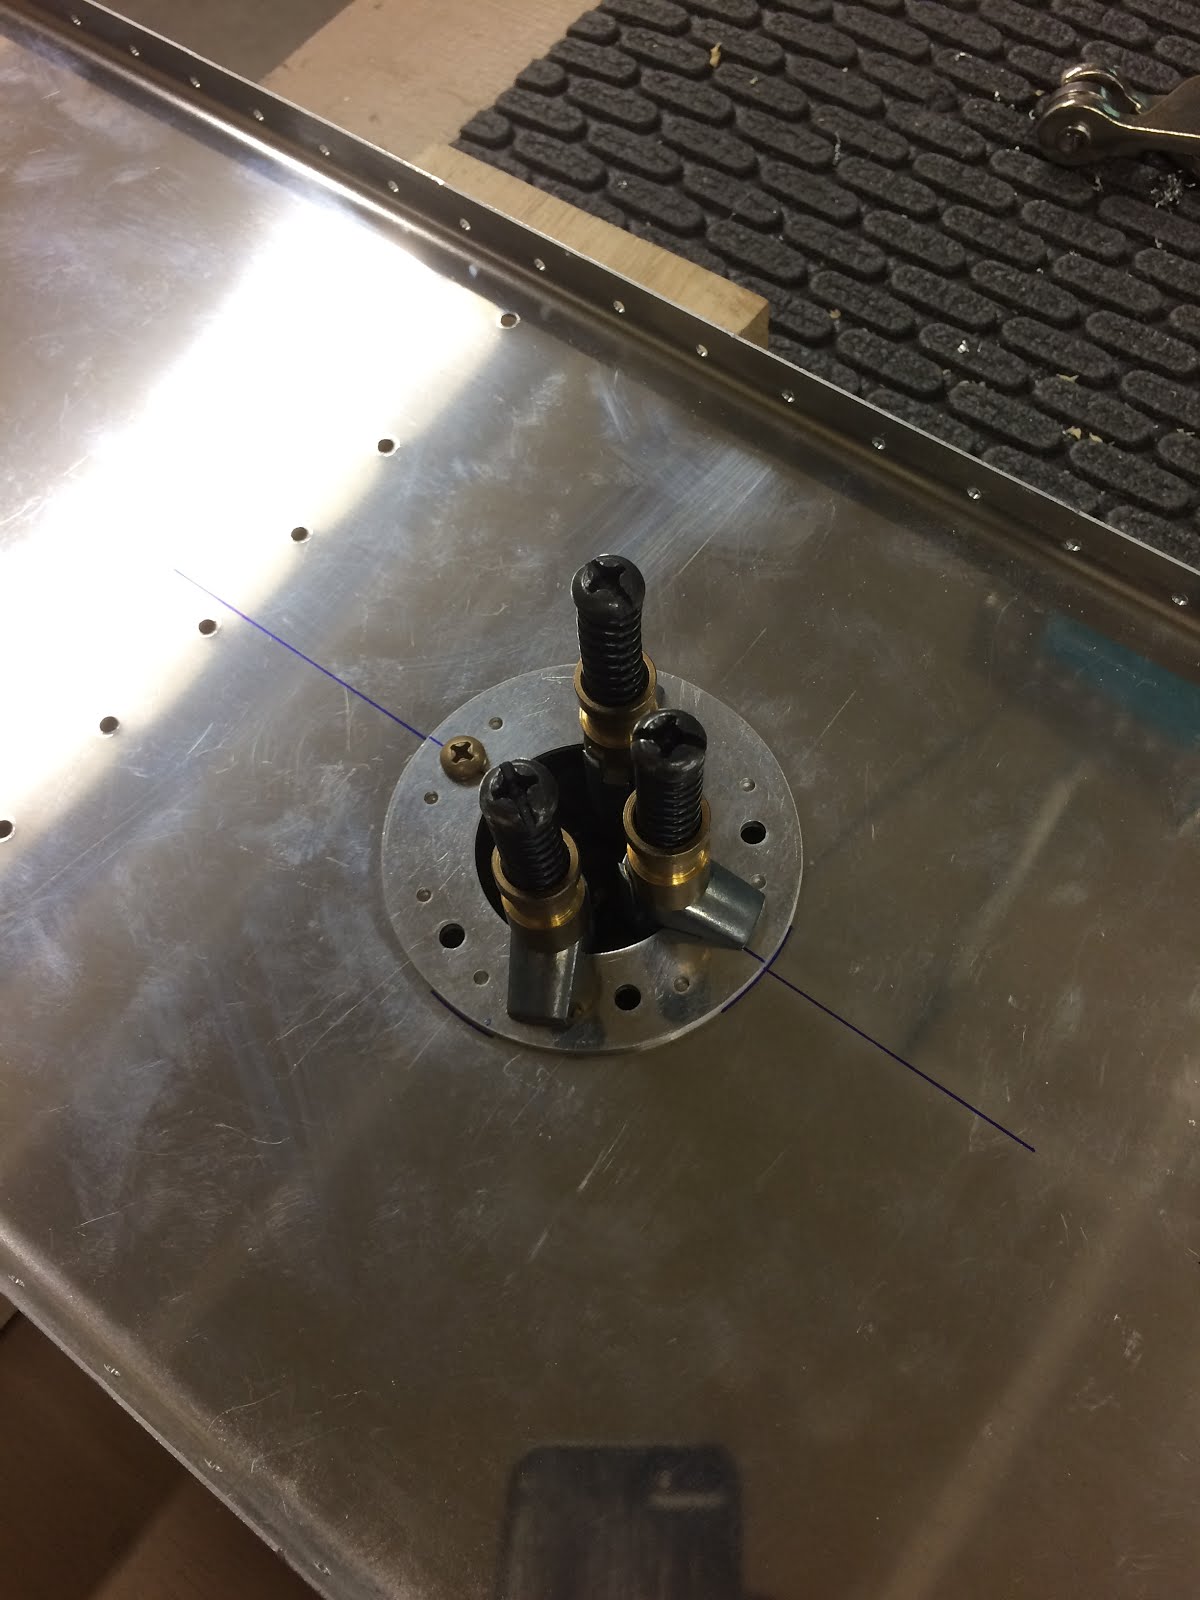
Now cutting the 1.5" diameter hole caused a bit of head scratching. I had asked my buddy Mike what he thought and he suggested a hole saw but cut in reverse rotation (forward rotation would chew up the aluminum). I didn't think this was too bad an idea. I had decided to cut a piece of oak with the 1.5" hole saw to help as a guide...that worked really well.


I was left with a nice clean hole. I used the small diameter 3m wheel and then a dremmel with scrotchbrite to smooth the edge. I then fitted the stiffener ring that I had fabricated and centered it on the hole. I checked twice to ensure correct orientation as there is only one way that the senders will fit. One I was happy with how it all lined up I drilled all of the holes for the nutplates.


I cleco'd the sender to the rear baffle and then set it on the tankoffset by one bay so the sender was sitting in the first bay. This way I can check max and min travel.

Just like before in the mock up. The travel to the top of the tank is excellent. A little more than 1.8" clearance. But on the low (or empty tank travel) the float holder wire contacts the tank stiffner.


Noticing that the contact is made at almost the end of the empty tank travel, I decided to cut a portion of the float wire with side cutters and smooth it out on the 3M wheel.

Now I have full travel with good clearance from the stiffener. The right tank is now ready to proseal. Time to finish the left tank. With exactly the same procedure as the right tank, I finished fabriction of the left tank.


I started to counter sink the fuel flanges for the tank die dimple. once I was happy with my depth I had stopped for the night. Then I received a text from Darin building the RV-14. Did I see the latest Service Bulletin for the wing? My heart stopped. I ran over to the laptop and looked it up. Soon a realized that I was in the clear. I had not reached that part yet on the rear spar and can easily incorporate the newly recommended stiffener for the aileron hinge.    

Next stop proseal!!!

Saturday, May 7, 2016

Fitted right tank inner anti-hangup and fuel sender - 3 hours

I fashioned up a 1/2" wide piece of 0.025" material for the inner anti hangup guide. Using a piece of paper I created a template to test. Once I had the dimensions figured out. I cut the material, bent it, and instantly had a anti-hangup bracket. Not much to write about, it went together as it looks.


Once that was done, all that was needed was to fit the fuel level senders. I bend the float rods according to the dimensions of the plans (also in conjunction with the Van's 'Float Wire Bending Diagram" for the fuel senders). Its a bit difficult to figure this part out as both my tanks are aerobatic and the diagram is for non aerobatic tanks. So I ended up settling on a dimension just a bit over 3" ~ 3 3/16"

Then, I clecoed the side of the sender on the internal rib to find the center point. I checked full travel up and full travel down.


Im slightly more than 1/8" clear top and bottom, but I feel happy with the fitment I have,
I then transferred the center lines to the rear baffle.

Friday, May 6, 2016

Fitting the right tank fuel vent line - 2 hours

One of the things that I should have done before I disassembled the tanks was to fit up the fuel vent line. I was not keen on doing this part as in my mind it was going to be difficult. It actually went fairly well. I had re-cleco'd the tank back up.....again. Next I used my table to roll out the 1/4" soft aluminum tubing. It rolls out fairly well, not straight as it tends to arc a bit. But if you gently work at it, it straightens out. Once it was rolled out. I cut it to rough size and gently polished one end on the deburring wheel. A delicate deburr of the inside and I was ready to flair.

I used the parker roto-flair tool from cleveland tools. Again. thinking it was more tricky than I thought it would be. I flaired the tube. It fit in the hardware very nicely.


Now....The most important part. I made sure the blue collar was on the tube BEFORE I bent the tubing. Bending the tube was guess and test. I picked a couple of random points looking off of other build sites and began the required offset bend. First I started with double 20 deg, very shallow. So again, again again I bent. Test, Check, so on. It finally worked out to a bend just shy of 45deg was the magic number.


I had the tube so it lined up nearly perfectly without connecting it to the fitting.
Next I had marked the opposite end to be cut just short of the end rib.

Now...I was curious how my vent clip would work. I cleco'd it on and the vent clip is just forward of the vent line. But....once the clip is riveted, i can push it back and it will line up perfectly with the vent line.


I'm pleased with how it turned out.

Tuesday, May 3, 2016

Finished the Right Leading Edge - 3 hours

Well short night in the garage tonight. I completed the riveting on the right leading edge. (well almost...Need help to finish the last row of rivets).

Now that I'm done with that I fell like its time to get those fuel tanks taken care of. I have to finish the inner anti-hangup bracket, the fuel vent line, and the fuel senders. Then its ready to start the proseal.
First order of business. Cleco the right tank back up.