Sunday, July 2, 2023

Installed F-6118 rudder pedal brace - 1 hour

 Short day in the garage today. I installed the F-6118 rudder pedal brace.


 As well I also installed the rivet for the top flange of the F-902 bulkheads (These are AN470AD3 to preserve the proper edge distance as the AD4 will blow all edge distances in this super tight area)


Saturday, July 1, 2023

Small fixups and installing the brake pedal assembly - 5 hours

 Before I can start prepping the front canopy deck for assembly. I need to put a bit of work into the cabin area and brakes. I did not finish this area off originally as all of the drilling of the front deck results in a bunch of metal filings I didn't want all over the fuel system and brake system. 


 I removed the center cover to expose the forward brake lines. During the original installation, I didnt get one of the plastic retainers installed as I was short 1 half. So, I took care of it. 


 Now...The issue I was having with my brake pedestal install last year is that I had an amount of play in the WD-655L/R brake weldments that would (in work case scenerio) allow the two master brake cylinders to rub against each other. To combat this, I need to install a small washer in the F-6116 bearing blocks to limit the amount of potential movement I can get between the two weldments. 

Last year I had cut a few 1 1/4" dia x 1/4" thick discs out of HDPE plastic. I just need to trim them down to proper size. Using the 3D printer once again, I made a template/guide so I can trim the white HDPE to a tight press fit in the bearing block. One 1/4" spacer is installed in opposite ends for each F-6116 weldment.


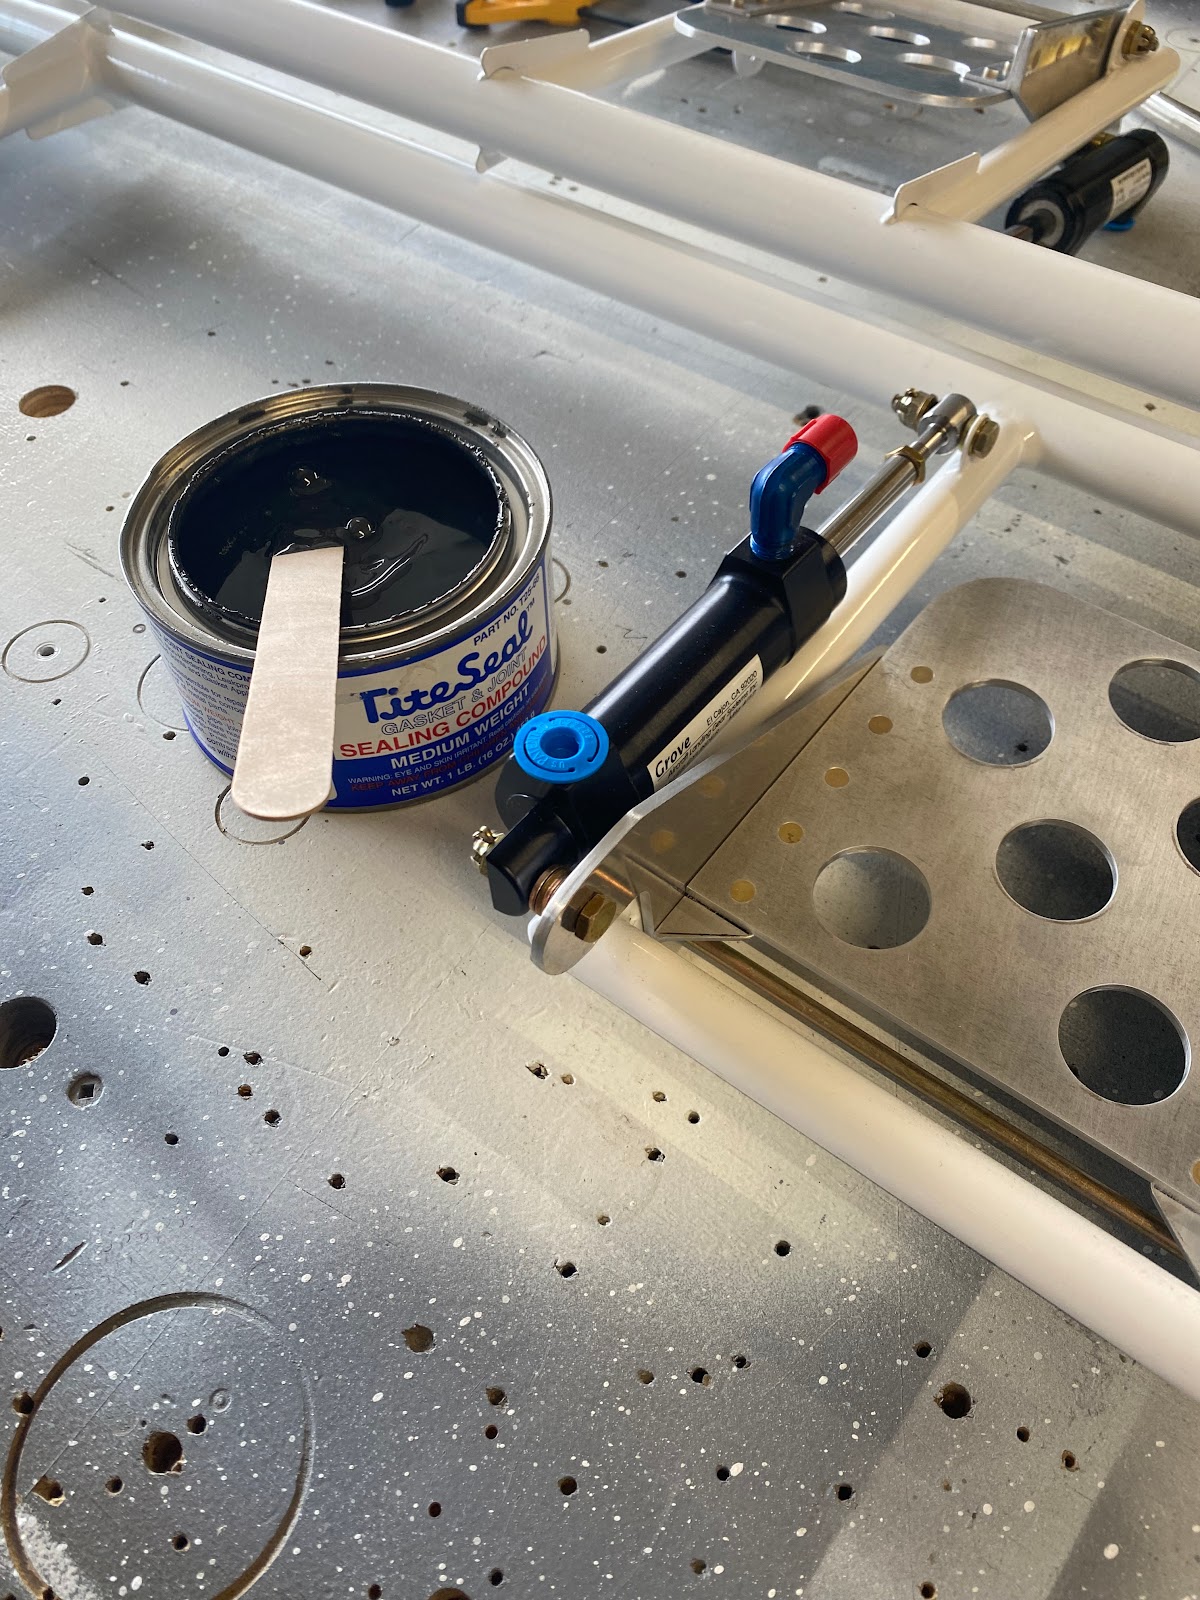
Next, I need to install eight AN fittings in the master cylinders. As per the Van's Instructions, I am using a small amount of tite-seal on the NPT threads to help seal them. 

Before the brake assembly is installed. I need to finish final installation of the park brake and the park brake lines.
 

Now I am ready to permanently install the brake pedal assembly. And I can also confirm the 1/4" spacers work perfectly as it prevents any lateral movement in the assembly causing the master cylinders to touch together.  


Sunday, June 25, 2023

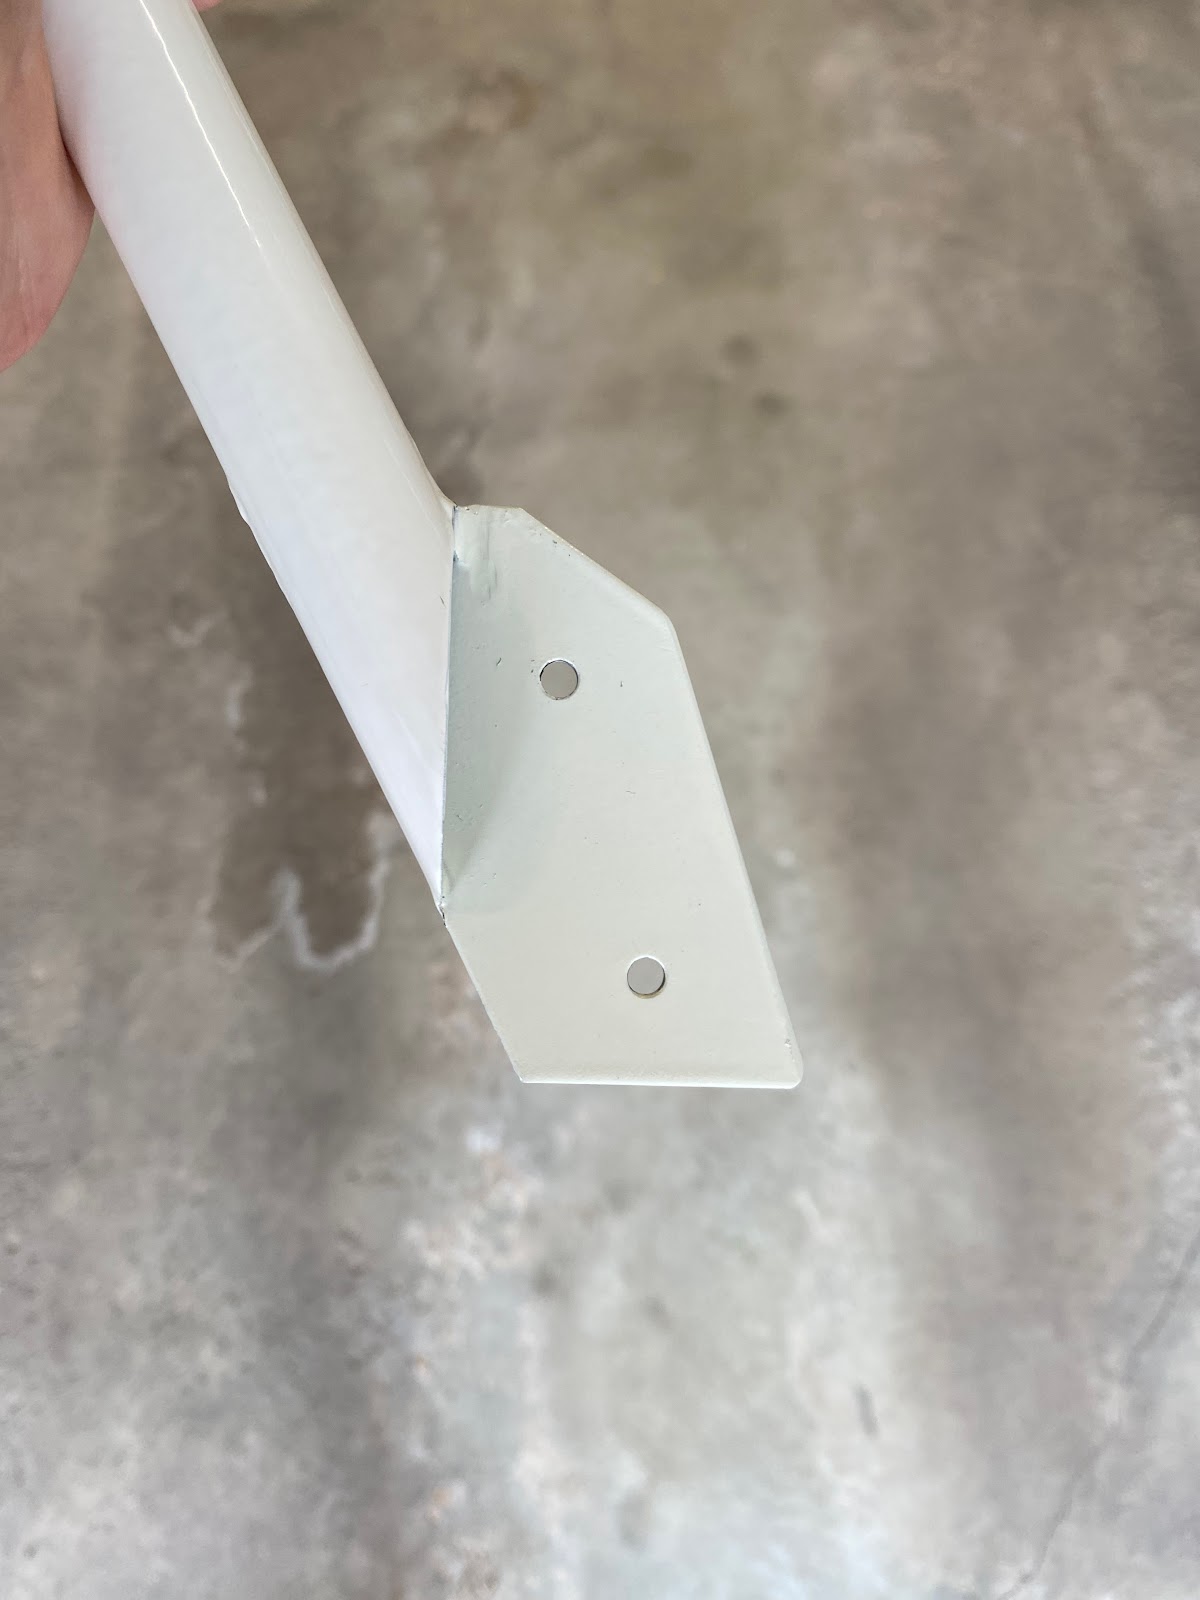
Final fitting the WD-643-SS canopy brace - 2 hours

 With the canopy brace fitted into position, I was ready to drill the holes for the AN3 bolts. I first drilled the holes to #19, and then reamed them to 3/16" 

After the holes were drilled. I began marking the lower portion of the tab so I can remove the excess material. The blue line represents approximately 3/8" edge distance while the adjacent (first) red line is the edge of the 3/4" angle, the red line on the far right is just an extra amount of material for good measure. That is my trim line. 


Saturday, June 24, 2023

Fitting the WD-643-SS canopy brace - 2.5 hours

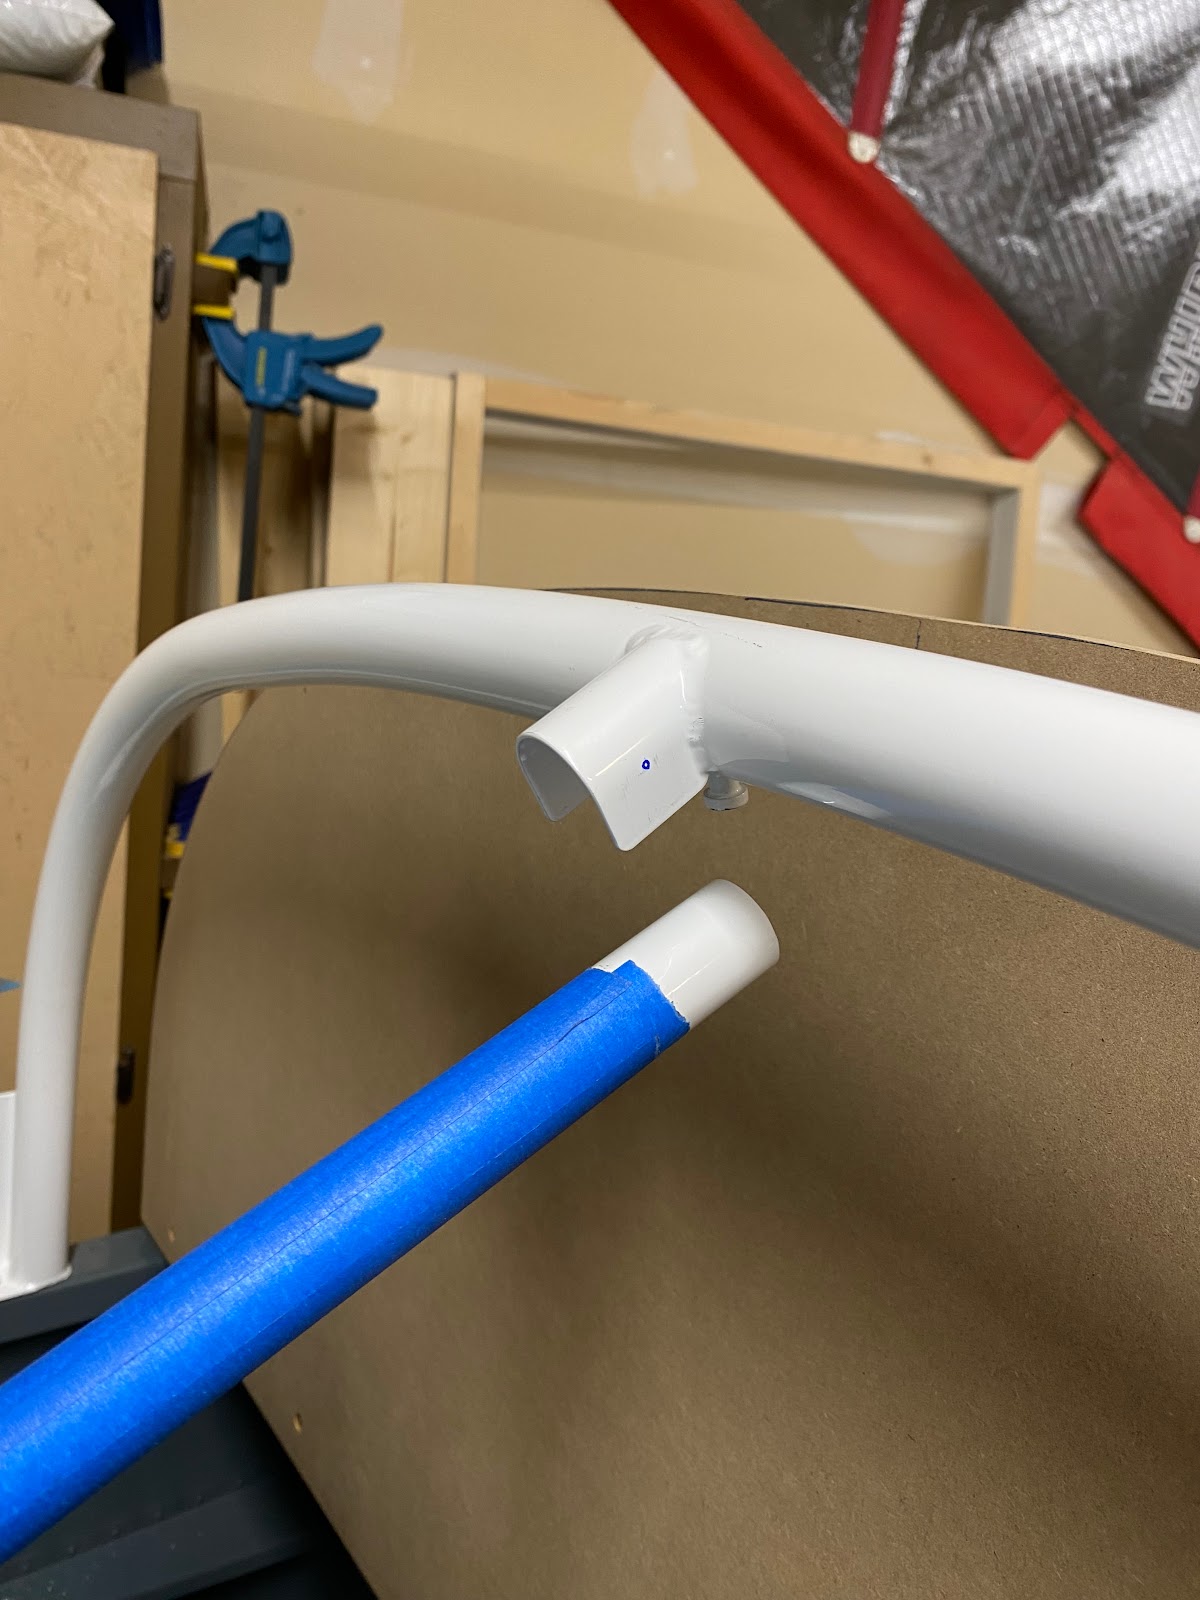
 Drilling the top most bolt of the canopy brace is going to be fun. How to drill a hole through the center point of a round tube on a receiver in the roll bar that is only half round. Honestly I don't know how I would have done this without a 3D printer.

 I designed a cap that installs over the roll bar receiver and with #40 pilot holes for the mounting bolt. Working in CAD I can align the proposed mounting holes perfectly in a round tube and then just have to project those out to suite the half round receiver. 


I checked the positioning of the pen marks and confirmed everything was square. Now...How to drill the hole. There is no doubt that if I drill these by hand the hole will be terrible, but there is no way I can drill them in a drill press. So the 3D printer to the rescue, I can just add on a drill guide to my cap design.
The drill guide makes a prefect and perfectly aligned pilot hole. 


Using the 3D printer again, I made a small saddle that allows me to get a nice tight fit of the brace into the receiver. 


Once the brace is drilled to #40 using the pilot holes in the receiver. It is extremely quick and easy (and accurate) to up-size the hole to #30, #19, 3/16" and finally 1/4" for the AN4 bolt.


Friday, June 23, 2023

Initial fitting of the WD-643-SS canopy brace - 1.5 hours

 Now to start the process of trimming the WD-643-SS canopy brace. I began by marking out minimum edge distances as noted on the plans (3/8").


Next comes the more tricky part...Getting the canopy brace to fit, but not cutting too much.  This ends up being a very slow process of cutting a little bit with a hack saw, then checking the fit, and then cut and trial fit. After the first few cuts, I could then get the canopy brace into the receiver on the roll bar, however I could see that I need the whole brace to be moved back so I get edge distance on both the front and back of the brace. 


 After more small cuts and fit checks, I had finally cut the bar down the right amount. I did notice though, that the weld between the tube and the tab on the brace make a fillet that interferes with the top skin preventing the brace to sit somewhat flush to the front deck skin.  I used small round files to tighen up the radius of the weld as well a slightly up up the slot in the top skin to allow a better fit. As filing removed some of the powder coat, I touched it up with some primer.


Tuesday, June 20, 2023

Ensuring square on the WD-641-PC roll bar - 2 hours

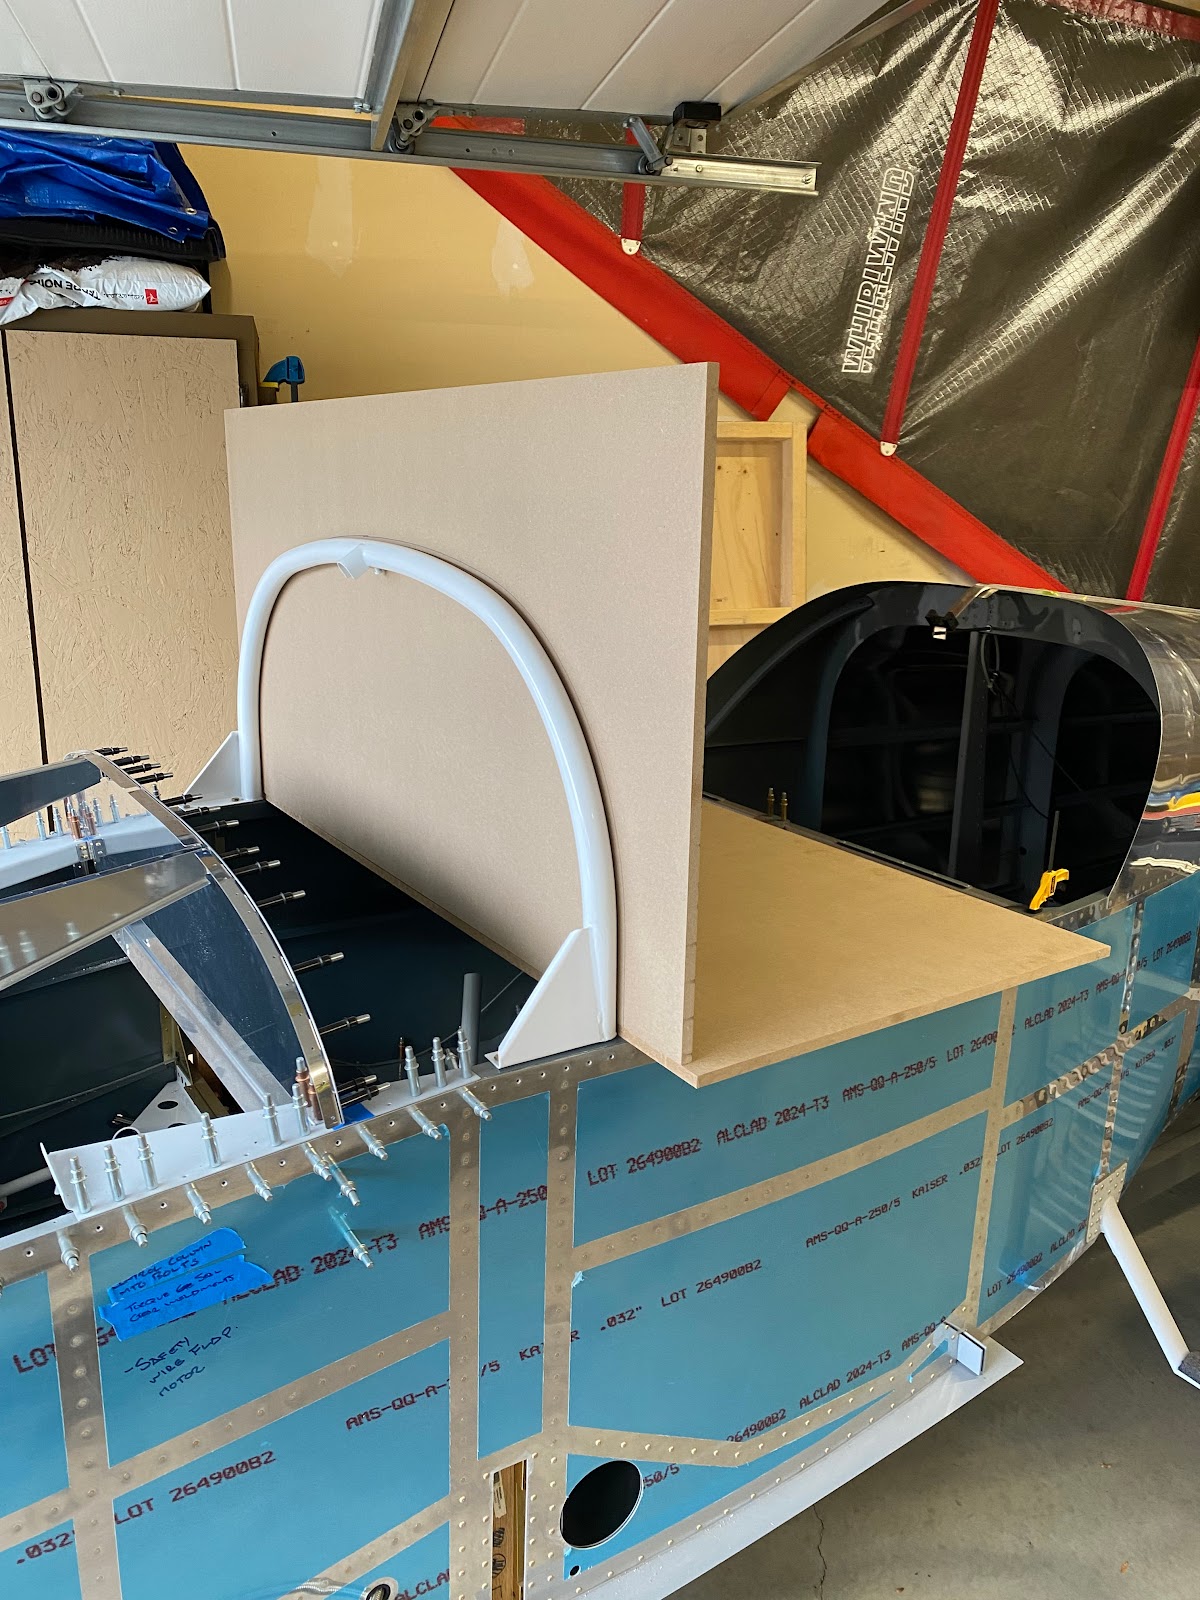
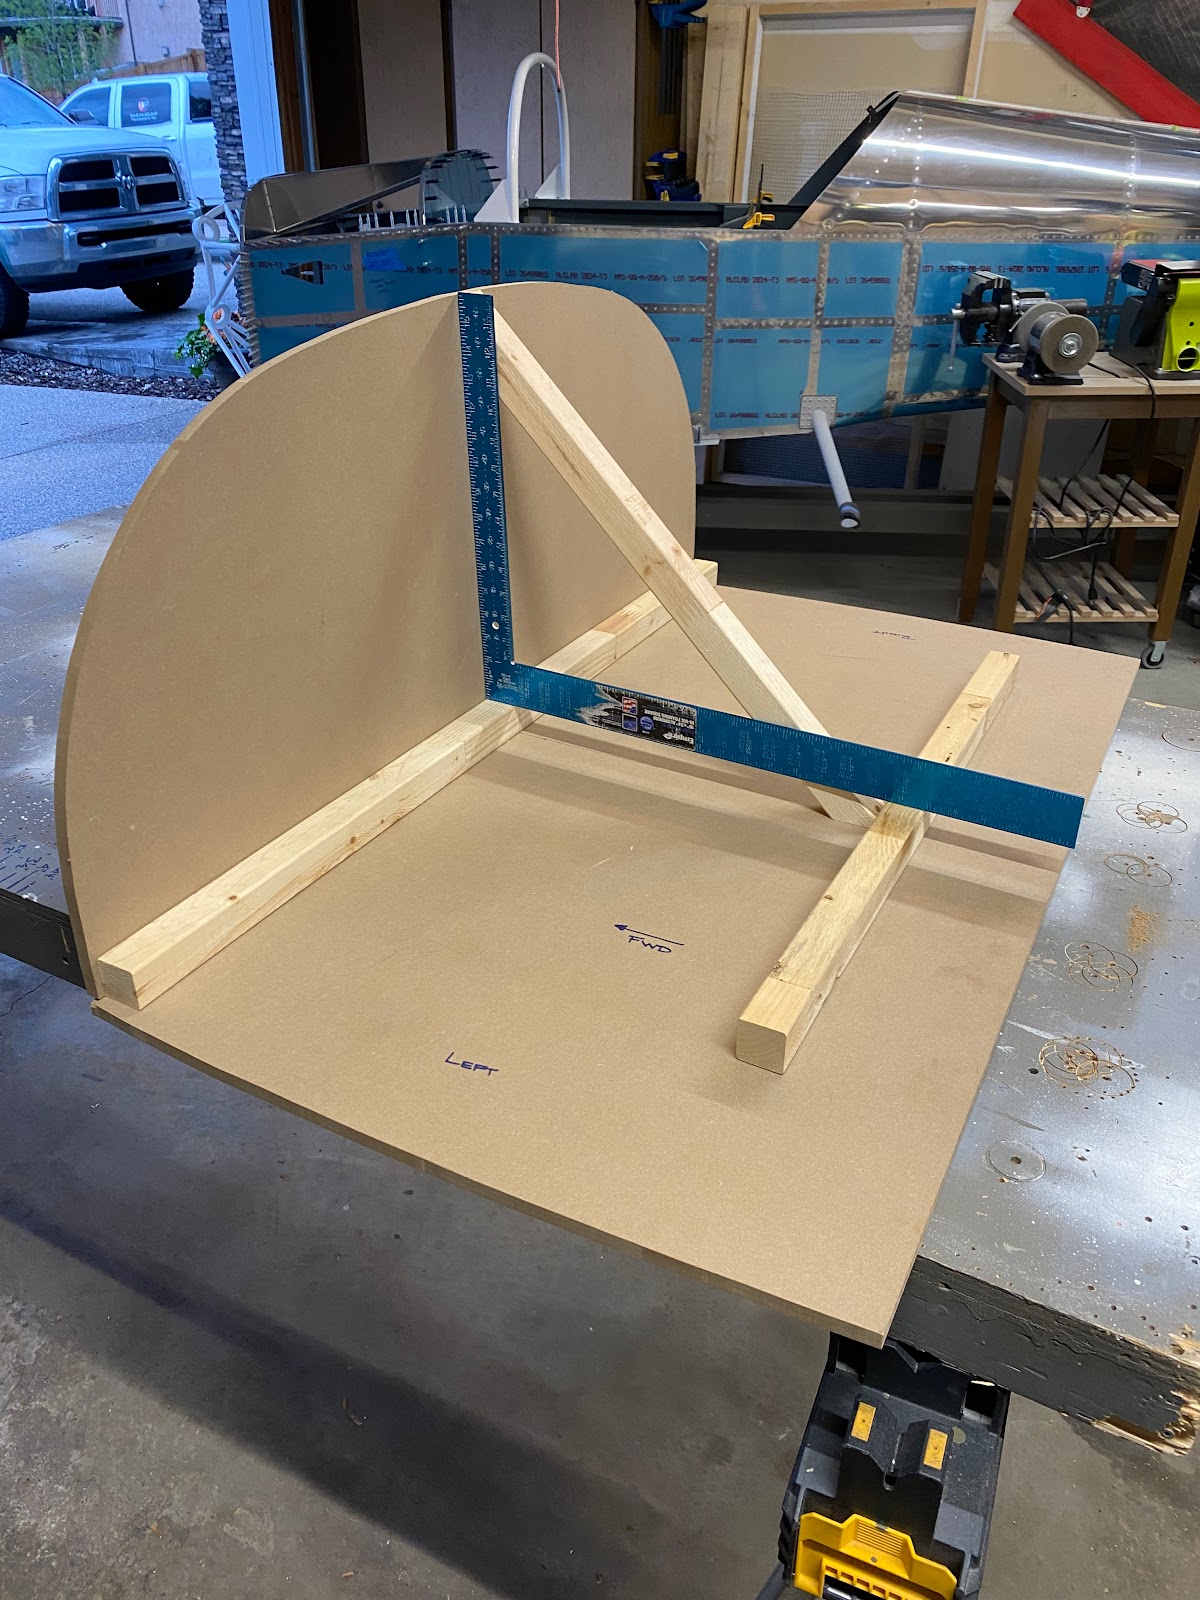
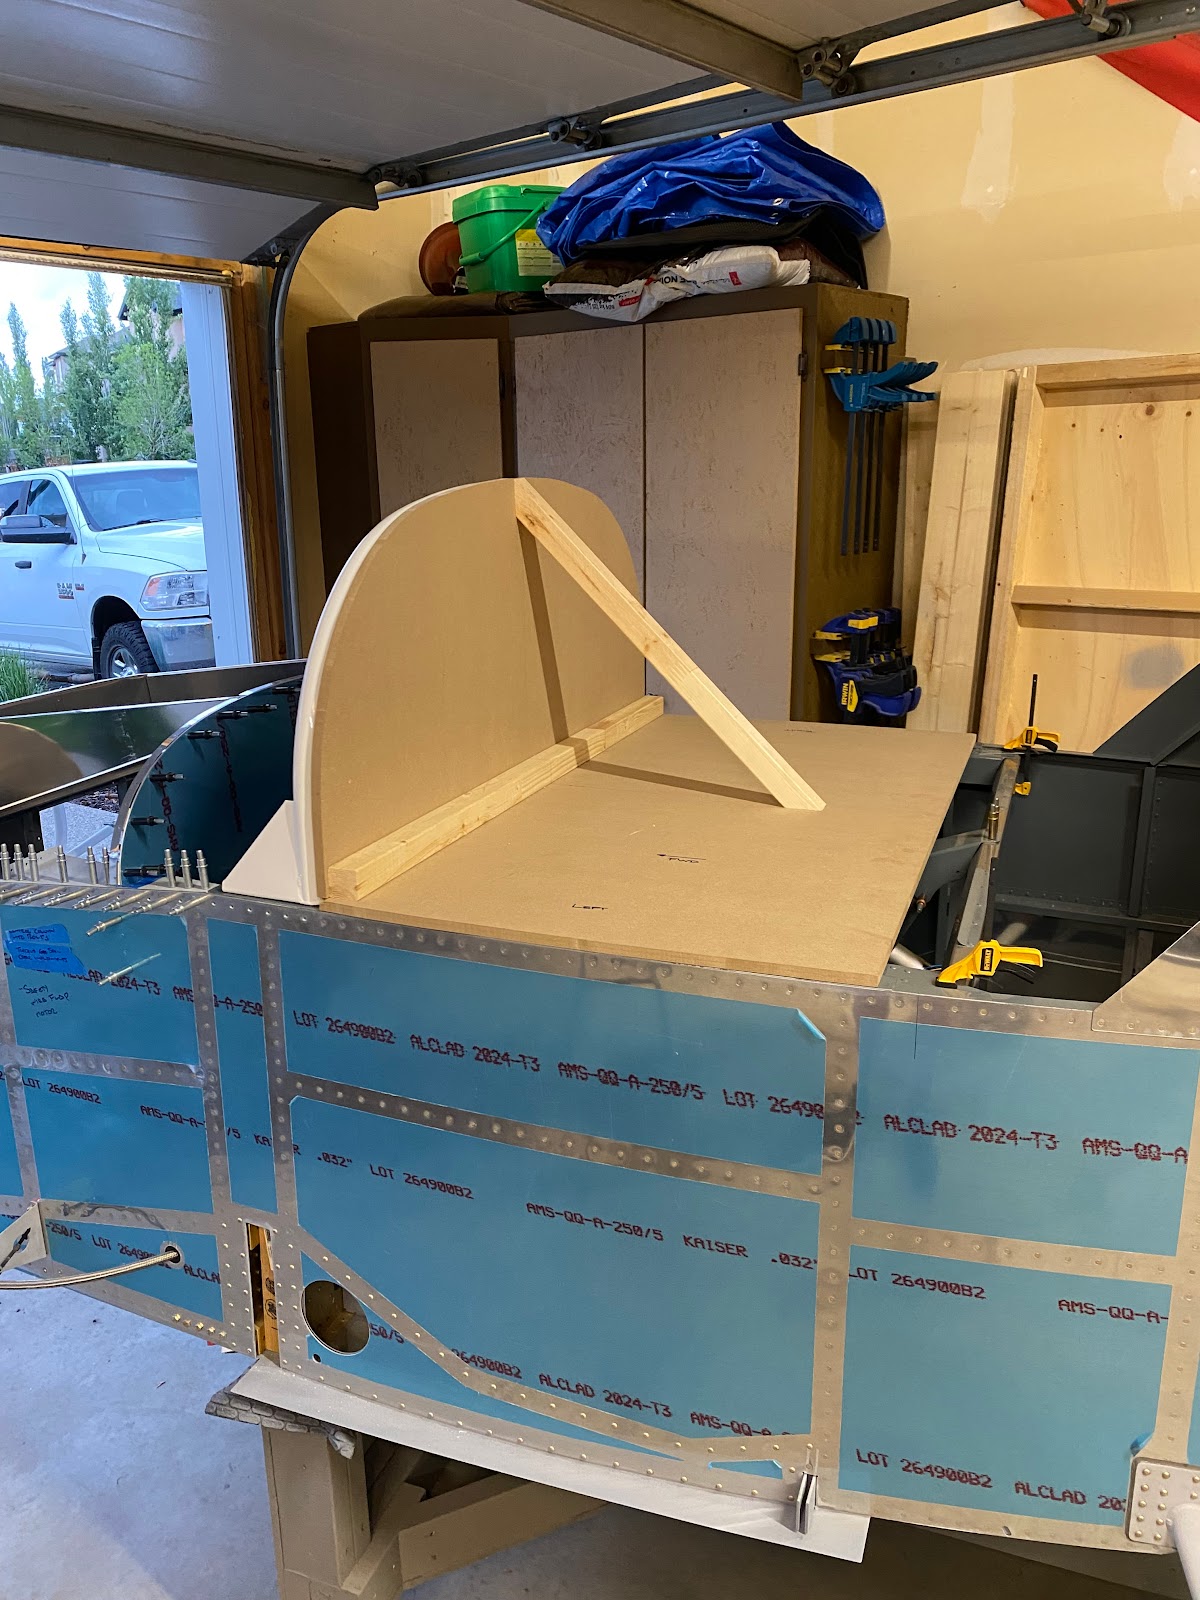
 Now that I can get the WD-641-PC roll bar bolted properly to the fuselage. I need to confirm that the roll bar sits square (or 90deg perpendicular) to the longerons. The only reliable way I can think of to get an accurate confirmation of square was to build a wood template.  Using some MDF and scrap 2x2's I made a structure that would allow me to check the entire roll bar profile for level. 


Fortunately the roll bar was quite square as is. I only was out about 3/32" at most at the very top. Just a small amount of finger pressure applied to the top of the roll bar brings it to square, so all I need to do is drill the WD-643-SS canopy brace accordingly rather than fabricate any shims.


Sunday, June 18, 2023

Bolting down the WD-641-PC roll bar - 2.5 hours

 If fitting the roll bar to the fuselage doesn't make you scratch your head, trying to bolt the roll bar (tightening the nuts) will.

On my first attempt and fitting the canopy frame I can see that I have so work to do ensuring that the roll bar is 90deg to the longerons. I have a gap between the roll bar and the frame. 


Making things more tricky is that I only have access to the AN3 bolts/nus of the roll bar. I can slip AN4 bolts into the rear mount of the roll bar, but due to the canopy deck lip accessibility to get washers and nuts on is near impossible. I need to get all bolts on and tightened if I have a hope of getting the roll bar positioned properly. I spent a few hours investigating my options, looking at special tools on the net (injector wrenches, offset sockets, etc) anything that would hold a nut in such a tight/odd space. Nothing I found would work. I see some folks on Vans Airforce forums just put a large scallop on the underside of the lip of the canopy deck allowing them to use a normal socket....This was my original plan, and went as far as drilling pilot holes in the lip. But I just couldn't bring myself to cut up so much of the lip. Between damaging the final paint and messing with the strength of the part, it was not the option I wanted. 

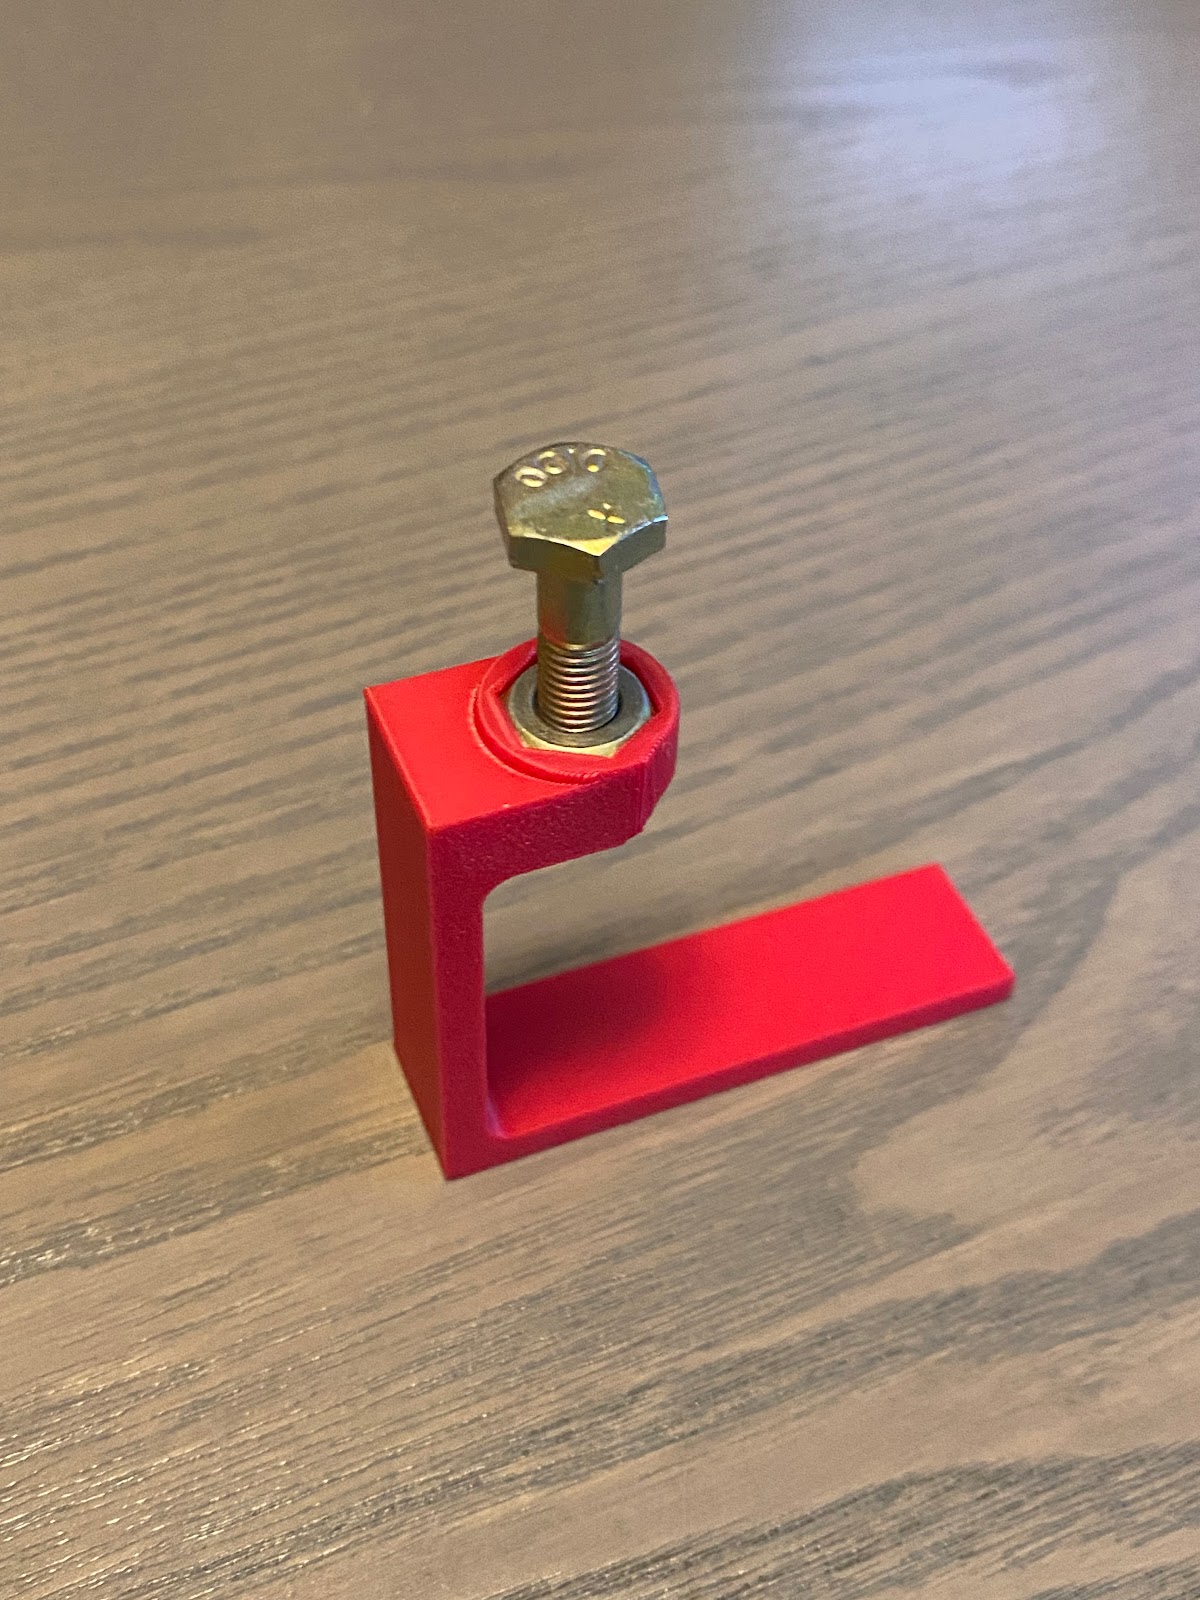
After some lunch, and a strong coffee, I had an ah-ha moment....Couldn't I just print a socket tool? I don't know why it took so long to think of this, but it could work. Assuming the plastic is strong enough? Well, I am currently using PLA+ in the printer. PLA+ is more rigid than regular PLA and its tensile strength is about double....give or take. I'll give it a shot and see.

I started to create a socket shape to accept the AN4 nut.


Next, I created a shape to test if I can get it to fit up under the canopy deck lip. 


Once I had all the rough dimensions worked out, I furthered the design to allow the tool to not only hold the nut, but the washer as well. Even when so far as filleted all the tool edges and cleaned it up!