Saturday, October 8, 2016

Continued working on the pitot mast - 8 hours

Next I needed to complete the cross brace. To do this I needed to make a specific oak bending block to fit between the ribs. I used the template I have made earlier to ensure the wing ribs where the correct distance apart.

I was sure to cut it to fit 0.025" material on each end of the blocks.

I then radius'd all the corners 1/8" and began to complete all my bends on the cross piece. Lots of triming, filing and sanding. Here is the near complete brace.


Now that I had the template I then set up to place the rivet line centered in the brace but staggered in the middle of the wing rib rivets.


I was now ready to clamp the assembly together and check fitment.

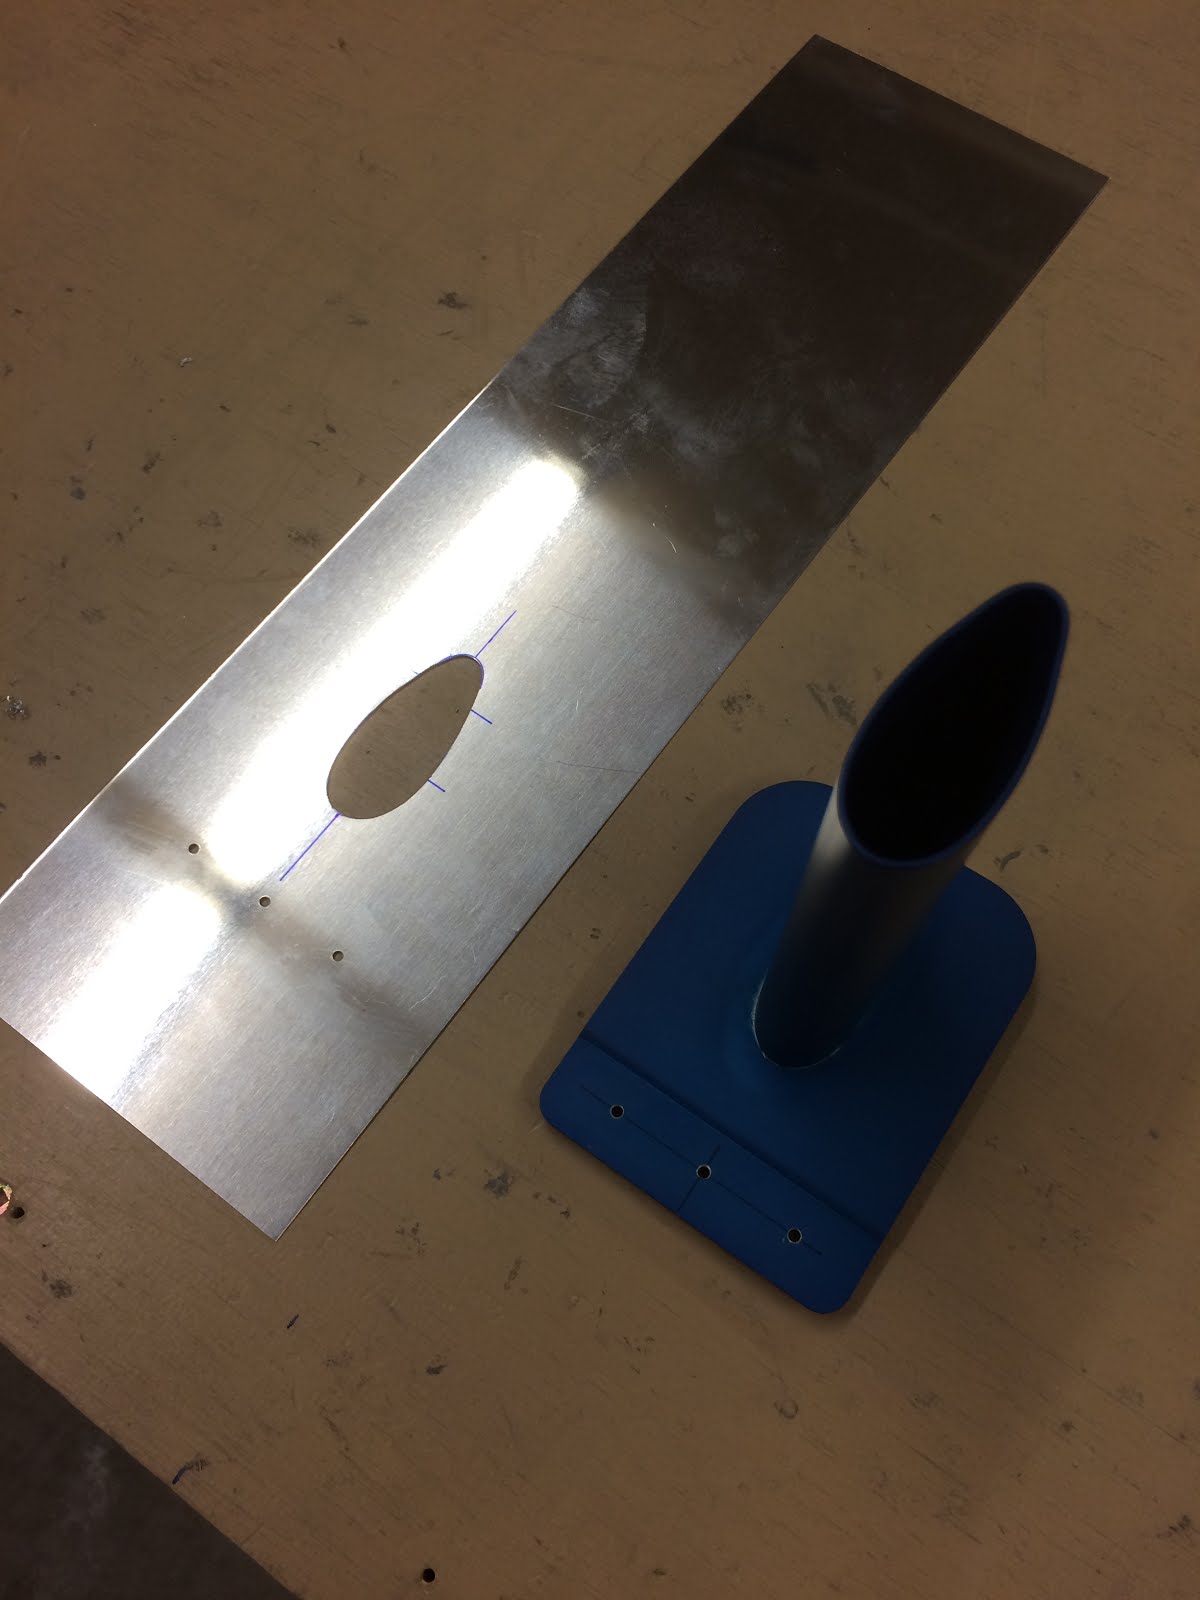
One of the items that I wanted to make is a proper aluminum template for the pitot mast to locate the hole in the skin. The paper template that comes with the mast is very poor. So I used some thin 0.016" thick aluminum and went to work. Best way I found was to cut the holes with a unibit, and then take down large chucks with a round file, then finish with the dremel sanding drums. 

Next I cleco'd the newly fabricated mast template to the wing assembly with the mast installed and everything cleco'd in place. I could then transfer the rivet holes for the cross bracket into the mast template.
Next step I removed the mast, and then celco'd the wing skin on to match drill the cross bracket holes in the wing skin.

I fitted the skin to the wing and very carefully drilled the rivet holes in the skin for the cross bracket.
Once the skin was removed, I could then cleco on the mast template directly onto the skin with precision alignment.

I marked the leading edge of the template and cut it inline with the leading edge of the skin. I cut the top of the mast template as well as it was excessive. I also drilled the two holes that attach the aft end of the mast to the skin.

Next I celco'd the assembly together to finish the rest of the match drilling and to drill in the nutplates that secure the cross bracket to the pitot mast angle bracket.


Little bit of final trimming to do to clear the welds on the mast.

All done. It was a long day but very productive and very precise. Many of the steps where a bit excessive, but at the end of the day I am really pleased with how well it turned out.


Thursday, October 6, 2016

Rethinking the pitot mast fit - 8 hours

After some time off from the plane building with so much other stuff going on. These last few days, I'm feeling like I need to jump back into it. Ive really been thinking about how to mount the pitot mast and support it. After all the test fitting that I have done, I realized that it is not going to work to line up the support bracket with the rivets in the wing rib. It's either too close of too far away. I will have to abandon my original method (sorta) and head in a direction similar to what JRichichi @ Vans Airforce has posted about the method he used to mount his SafeAir1 pitot mast. The difference being that I want to rivet the support brace to the wing for the entire span.

I wanted to form the support brace (bracket). Looking at the methods shown by the "Sportplane Construction Techniques" Book by Tony Bingelis. I can easily make a form out of oak and used them as bending blocks to form the aluminum. So, I when to work making the oak blocks. Then, using 0.025" material. I began to make by first bend.


It came out really nice.

Next piece that I need to bend is another angle support bracket for the pitot mast itself. This bracket gets riveted to the pitot mast, and screwed to the support brace. The idea is that if you ever need to remove the mast for some reason. Three rivets that hold the mast at the spar get drilled out, and two screws accessible from behind get removed and the mast will be able to be removed, without much hassle. To make the pitot mast support. I chose 0.032" material. Bit thicker.

Once it was bent, I cut it to clear the welds on the back side of the mast.


I then fit the assembly to the wing.


Tuesday, September 20, 2016

Match drilled and deburred Ailerons - 4 hours

Pickup where I left off yesterday, I match drilled all the stiffeners to the aileron skins. But the part that I am dreading is the deburring of the skins and stiffeners. A very slow and painful process....I plugged away. Again, Netflix to the rescue to help pass the time. After some time it was all done, and then before dimpling I scuffed everything up with scotchbrite.

I then started dimpling the stiffeners

One little slip up with the pneumatic squeezer resulted in a bad dimple....I will need to replace one stiffener. Doh!!!

Monday, September 19, 2016

Preping the Aileron skins - 3 hours

I'm battling with motivation to build as work is so busy and I have a lot of yard work to do. I managed to get myself working on the Ailerons. First I need to devinyl the aileron skins. Mindless work, but it past quickly thanks to Netflix.

Then I was able to mark and cleco the stiffeners to the skins.


Monday, September 12, 2016

Initial fitting the pitot mast - 3.5 hours

I was finally ready to begin fitting the pitot mast. I had already settled on a SafeAir 1 mast some time ago and had purchased one. over the last few months I was deciding on where to put it. Considering I need a heater pitot, I need to make sure there is room for the heat controller. I finally settled on a position between two ribs outboard of the aileron bellcrank. The tricky part will be to build a support stiffener to help secure the mast between the two ribs as the wing skin is pretty thin at that area.
I began playing with the fit on the spar.


Looks like I will have to watch the clearance with the spar rivets.


Now at this point I could see how things were going to work out. More in terms of the rivet lines. One thing that I wanted to do was have the horizontal rivet line, in line with the rib/skin rivets. 
Another item of concern was making sure that the ribs were going to be in the right place to make the stiffener. My solution was to make a template based on the skin. I took a piece of scrap and similar to the method used in the spar doubler, I match drilled the rivet holes from the skin.


Now that I had the correct placement of the rib holes, I now could ensure that my rivet line going across would line up with the rib rivets.


Here it is fit into place.


 I was sure to check, check and re-check that the mast center line was correct and perpendicular with the spar.

 
 No, I needed to place the mast, so I needed to cut a template to trace onto the scrap. I didn't want to use the paper template just yet, so I used a piece of cardboard.


 It makes a perfect outline when you press the mast on it.

Now that I had the outline, I could trace it onto the scrap piece and find the correct fit/location.

It sits a little forward as the mast frame makes contact with the spar/skin rivets. I may need to either move the mast back slightly, or simply remove a little material from the mast plate to clear the spar rivet shop heads


I haven't drilled the spar holes into the pitot mast just yet, and I'm thinking on when its best to drill those holes.

Fitted Aileron and flap braces- 4 hours

Next step needed was to fit the aileron and aileron and flap braces to the wings. I figured that this would be a very quick step, but after initial fitting it was clear that I had to file down some edges as the pieces wouldn't fit.

Here the aileron brace interferes with the left wing aileron bracket.

 I took out the file and went to work.

The right side is very close too, so I filed it down.


The left wing flap brace needs a little bit of tailoring to fit with the spar doubler.

All good to go to start match drilling holes.