Sunday, January 3, 2016

More riveting wing ribs to wing spars - 5 hours


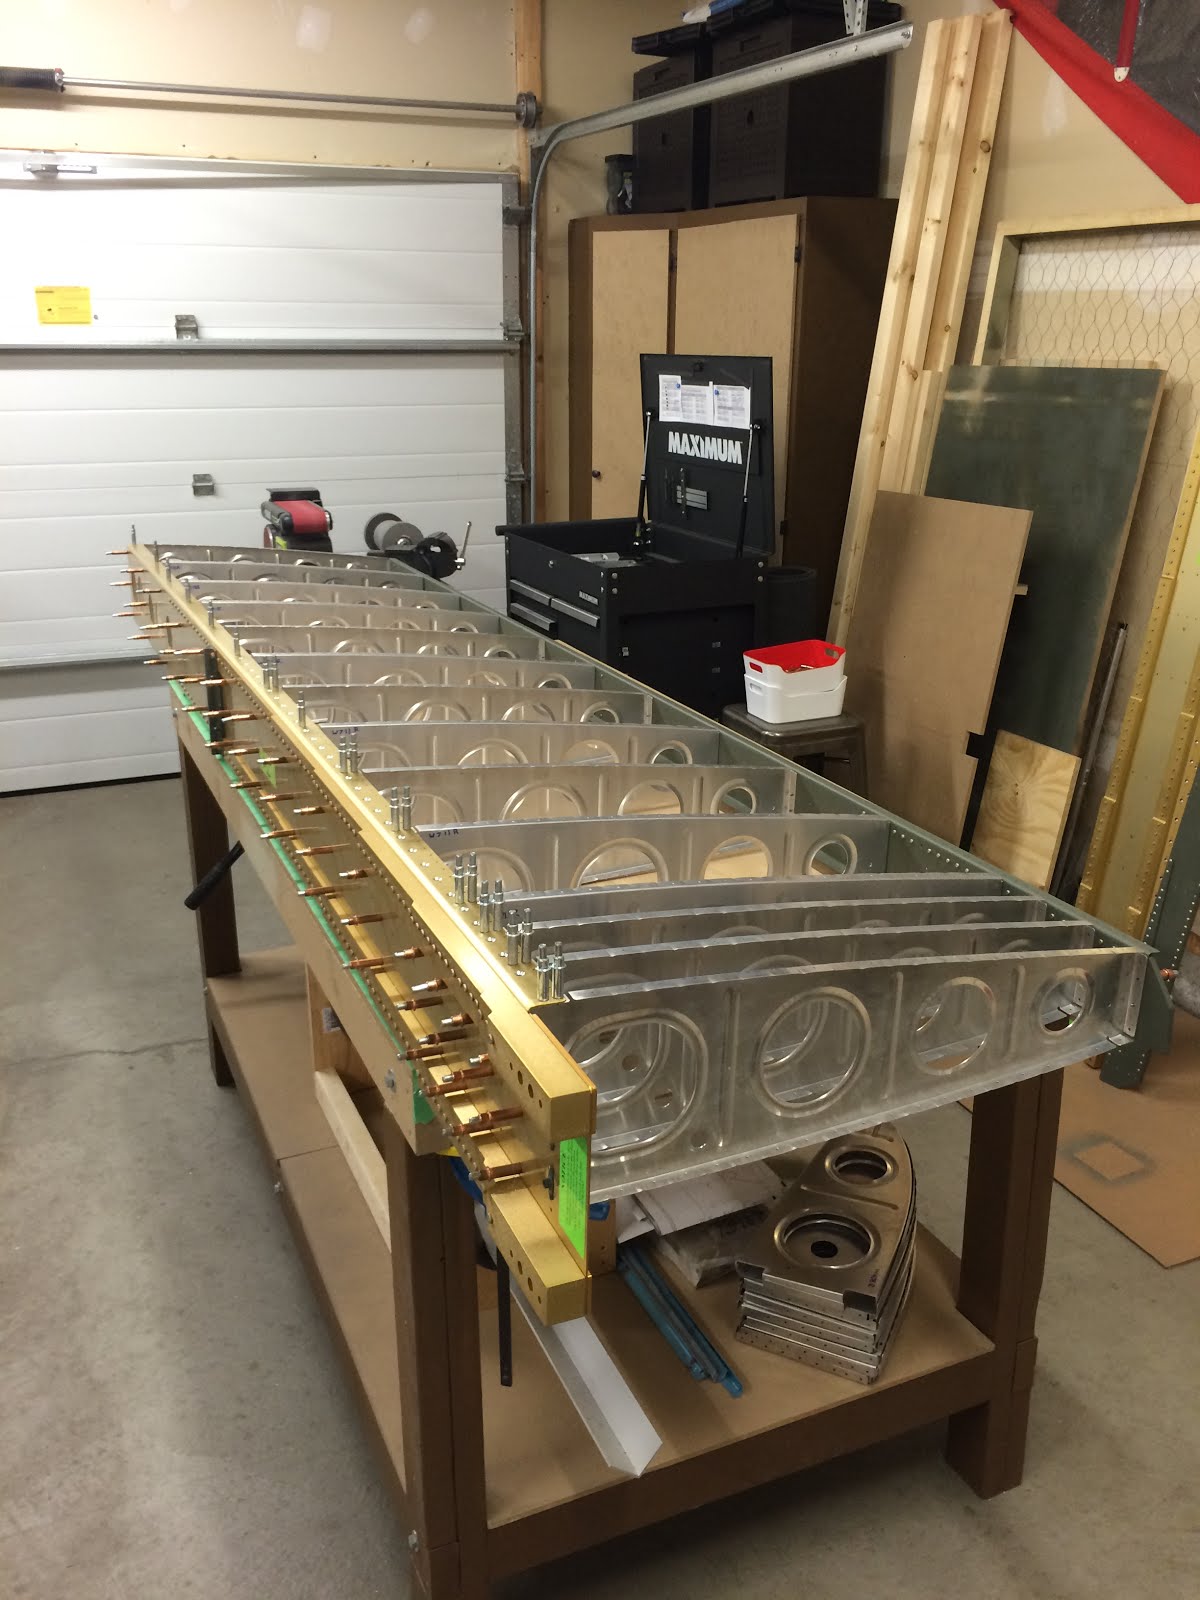
I hung up the right wing as it is on hold till I order a new W-711-L inboard rib. I decided to start the left side. I back riveted ribs #13 thru #10. Back riveting the ribs #9 thru #1 becomes tricky as you have to be very careful not to damage the top and bottom doublers. It was an incredible pain to try to avoid this on the Right wing that I decided to try something different. I set up blocks to help ensure I don't push the assembly off the table. I then set up a block with a clamp as a bucking bar rest.

I have a second person hold the bucking bar as I shoot the rivet. The rest work extremely well for someone that has no experience bucking rivets. It's very easy to ensure the bar is perpendicular to the work. The result is extremely well set shop heads.

I have to do this kind of setup more often!!  

Seems that I have a small interference on rib #3 left wing with one of the spar rivets. I have double checked that I have the correct rib and correct orientation. Might have to do some trimming. Thought I would post it on Vans Airforce and make sure I am correct before I start cutting.


Friday, January 1, 2016

Started riveting ribs to spars - 7 hours

I was extremely eager to get the ribs riveted to the spars, yet very concerned. I really did not want to mess this one up. I was struggling to figure out how best to do this without a bucking partner. After some thinking, I decided to try to back rivet similar to the way Wirejock (Larry Larson) shows in his build log.

I set up with a sponge under the spar and the back rivet plate with the bucking bar under the rivet that is to be set. This allowed me to get the parts pressed tight together as I shot the rivet.
 

It produces very nice shop heads.

I had ordered a selection of long rivet sets a couple of weeks while ago from ATS as I really did not want to use a double offset rivet set on these (I really don't like the double offset....really tricky. For me it's a tool that I only pull out when I must). I found the 10" long rivet set is the best in this situation. I had taped the rivet set to the gun rather than use the spring as there is less potential for scrapping the ribs when I rivet.

After riveting, on close inspection. I have some spider cracks in the anodizing especially where rivets are set through the Spar web, less so where they are set through the doubler. At first glance it caught me off guard, but a quick search of the Vans Airforce forums shows that this is extremely common and is not anything to be concerned with. (It just affects the anodizing finish and not the aluminum). The forums are clear...it's ok, build on. Update, I called Vans to double check that this was not going to be an issue and they confirmed that it is alright. Build on

Just before I decided to call it a night, I slipped of the rivet on Right Wing rib #4 and put a smiley in the rib. Grrr...Every thing was running smooth. I decided to remove the rib and replace it with new. I have to put in a big order soon for more cleco's, conduit, flop tubes, etc. so I will order the replacement rib then.
 

Thursday, December 31, 2015

Completed priming wing ribs - 7 hours

Worked hard to get the priming completed for the ribs. All done just in time for company to come over later in the evening.

Wednesday, December 30, 2015

Completed drilling Ribs for wiring, started priming - 6 hours


I went back to the drawing board with the wing wiring. A bunch of time was spent last night researching on the internet to ensure my wing wiring would be ok. This morning, I headed out into the garage to open up the tool holes in the right wing ribs (1 thru 10) this will likely be spare or contain alternate auto pilot or OAT wiring.

Here is the completed layout.


I then set up and began the priming process. I set up the tubs and washed each rib in soapy water, scuffed with scotch brite. Rinsed. Dried. Wipe with degreaser. Wipe with MEK. Prime. Labor intensive but I am pleased with the results. Managed to get nearly the right wing ribs done.

Monday, December 28, 2015

Drilled ribs for wiring/plumbing and match drilled to Spars - 9 hours


Woke up this morning with a cup of coffee planted in front of the computer, still reviewing the potential wiring needs of the wings. I will need a OAT probe, but that can be located in the right wing which I already have holes in the ribs I can use. I have a bunch of reading to do on remote magnetometers. I see Dynon has just released one earlier this year.
First order of business was to make extra sure that all the ribs were sorted and marked for the correct layout.

Then I transferred the tooling holes to the W-710-R rib on the left wing side. This tooling hole will be opened up to 3/8" to allow for the AOA/Pitot lines.

Next was to mark and drill the outboard end ribs of the wings to allow for the mounting brackets to be used to mount the assembly in the wing stand. I cut a small rectangle of aluminum and drilled a 3/16" hole. This hole lines up with the existing tooling hole. Then I measured 3" over and drilled a #40 hole. This is the pilot hole for the other 3/16" mounting hole which I then drilled. Worked like a charm! The template I created will be useful for the mounting angle when I build it.

To locate the 3/4" conduit hole in the ribs, I built a jig. The jig allows a rib to be slipped in and out when clamped in a drill press. I placed a smaller piece of plywood as a cover to help as a drill guide for a #40 pilot hole. Once each rib was drilled, I opened the holes with unibits in the drill press until each hole was 3/4".  Then I opened up the tooling holes on the left wing ribs to 3/8" to allow for the pitot and AOA lines.


I then set up the main and rear spars and match drilled the ribs.

 I was sure to get one of these shots. It's tradition!

Sunday, December 27, 2015

Completed wing rib prep - 8 Hours

Another stellar day on the project, I fluted all of the wing ribs. The leading edge and tank ribs where a tad tricky, but the wing ribs themselves were pretty easy. The only ribs that I didn't flute was the W-708 ribs. I will need to locate the holes in the ribs in order to find the proper area to flute.


Once the fluting was done, I grabbed the dremel tool and finished deburring the nooks and crannies of the wing ribs. I used a 1" square cut from Maroon Scotchbrite and screwed it to the mandrel on the dremel. Worked like a charm!

After that was done, I ran over to Home Depot and picked up a few supplies to build the wing cradle.


Figuring out Wing wiring

Now to figure out the holes to make in all the wing ribs. I have been researching this for a while and I have a pretty good idea of what I need to do, but I think I'm going to post on Van's Airforce just to make sure that what I plan will work just fine.

Here's what I plan to have:

Left Wing - AerosunVX Landing Lights and Pulsar Nav Lights, Dynon Heated AOA Pitot, Wingtip NAV antenna, Vans Stall warning.

Right Wing - AerosunVX Landing Lights and Pulsar Nav Lights, Dynon Autopilot Servo.


Revision #2 updates:

Moved pitot heat, autopilot, stall warning to 3/4" Conduits. Opens up the original 7/16" holes for potential NAV/Comm antenna's (or other wiring i.e. Remote Magnetometer)