Monday, May 22, 2023

Mounting the flap position sensor - 4 hours

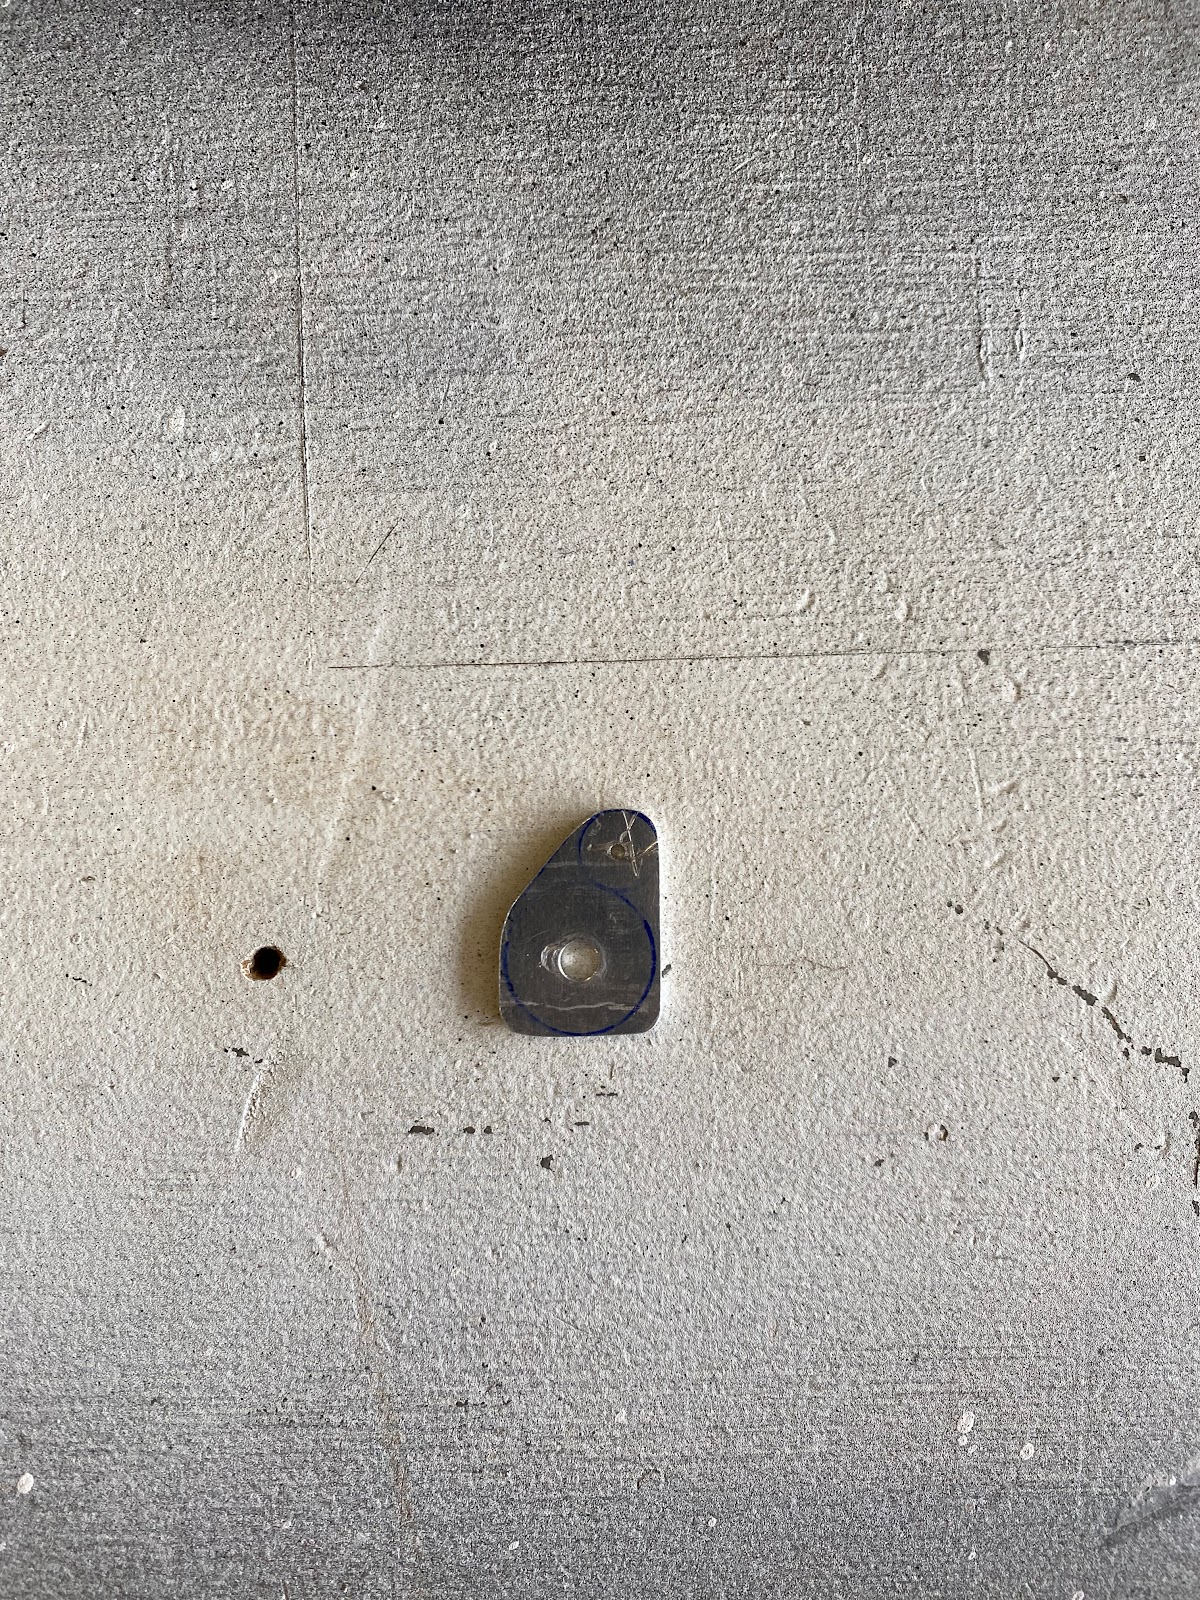
 Before I start mounting things, I need to fabricate a control horn that I can mount to the WD-613-EF flap weldment. There's no real dimensions to work from, but from my initial prototypes, getting the control horn mount point closest to the center of the pivot point of the weldment is needed. So I made site the control horn was asymmetric. 


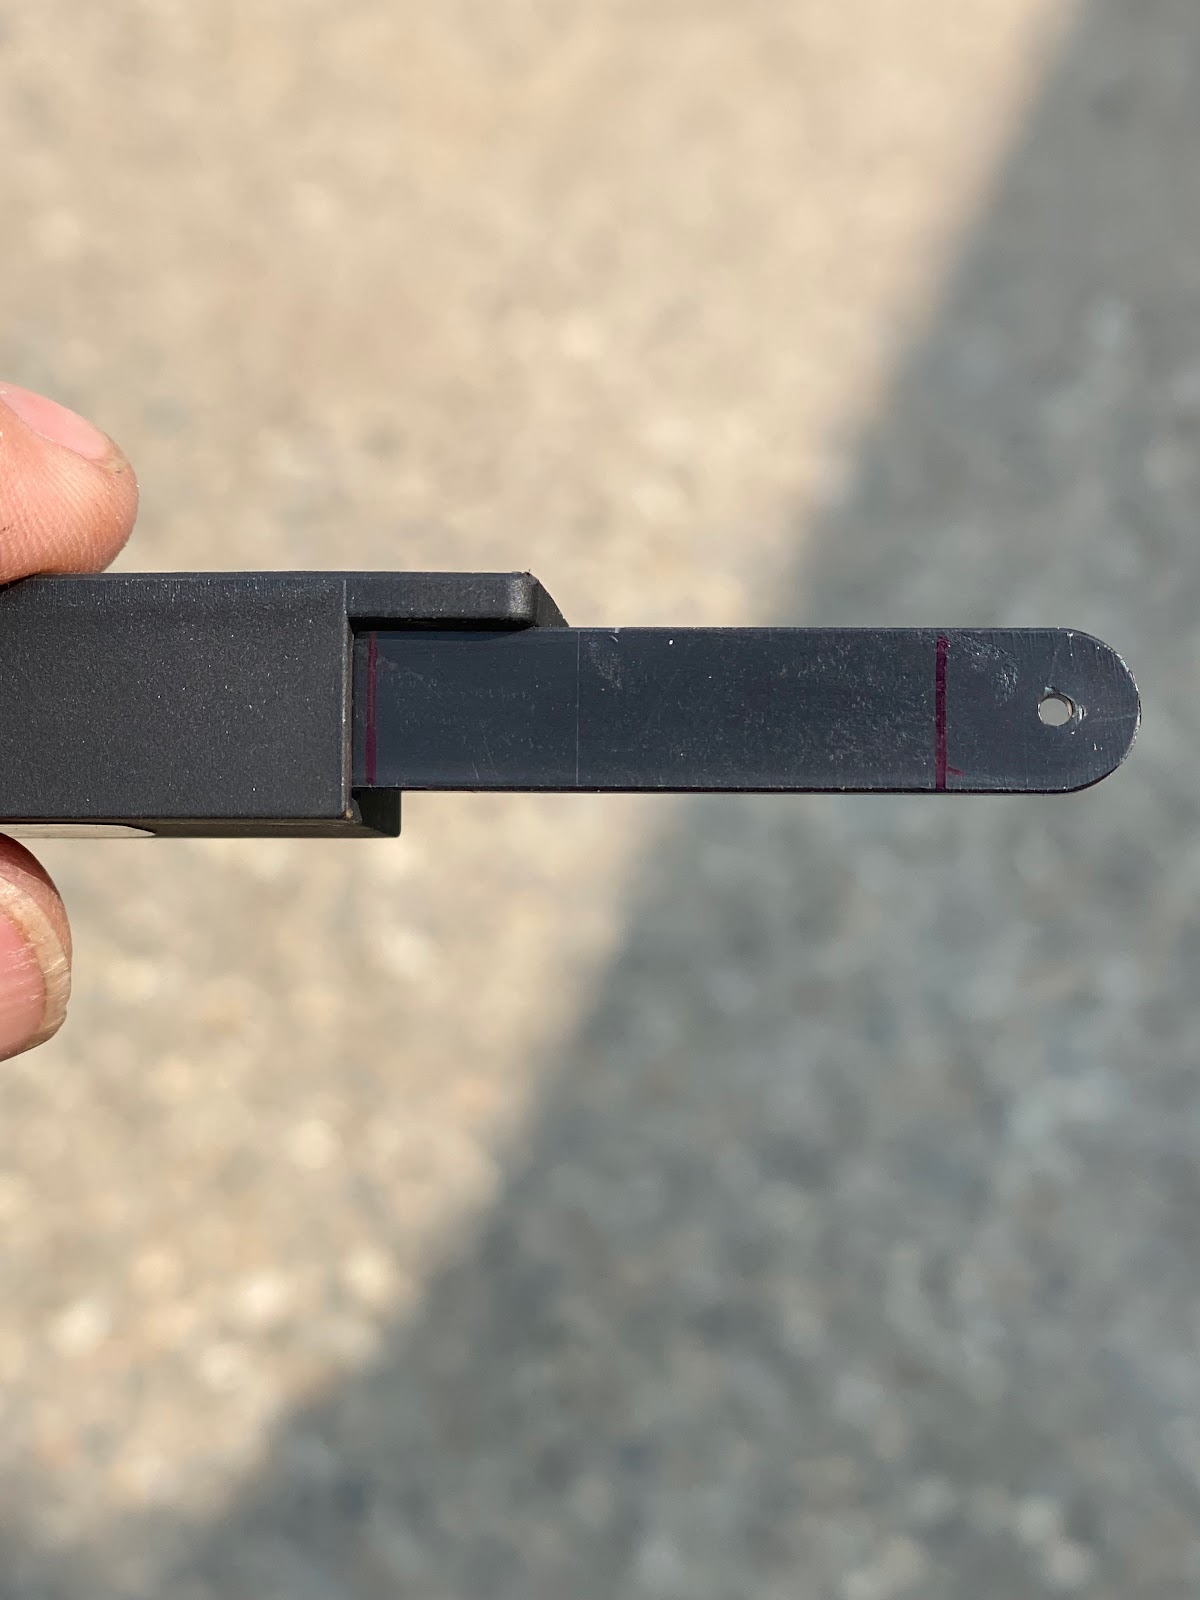
Next I marked lines on the flap position sensor to note the maximum and minimum travel limits of the sensor. 

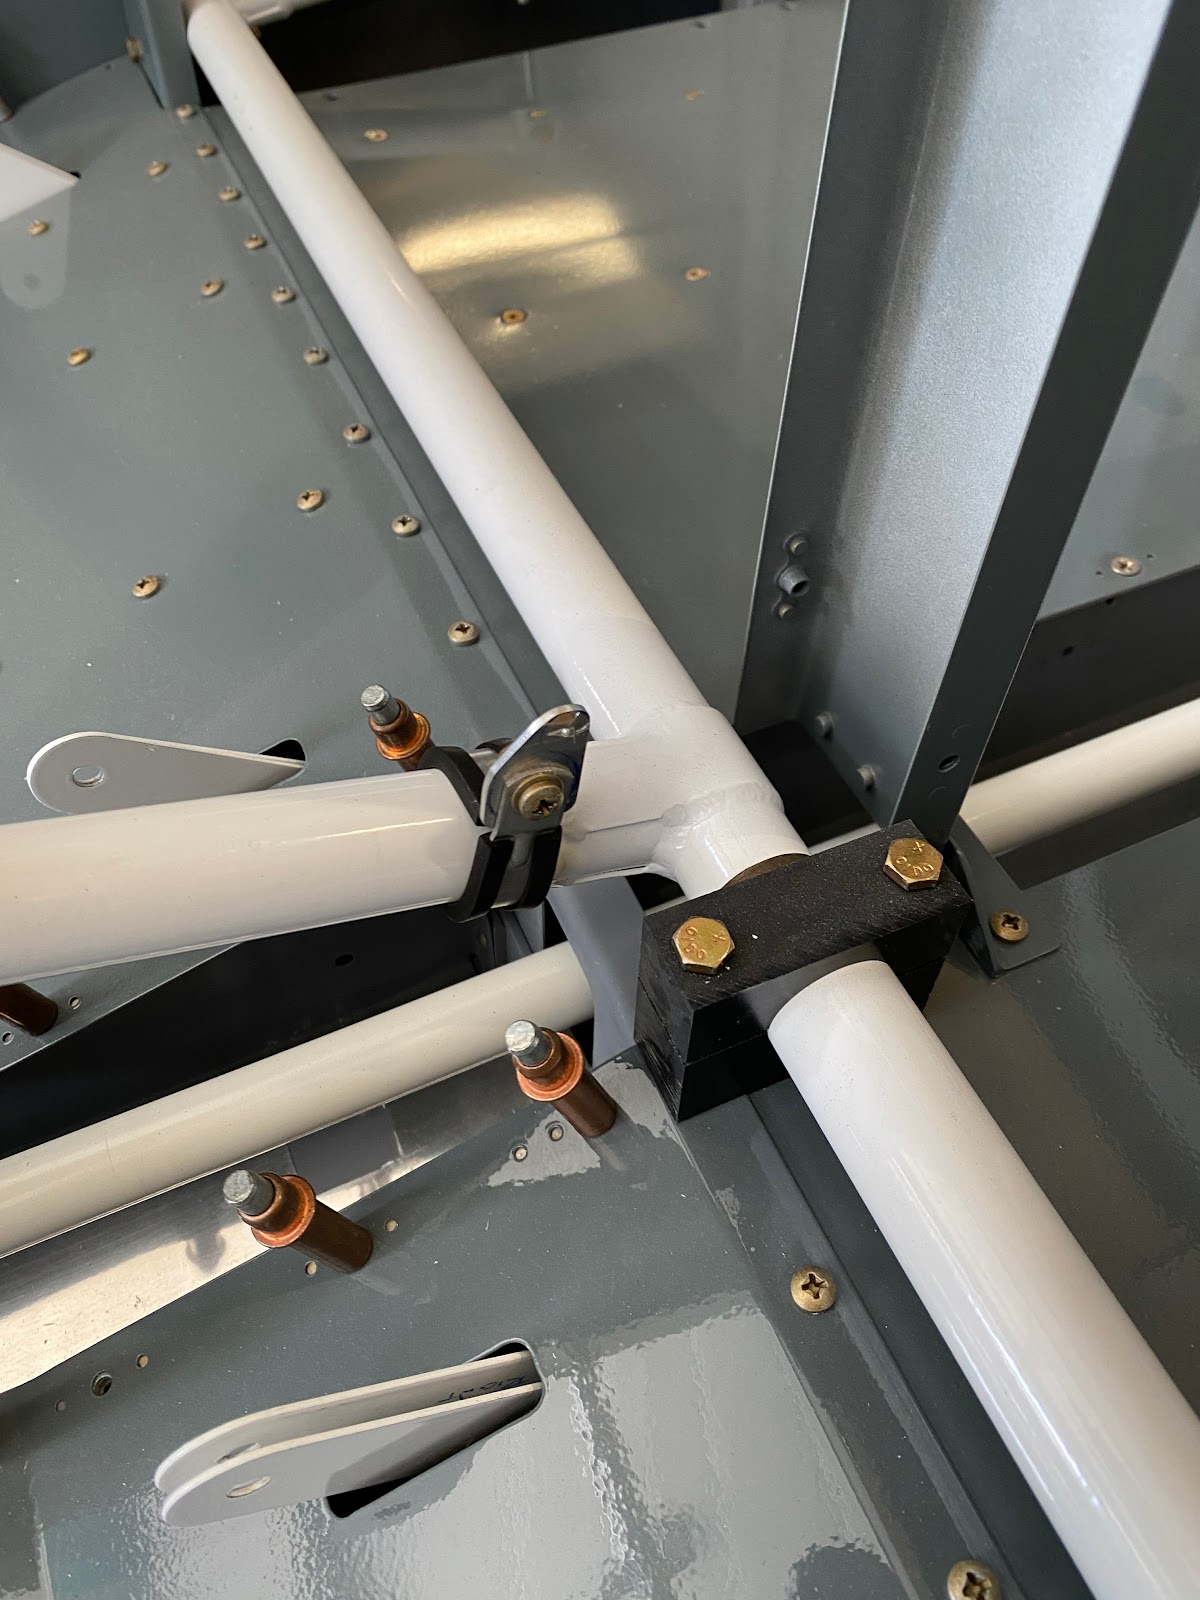
I temporary clamped the assembly to the backrest brace and then used a 12V battery to raise and lower the flaps. Eventually I was able to dial in a sensor position and rod linkage length that would allow the flaps to travel to reach both min/max limits on the sensor.   


 I completed the final fitting of the control rod linkages, marked the sensor mount positions and drilled for #6 screws and bolted the assembly to the back brace. Everything works perfect!


Wednesday, May 10, 2023

Created angled mount for flap sensor - 3 hours

 One of the things I have been messing with for the last 6 months is 3D printing. I decided to design and print my sensor mount out of PLA plastic. The advantage of 3D printing is that I can make almost any small plastic part I would ever want, the disadvantage is that the PLA plastic is that it gets soft at temperatures at or above 60degC. So I have to be careful if where I use it. For the flap position sensor, I don't believe there to be an issue. As well, once I have the mount design I can easily print it in any number of various materials including those with higher heat ratings, and carbon fiber infused filaments. Thankfully Ray Allan Company provides excellent CAD drawings for the sensor. 


 I then could spend some time and work out the best angle for the sensor basically by printing a number of different prototypes and try each. I finally settled on a mount angle of 17deg. As well, I opened up the mounting holes in the sensor to allow for a #6 screw/bolt. 


Sunday, May 7, 2023

Planning to mount the flap position sensor - 3 hours

I spent a couple of hours today planning on how I am going to mount the flap position sensor in the center console. This also included a run to the local hobby store to buy some 4-40 threaded rod and clevis ends as suggested by the Ray Allan instructions. 

 I really like some of the mounting options that folks have shown on Vans Airforce with an angled mount. In my opinion this gives a great action to the flap sensor mechanism. I decided to start designing an angled mount.


Monday, December 5, 2022

Busy Busy Busy

 It’s been quite some time since I have worked on the Plane. Our lease on the office was coming up for renewal at the end of September and given the declining state of the downtown core, as well as the declining state of our office building the writing was on the wall for our need to move to a new office.

So…I’ve been hard at work searching for new office space, and then designing all of the architectural and electrical for the new space. The designing, drafting and attending to the new construction has taken a considerable amount of time and I’ve not been able to spend any time on the plane. Add to that we need to move the office and get it all set up and running has been quite an amount of work as well. 

That said…Hard work has paid off in dividends because I think our new offices are fantastic. I will get back into the swing of things with the plane now with the Christmas break. Lots to do to finish the cockpit panel off and then I can dive into the canopy. 

Sunday, June 19, 2022

Completed the canopy slide rail - 5 hours

 Being that I messed up my original C-762 Canopy slide rail spacer. I had to pull out my original one as a replacement.

Back when I ordered my supertacks mod I had ordered the long RV8 Spacer and slide rail in an effort to make it all one piece rather than 2 sections. Well...Messing up the spacer derailed that idea somewhat. Without spending a bunch of money on shipping, I will have to make the space 2 pieces, but at least I can make the slide rail one piece. 

Well, second try here we come! I checked the angle of the spacer. 

Next I drew out centerlines on all pieces and then stater initial drilling moving from front to back.


Now comes the somewhat difficult task of getting the slide rail tightly bent around the curve in the spacer. This is where basically every small clamp I own is used. After clamping and checking, and re-clamping and re-checking. I started to drill the rivet holes. 

After an initial fit check, I was able to confirm the potential mounting screw holes and also plan the fitment of the rear most section of the spacer. 


Sunday, June 12, 2022

A flight in an RV7A

 Today was a treat! A local builder reached out and asked if I would like to come with him on a flight out east of the city. What an awesome offer! Tracy built an RV7A and just finished a couple of years ago and the chance to go look at it and fly in it was an offer I was not going to pass up.

This was well needed for me at this stage of the build, particularity with what I need to figure out with respect to how I need to be building and positioning things, especially in the cabin area and the front deck. Tracy was kind enough to allow me to really look over his build and learn as much as I can. 

We flew out of Cooking Lake, and did a round trip to Flagstaff/Killam-Sedgewick. It was a beautiful flight with perfect weather. Tracy let me take the controls, but I will have to admit I was awfully nervous as the only plane that I've really flown lately is the Cessna 172, and lets face it...things happen fast in the RV. (That and I'm not entirely familiar with his RV). But I appreciate the stick time and appreciate the opportunity. 

One item that stand out in my mind for the build is the importance of knee space under the instrument panel. I think for my height, I am going to have to rethink my headset jacks placement.


Saturday, June 11, 2022

Fitting the vent mounts behind the instrument panel - 1.5 hours

 I need to trim the bottom flange of the instrument panel to allow the vent mount to sit flush behind. A little bit of work with the files made the new vent plates to nest nicely.