Monday, March 18, 2019

Fabricated F-711D and fitted to bulkhead - 2.5 hours

Well, after getting back from holidays in Mexico the desire to build is very low. I have to make myself get into the garage today. I fabricated the F-711D angle which is fairly straight forward. I took my time and made sure it was exact. Once fabricated, I carefully clamped it to the Bulkhead.
 
 I drilled and clecoe'd. Yup everything looks good.

I set the angle so that the bottom of the flange is even with the top of the bulkhead as per the plans.


Friday, March 1, 2019

More work on the F-711C bars and the F-711 Bulkhead - 2 hours

I wrestled with the idea of cutting down the horizontal attach bars. Of course on the RV7 they are not cut down, but the plans call for it on the 7A. I see on some 7A build logs not everyone cuts them down and I suspect to maximize strength. In the end I decided to cut down them down to shape to save the weight. Everyone complains about the tail being heavy, nobody complains about this area being weak.

All cut, finished on both the sanding station and the 3M station.

Next, I went to work with the files on the F-711 bulkhead opening.


Wednesday, February 27, 2019

Working the F-711C bar (again) and working on the F-711 bulkhead - 3 hours

The replacement AB4-187x1 1/4 arrived so I can remake the F-711C horizontal stabilizer attach bar. Fortunately I have one completed and ready to go so it makes things very quick to so the second. I measured everything out. Placed the correct piece overtop and used the palm drill to provide pilot holes for the bottom most hole and top two attach holes. Before completing the holes in the drill press I verified the measurements of the holes.


Looking great, so I finished the holes in the drill press. Next I then cleco'd the attach bar to the F-711 bulkhead and transfer the holes. Then I completed those holes on the drill press.

Then I marked the space that is cut out on the F-711 bulkhead and cut it on the band saw.

I will have to finish these off with a file.


Sunday, February 24, 2019

The longeron twist - 2 hours

No magic here. The twist goes extremely quick and is very easy to do. Looking at other blogs, I used a piece of 2x4 that I cut out the shape of the angle out of the wood. It was about 2' long and made the bend very easy.

First I verified that I was 0deg before the twist. 

I used the 2x4 to twist the angle. I must admit I checked about a hundred times to make sure that I was twisting the right way, the top of the angle bends in, and the bottom bends out. It only takes a few mins to get the 17deg bend.

So glad to be finished with the longerons. They got stored up in the garage for installation later.


Saturday, February 23, 2019

The sharp downward bend - 3 hours

 I'm glad to be finished the big bend or curve as it was very nerve wracking. I was terrified of ruining the longeron, but in retrospect it wasn't that difficult. Just quite time consuming and a little frustrating as the plans suggest. An I too agree that its best done when broke into small segments.

Fortunately the sharp downward bend goes much quicker. I was careful not to put a sharp edge on the piece of oak that i'm using using for a bending block (its 1/8" radius) as I have found in the past bending aluminum around sharp corners can cause cracks at least with thin material....so why stop now.


I was having a tough time figuring out how best to set up for measurement of the 2 3/4" drop. I have a bike stand that I used to clamp a wood ruler onto.


It looks good in theory, but in actual fact it doesn't work so well. I ended up in the end just simply using the straight clamped across the top and using a ruler to measure the drop. The sharp bend down causes quite the bend in the other direction so ultimately the stand just gets in the way.
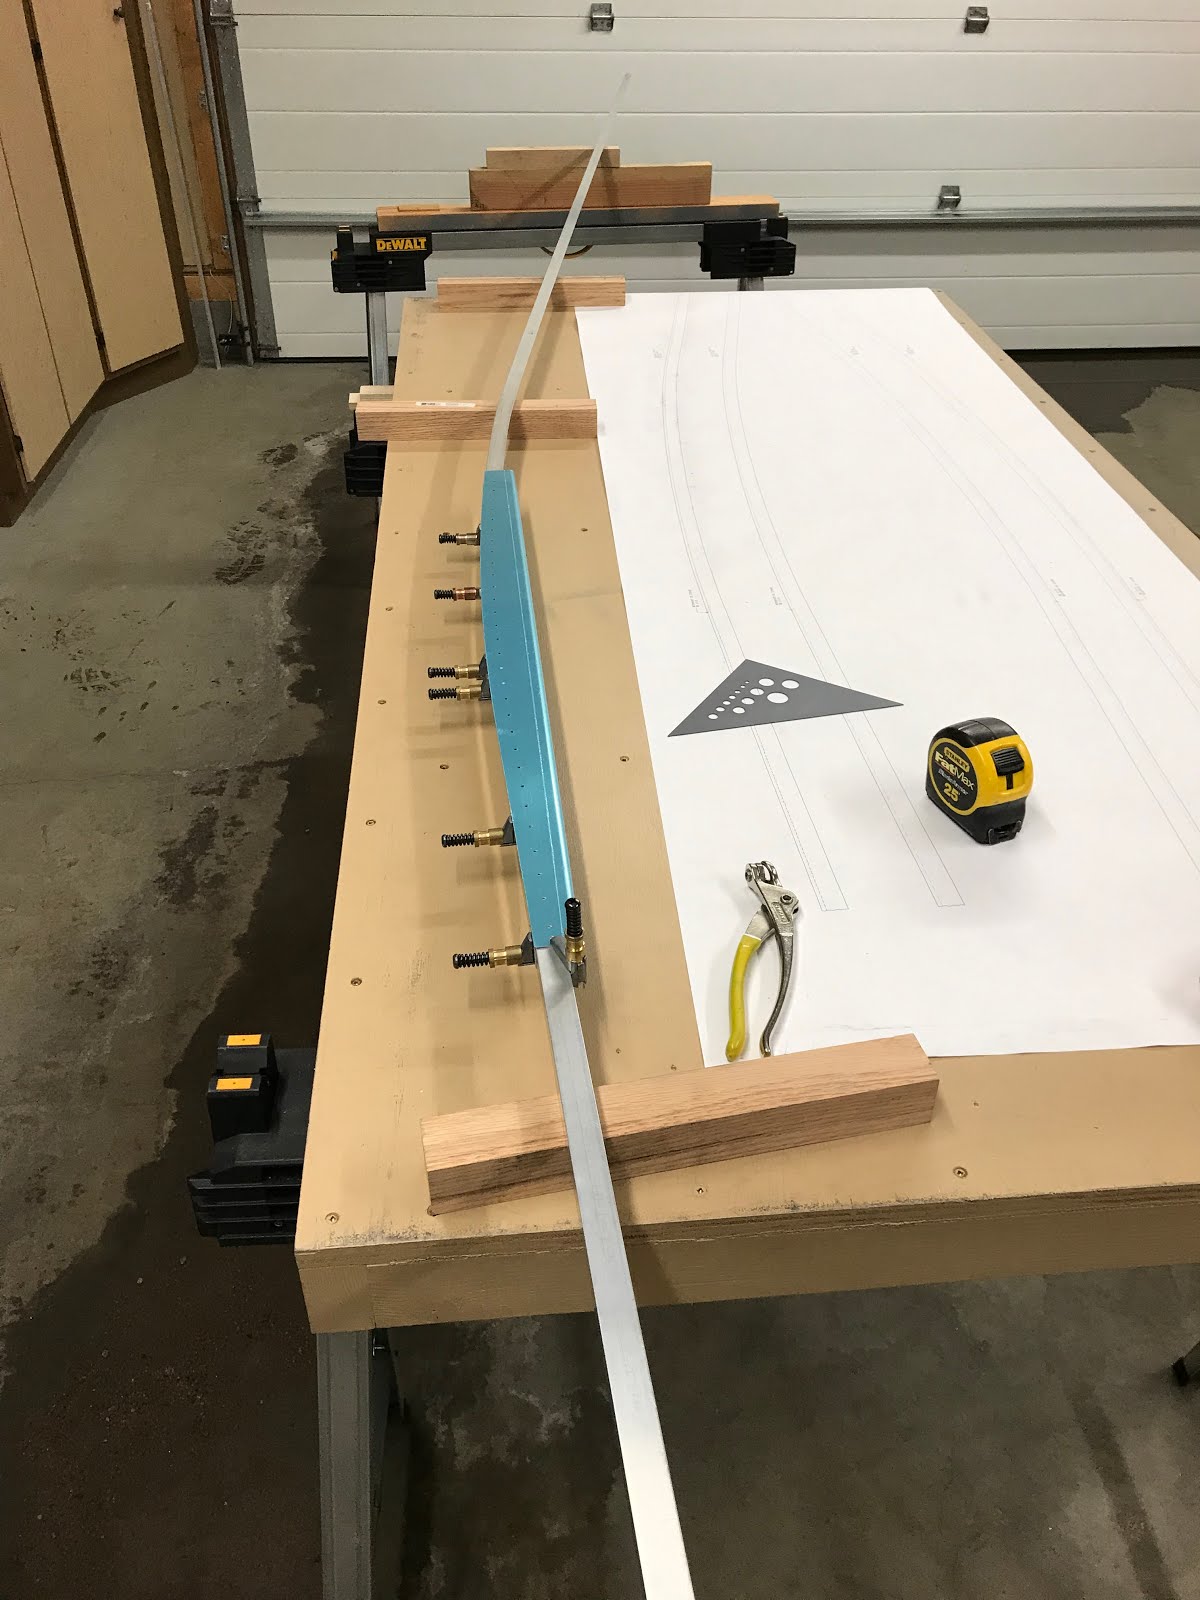
To promote a clean sharp bend at the 28 1/4" mark, I locked the angle down in the vice and clamps.


I began to bend, check, correct for straightness, bend some more, so on, and so on. I managed to get one finished fairly quickly. But it is time consuming to remove the clamps just to do the measurements. One all done...Measures 2 3/4" apart from the unbent one.

Now its 5 1/2" apart when both are bent, and more importantly both are perfectly aligned.

Best of all, it matches the skin perfectly.


Thursday, February 21, 2019

Finished the big bend on the longerons - 4 hours

I managed to work a bit more on getting bends on both the horizontal (to match the plans) and the vertical (to flatten them out). Another couple of hours of "whispering" and things worked out well.


Next step I was ready to drill the F-721B aft decks. I cut some 0.032" strips from scrap as the plans suggest. I used a tedious process of clamping, Marking pilot holes with the palm drill and completing holes with the drill press.


Things look excellent. (I left that last hole fwd undrilled) I just figured I wanted to drill it after I made that sharp downward bend as its so close to that line.


Tuesday, February 19, 2019

More longeron bending - 3 hours

One of the benefits of working in an engineering office is that I can draft the longeron bending templates to perfect full scale and also mirror them to fit both the Left and Right sides. I scanned in my F-721B aft deck pieces and then drew out the correct bend in autoCAD to 1:1 scale.

And of course the continuous roll plotter comes in extra handy.I managed to print out a 72" long paper template.

I managed to make short work of the second longeron. It goes way more quick than the first one as you now have a feel for the correct pressure needed on the bending dies, and you are not so afraid of over bending. I managed to bend the send one to near correct in about an hour or so. Then came the not so fun tweaking. The bend of the two pieces is virtually perfect on the horizontal, but not on the vertical. this shows up when you clamp the two pieces together.
Looking great here....


But not so good here....

This is where things can get a little frustrating. Trying to flatten that unwanted separation between the longerons results in changing the bend that you want to have match the template. So lots of back and forth futzing. I spent an hour on it but was making little progress, but at least I was in the ball park.