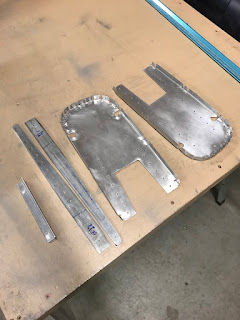
One of the items that I didn't fully complete was finish cutting the J-stiffeners. It's not entirely clear from the plans and manual if J-stiffeners cut trimmed on each ends. Also, I'm leery to cut the J-stiffeners to length as per the plans or should I be leaving them long for best bit. Once I started lining things up, I could see that I did in fact need to trim both ends of A,B, and C stiffeners per the detail on the plans and also that the length stated on the plans is bang on.
Update - For the notch that gets cut into the ends of the J-Stiffners (as detailed on the plans), Notch both ends of the two longest stiffeners. The shortest J-Stiffener that goes on the top only gets notched on one end. Really, in order to assembly the aft fuselage you only need to cut and notch the two sets of longest J-channels. So you can always leave the 3rd (short) set till much later.
After marking the ends per the plans, I rough cut them on the band saw and then using the 3M wheel they were easily shaped to final form.
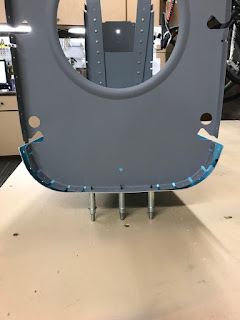
Next I began a lose fit of the F-712, F-711 and F-710 bulkheads to the F-779 tail bottom skin. I knew from reading the various blogs that the bottom skin needed some TLC to fit the bulkheads better. It was easy to see how off it is.
I could also see how I needed to angle the flanges on the bulkhead. Yup, lots of adjustment needed.
I decided to hand bend the F-779 bottom skin, I took my time and slowly worked at it.
I finished up the day with clecoing the Aft fuselage to check fit.
Sunday, March 31, 2019
Monday, March 25, 2019
Completed the F-711 bulkhead assembly - 0.5 hrs
Sunday, March 24, 2019
Primed the F-711 Bulkhead and started assembly - 3.5 hours
Very small day today. I just need to prime the components before I can assemble them. I always try to get 12hrs dry time on the parts when I can as the primer can be too soft.24 hours is best.
My priming process is a little intense. First a scotchbrite scrub, then soapy wash, then acid bath, Degrease wipe, MEK wipe and prime.
All done with priming. Now to wait for it to dry.
I waited until the late evening to start assembling. I cleco's the assembly and clamped it in the vice, and started bucking.
As I started the row at the very top (where it isn't clamped well). I slipped with the rivet set and gave the piece a small smiley. Ugh....very annoying. I managed to perform some surgery and dressed out the smiley with some scotchbrite on the dremmel to remove any sharp edges.
I then wiped the area with acetone and masked off the set rivets and re-sprayed primer. Almost like it never happened.
Saturday, March 23, 2019
Prep'd the F-711 bulkhead components - 3 hours
I was ready to prep and prime the F-711 bulkhead components. Unfortunately this took quite some time as the F-711 bulkhead as a lot of little tabs, nooks and crannies. Like every other piece I broke the edges with a small file, and then polised the edges on the 3M wheel. All of the nooks and crannies get polished with the maroon scotchbrite on the dremmel tool.
Monday, March 18, 2019
Fabricated F-711D and fitted to bulkhead - 2.5 hours
Well, after getting back from holidays in Mexico the desire to build is very low. I have to make myself get into the garage today. I fabricated the F-711D angle which is fairly straight forward. I took my time and made sure it was exact. Once fabricated, I carefully clamped it to the Bulkhead.
I drilled and clecoe'd. Yup everything looks good.
I set the angle so that the bottom of the flange is even with the top of the bulkhead as per the plans.
I drilled and clecoe'd. Yup everything looks good.
I set the angle so that the bottom of the flange is even with the top of the bulkhead as per the plans.
Friday, March 1, 2019
More work on the F-711C bars and the F-711 Bulkhead - 2 hours
I wrestled with the idea of cutting down the horizontal attach bars. Of course on the RV7 they are not cut down, but the plans call for it on the 7A. I see on some 7A build logs not everyone cuts them down and I suspect to maximize strength. In the end I decided to cut down them down to shape to save the weight. Everyone complains about the tail being heavy, nobody complains about this area being weak.
All cut, finished on both the sanding station and the 3M station.
Next, I went to work with the files on the F-711 bulkhead opening.
All cut, finished on both the sanding station and the 3M station.
Next, I went to work with the files on the F-711 bulkhead opening.
Subscribe to:
Posts (Atom)