Monday, September 9, 2019

More riveting the bottom skin - 2 hours


Work has been insane lately. Just no time to work on the RV. I managed to sneak out into the garage and do a little on it. I set a few more rivets solo. Going well.


Sunday, September 8, 2019

Started riveting the bottom center section skin - 2.5 hours


I started the evening off by cleco’ing the bottom skin to the centre section. Feeling on a roll, I started to rivet. Fit was a bit tricky on the F-705 bulkhead, but little bit of TLC soon aligned the holes to accept a rivet. Well sure enough I had set a few by the end of the night solo.


Monday, September 2, 2019

Riveted the F-705 bulkhead - 6 hours


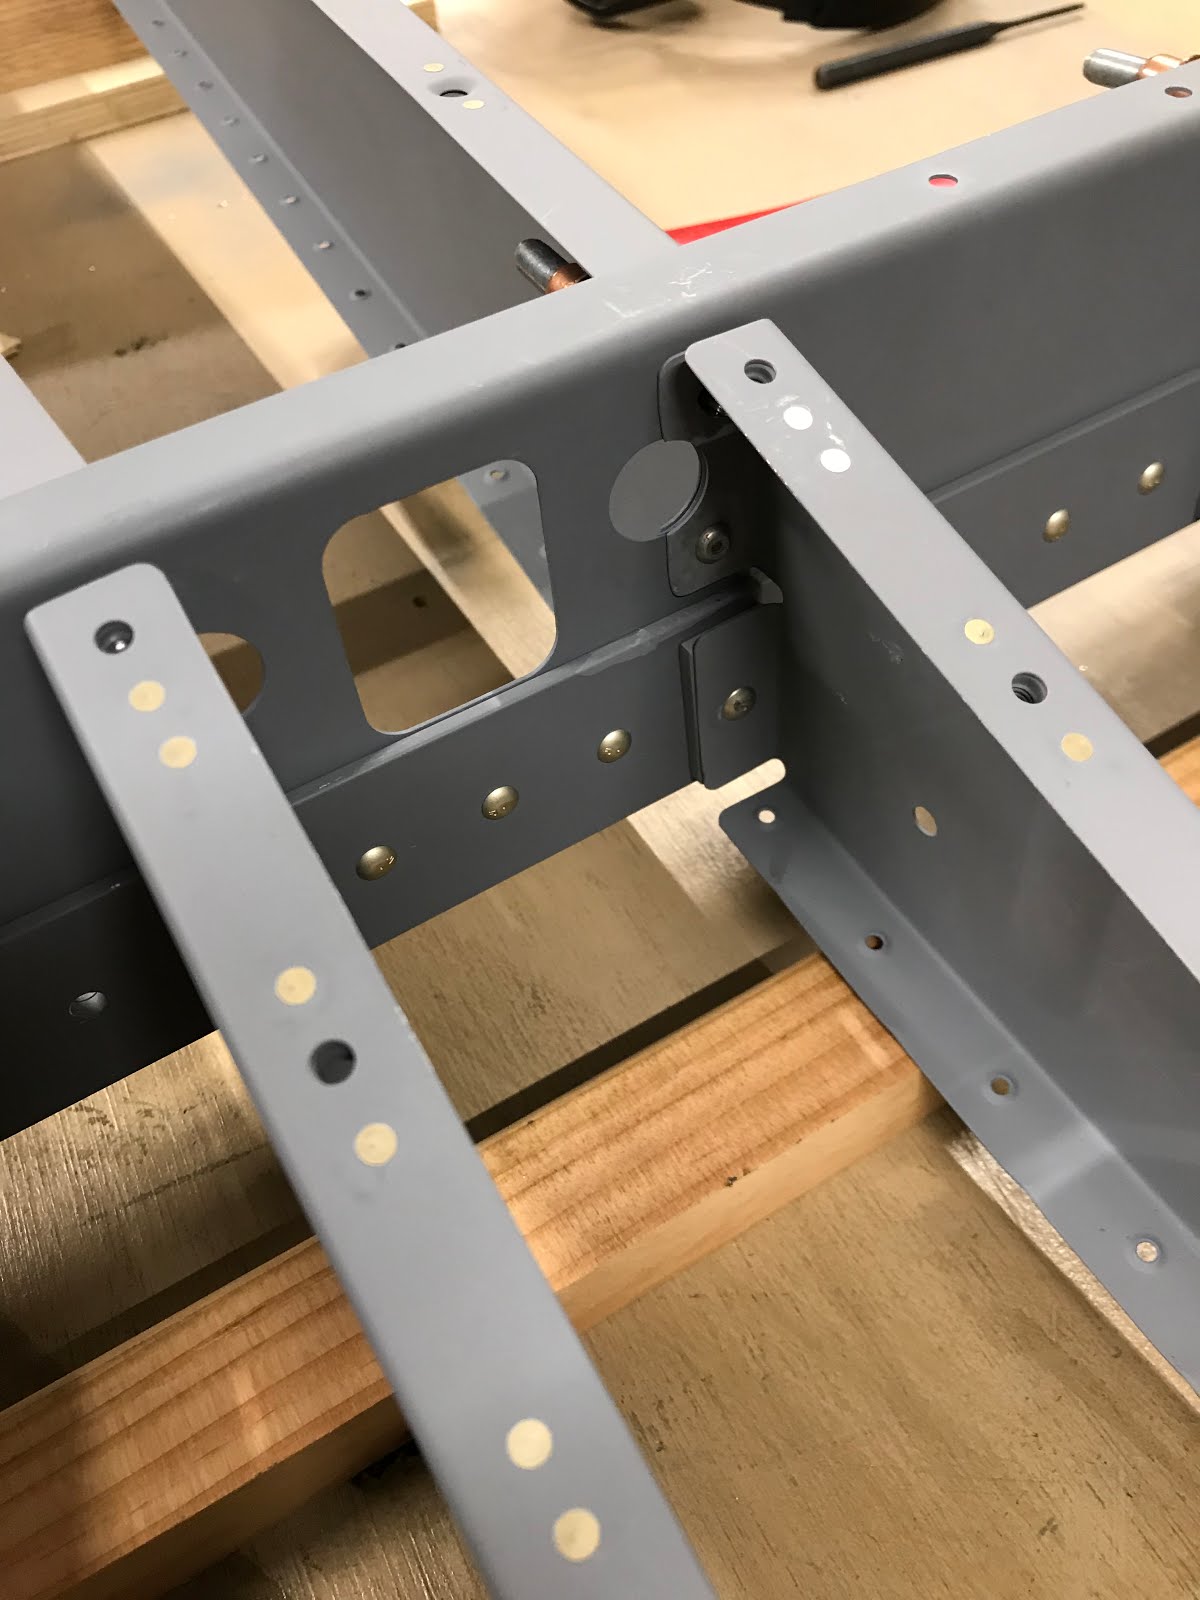
Well here is some fun riveting, I cleco’d the F-705 bulkhead to the seat ribs, and then started to install the luggage ribs to the F-705 bulkhead.


I struggled for a while to figure out how best to rivet this. I ended up bucking all of them. Nearly all are shop side forward using the double offset and extra long rivet set. These I did all by myself, no bucking partner was available. And yes I was sweating bullets the whole time. I soon ran into one tricky spot. Middle rib, Pilot side. The rivet has slumped, drilled it out, slumped it again. Now I’m worried it will happen a third time.

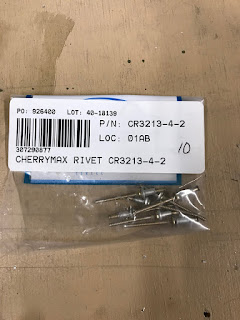
 I decided not to be a hero, pulled out the cherry max gauge and figured out how to solve the problem. A CR3213-4-2 rivet saved the day.


After that the riveting went very smooth all things considered. 

I was finally left with the top most rivets which access is hindered by the angle in the seat rib. After much head scratching. Changing squeezer yokes. The only way possible to get these set was to you a steel bucking bar I’ve never used. I went to it.....and it worked. Wow!
 
And done!


Then I noticed a critical miss. I didn’t dimple the bottom of the F-705 flange. I was just too excited to start riveting. I cleaned the holes, and dimpled with the squeezer. That is very tight space. 
I cleaned and reprimed the holes. I called it a day.
 

Sunday, September 1, 2019

Started assemble of the Center Section - 4 hours


Well...Quite the interesting day on the build. Learned a lesson today.

I cleco’d the ribs spar and rib doubler together and drove a rivet. Set beautifully. Then I noticed that I couldn’t fit the next rivet in the hole above. The doubler shifted a bit during riveting and the cleco’s didn’t hold it enough to stop the movement. Since I couldn’t move the doubler (it was so tight), I toyed with the idea of drilling out the hole. But that would likely oblong the hole. I decided to drill out the rivet, which turned out to be very tricky. I ended up oblong the hole in the doubler. Crap!

Ok, Made a new doubler. Started riveting it....Soon realized It wasn’t 100% perfect. The AN3 bolts didn't want to slide into place. Drilled out two rivets now. Had to make a third doubler. Slid the AN3 bolts in, cleco’d it. Started riveting, but first rivet slumped bad. Drilled it out again. Set it again. Better! But not perfect, Crap! Well it sucks, but I decided not to do anything more with it as it will make it worse. All in all, its the only questionable rivet in the entire session, the rest are all set well so, I'll let this slide.  


Rest of the rivets went very well.

But after I was done I found out I had drilled the AN3 holes in the doubler upside down. The fit is perfect, the only thing it did is it put the long side of the doubler toward the bottom rather than towards the top. So yup...This is the boo boo that gives the plane character. Nobody will know about it unless you are one of the few people that read this blog. Stings, but I will get over it.

The rest of the riveting went extremely well. Go figure. Used both the double offset rivet set, and the super long set with a bucking partner.


Saturday, August 31, 2019

You guessed it, more nutplates - 5 hours

Today I finally managed to finish off installing all the nutplates. Just a few one legged nutplates left to do on the luggage ribs and the crotch bracket. Setting went well, but getting the nutplates on the aft crotch bracket was interesting. I tried to squeeze the rivets, but soon figured out that it wasn’t going to work. I ended up setting them with the back rivet set and the squeezer.

Next I was ready to assemble the crotch strap brackets to the seat ribs. I bucked these rivets with the gun and bar. Slight change-up, I put shop heads to the outside. Turned out excellent!


Next item on the to do list was to dimple the F-704 Bulkhead/Spar. I dimpled the aft spar flange and then cleaned and primed it (as it will mat to the bottom skin).


 Next I needed to address the forward spar flange. I carefully figured out which holes do not get dimpled and taped those off. Checked, checked and rechecked. Then dimpled the remaining holes.


Now the last nasty step. Since I am building the 7A, I need to counter the top of the first five holes on each side of the flange to allow for a double flush rivet. Good luck getting a countersink cage in these holes, so I tried doing them by hand. It took a while but I managed to get all holes (5 per side).


Next I primed the bottom of the flange.

Wednesday, August 28, 2019

More nut plates - 2 hours

Been quite a busy week and I've had no time to work on the project. I did manage to drag myself out into the garage to finish up some of the nut plates on the baggage ribs. I needed to prime 4 countersunk one leg nut plates so I can install them on the end of the 4 baggage ribs. SO I managed to clean and prime those. Just need to let them dry.


I will also need to change out the yoke on the squeezer once I am done with riveting to then get at the nut plates on the crotch strap brackets that are really tight to get to.


Sunday, August 25, 2019

Priming nutplates and riveting nutplates - 8 hours

I started early in the morning cleaning nut plates to prep them for priming. And yes as everyone says....there is a lot of nut plates.


Once the primer had a few hours in the sun to dry up a bit, I started riveting them to the seat ribs.

Riveting went fairly well. I few I needed to drill out and try again. But all in all, it went faster than I had anticipated.

I just have a small of nut plates finish off. The crotch strap brackets and a few baggage ribs needs some attention still.