Showing posts with label Wings. Show all posts

Saturday, November 25, 2017

Picked up some AeroLED's


Managed to pick up some AeroLED’s Navigation/Anti-collision Strobe/Position lights. Pulsar NS and the Suntail. I hooked them up to a 12V battery to test them out and they work perfect. Wow are they bright.
  

Wednesday, November 15, 2017

Installed wing inspection plates, wings finished - 3 hours

Last step was to complete the wing inspection plates. I had filed all the edges on the inspection plates down to clean the shear marks off, and then chamfered the edges to ensure a good fit with the radius corners of the skin. I ran each through the 3M wheel to finish the edges. I final drilled each screw hole on the drill press. Most important, I polished each hole with the dremel and fine grit sandpaper (lesson learned from the wing tank screw hole to ensure no cracks in the thick material when dimpling). The wings are now ready for storage.

Monday, September 25, 2017

Installed the wing fuel tanks - 2 hours

Finally the day has come. I've waited a long time to finally get these tanks installed. I kept the wings in the wing stand for installation and it proved to work very well. Installation of the tanks is not exactly that easy. I slipped the tanks up onto the wings and once I was satisfied with the fit and everything was clear, I then used the jacks to help support tanks. I then began to install all of the bolts on the z-brackets. I installed all bolts initially and then began to tighten everything up little by little to ensure straightness. Once I had the bolts installed, I then installed the screws. and more screws and more screws. After that I torqued the z-brackets. Overall I am extremely happy with the fit...Very nice!


Sunday, September 17, 2017

Finished riveting the Left wing rivets - 3 hours


Little by little I’ve managed to finish up riveting the wing skins. In retrospect, its a much slower process than every other blog that I’ve come across, however with that said I’ve done all the work solo and I was sure to check every rivet and can say with confidence that I have given it my best effort and I am proud of the quality. No question that once you have finished riveting the wing skins you’re a “master riveter” 


Saturday, September 16, 2017

More left wing riveting - 3 hours

Just plugging away. Little by little. Working around the pitot mask is a bit tricky. Just more angles to work around with your hands. Progress is slow, but the rivets are nice.  One thing is for certain, this installation makes for a very solid pitot mount.


Here is a look at the inside mounting of the pitot bracket to the stiffener. I used bolts so all that is need to do is drill out 5 rivets and remove two bolts that hold the mast to the stiffener, and the pitot mast slides out of the wing. Without the stiffener the pitot mast is not very solid.

Friday, September 15, 2017

Misc wing riveting and more riveting the left wing skin - 4 hours

My order for cherry rivets have finally arrived allowing me to set the final rivets in the aileron brace. Since I have installed the Van's S.B. stiffener on the rear spar, the ability to buck the AD rivet in the rear spar at this location is near impossible. Ive chose to use cherry rivets in this location for their superior strength. Below shows how nice the cherry rivet clears the stiffener when set.


A bit more riveting on the left wing skin.


Here a good view of the two wing skin rivets along the rear spar that when the Van's S.B. stiffener are installed are impossible to buck. As an alternate I have just used MK-319 pull rivets for these two spots.


Tuesday, September 12, 2017

More wing skin riveting - 1.5 hours


In order to set the rivets closest to the access holes, I found that squeezing these does the best job. I just spent a little time this evening setting those rivets as well as a few more.


Monday, September 4, 2017

Started the left bottom outboard wing skin - 2 hours


So it turns out that I am short a few pull rivets so I cannot complete the right wing tank....so it’s back onto the left wing while I wait for a parts order.
I cleco’d the left wing skin on to check the fitment. 
 

Monday, August 28, 2017

Finished riveting the right wing - 2 hours

A couple hours in the evening and I completed the riveting on the right wing. So glad to be done. Just the left wing left to do.

Sunday, August 27, 2017

More wing riveting with a slight oops - 5 hours

As I continued the right outboard wing riveting, I found that I had skipped dimpling a couple of rib holes. Of course...I had set one rivet in the undimpled hole but on my inspections after each rivet I noticed the mistake.

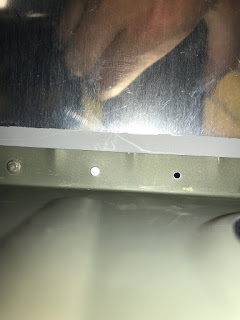
I ended up drilling out the perfectly set rivet. I though for a while on how to fix the missed dimples. I was really reluctant to drill out all of the rivets in the rib that I had set. I finally had an idea of using the tight space dimple bar with the rivet set on the gun. Of course I was very concerned about marring the exterior skin. I figured that if I used the tight space rivet bar with the bucking bar, it would be very similar to the standard bucking process.

Sure enough... using this setup with the pressure on the gun dialed down a little. The day was saved and I very easily dimpled the two holes. You would never know I missed them.


A few more hours and I was nearly complete the right wing.

Saturday, August 26, 2017

More wing riveting - 4 hours

More riveting. Checking each rivet as I set them. Slow progress but good progress.


Thursday, August 24, 2017

Started the right bottom outboard wing skin - 3 hours

I finally managed to get back into riveting. The first step was that I clecoed the entire wing skin onto the wing to ensure straightness. Once I was happy with how it all sat. I took out the clecos and set the inboard line of rivets. Then I re-clecoed the skin down in its entirety and set the complete bay through the most outboard access hole.
 
 
 I reached the point on the rear spar where I could not use the bucking bar where the aileron stiffener was. I used MK-319 rivets instead.


Monday, August 14, 2017

Prep'd the bottom outboard wing skins - 3 hours

I prep'd and primed the outboard wing skins. Same process as before. Clean, scuff, wipe, acid etch, MEK, prime! Fun Fun!!

Sunday, August 13, 2017

Saturday, August 12, 2017

Started riveting the Right Inbard bottom wing skin - 7 hours

With having the "Feel" of the wing riveting dialed in. I started in on the right wing (bottom, inboard) skin. I was eager to get this done as its a bit tricky. I'm very much stiff and sore from all the contortion needed to reach all the rivets.

For some reason I found the right side, just a bit more tricky then the left.

One of the items that I needed to do was to use some proseal on a bent rib flange. I had bent this flange when clecoing the skin on earlier.

EDIT - Tip...This method doesn't work. The proseal doesn't hold well, and trying to reach in after to re-apply proseal or epoxy just makes a giant mess. The best method I found was to use a couple of layers of cardboard on the bucking bar when you go to set the rivet. The unset rivet pokes through the cardboard and allows the flange to press tight back to the mating surfaces. When you shoot the rivet. it's perfect!