Showing posts with label Longerons. Show all posts

Sunday, December 29, 2019

Drilled the longerons fwd of F-704 bulkhead - 6 hours

A big item on my to-do list is to finish drilling the longerons forward of the F-704 bulkhead. I've put this off for a couple of days thinking how best to do this. I want to ensure that the longerons are even on both sides. I fear that if I just go ahead and drill them they may not be exactly aligned, even crooked. I finally decided that I need to temporary install the firewall. I used the ironing board to support the weight and clamped/secured it.

I drew centre lines all down the firewall and down the centre of the bottom skin.

Then I set up the laser level and began checking everything. Some very small adjustments, but I was happy that both longerons where sorted. This was a very tedious process I might add. I began drilling from the F-704 bulkhead forward alternating sides. I finally reached the #30 holes and I marked them with a sharpie to double check edge distances. All good!


I finished drilling the longerons. Now I just need to trim them back 3/4" from the forward edge of the skin. I'll save that for tomorrow.


I need to get the F-904L attach strips cut. Reading other build logs edge distance is a possible concern here so I just used the full 3" lengths that came with the kit. Ill drill them first and then cut after to ensure edge distance is not compromised. I checked the fwd pieces and marked them to be cut at an angle so that they will nest into the longeron.

I started to carefully mark and drill my holes. I also rounded the bottom edges to nest into the radius of the longeron.

As you can they are very long. The aft pieces will allow me to drill an extra cleco at the top.   I will trim them down. The blue line represents 2 1/16" however that is too close to the rivet hole so I scrubbed that line. I'll do some checking on build logs first, but I will likely leave a good amount of edge distance and go a bit longer than the 2 1/16" dimension.

Saturday, December 14, 2019

Fitting the longerons to the aft fuselage - 9 hours

As usual. It's been a very busy week leaving not a whole lot of time to work on the RV. I am teaching ground school one day a week but frankly its lots of work to write power point presentations. Did I mention its not easy to teach...You really want to know a subject, try teaching it.

I rechecked the fit of the longerons just to make sure I was happy with everything. I need to make very small adjustments for the vertical stabilizer bars. (Longeron openings are a tad snug). I also double checked the ends of the angles for trimming.


Now that I'm happy with the fit of the F-710B angle I riveted it to the bulkhead.

Next step I cleaned up the longerons. I filed the openings for the horizontal stabilizer bars so they weren't so tight. I filed down some thickness on the flange that was trimmed back on the aft end, and I also timed the aft length so that it sat flush with the tab on the aft bulkhead.


All ready to install on the fuse and then to flip the fuse over.


Next I was then ready to join the aft and center sections. Slow and easy wins the race.

It occurred to me after some time that the F-704 Bulkhead does not sit "in" the angle. I used some spacers to lift up the F-704 bulkhead as it sits on "top" of the angle.Then the side skins and everything else started to fit quite nicely.


Saturday, November 30, 2019

Getting ready to fit the longerons - 5 hours

Bit of a long day today working with little progress. Some tedious tasks that I need to take care before I can fit the longerons. Firstly I need to set a handful of rivets still in the aft fuselage. These are not that easy to set due to the curvature of the skin. I managed the very rearward set of rivets but for 8 others I need to call my buddy mike for help.

Mike texted me back will come by in a few days so in the mean time I will have to put the fuselage on pause and move onto the longerons. I brought them down from storage and cleco'd them together. One of the tasks that I held off on was to cut the groove into them. I wanted to wait till now to do that rather than do it prior to bending them.

Now that they are celco'd together, I could verify that they are nearly symmetrical. (well one was out about just a tad ~ 1/32 or 1/16"). So I set it all up, and remeasured and sorted the correct length. Now that they are perfect. I marked out the areas I need to cut.


Rough cuts made on the bandsaw, but then all the rest of it was finalized with lots of careful filing.


I left the aft end of the longeron long on purpose. I will mark them for proper edge distance and cut later. I also left them purposely thicker than 0.125". I'll take the thickness down later.


Sunday, February 24, 2019

The longeron twist - 2 hours

No magic here. The twist goes extremely quick and is very easy to do. Looking at other blogs, I used a piece of 2x4 that I cut out the shape of the angle out of the wood. It was about 2' long and made the bend very easy.

First I verified that I was 0deg before the twist. 

I used the 2x4 to twist the angle. I must admit I checked about a hundred times to make sure that I was twisting the right way, the top of the angle bends in, and the bottom bends out. It only takes a few mins to get the 17deg bend.

So glad to be finished with the longerons. They got stored up in the garage for installation later.


Saturday, February 23, 2019

The sharp downward bend - 3 hours

 I'm glad to be finished the big bend or curve as it was very nerve wracking. I was terrified of ruining the longeron, but in retrospect it wasn't that difficult. Just quite time consuming and a little frustrating as the plans suggest. An I too agree that its best done when broke into small segments.

Fortunately the sharp downward bend goes much quicker. I was careful not to put a sharp edge on the piece of oak that i'm using using for a bending block (its 1/8" radius) as I have found in the past bending aluminum around sharp corners can cause cracks at least with thin material....so why stop now.


I was having a tough time figuring out how best to set up for measurement of the 2 3/4" drop. I have a bike stand that I used to clamp a wood ruler onto.


It looks good in theory, but in actual fact it doesn't work so well. I ended up in the end just simply using the straight clamped across the top and using a ruler to measure the drop. The sharp bend down causes quite the bend in the other direction so ultimately the stand just gets in the way.
To promote a clean sharp bend at the 28 1/4" mark, I locked the angle down in the vice and clamps.


I began to bend, check, correct for straightness, bend some more, so on, and so on. I managed to get one finished fairly quickly. But it is time consuming to remove the clamps just to do the measurements. One all done...Measures 2 3/4" apart from the unbent one.

Now its 5 1/2" apart when both are bent, and more importantly both are perfectly aligned.

Best of all, it matches the skin perfectly.


Thursday, February 21, 2019

Finished the big bend on the longerons - 4 hours

I managed to work a bit more on getting bends on both the horizontal (to match the plans) and the vertical (to flatten them out). Another couple of hours of "whispering" and things worked out well.


Next step I was ready to drill the F-721B aft decks. I cut some 0.032" strips from scrap as the plans suggest. I used a tedious process of clamping, Marking pilot holes with the palm drill and completing holes with the drill press.


Things look excellent. (I left that last hole fwd undrilled) I just figured I wanted to drill it after I made that sharp downward bend as its so close to that line.


Tuesday, February 19, 2019

More longeron bending - 3 hours

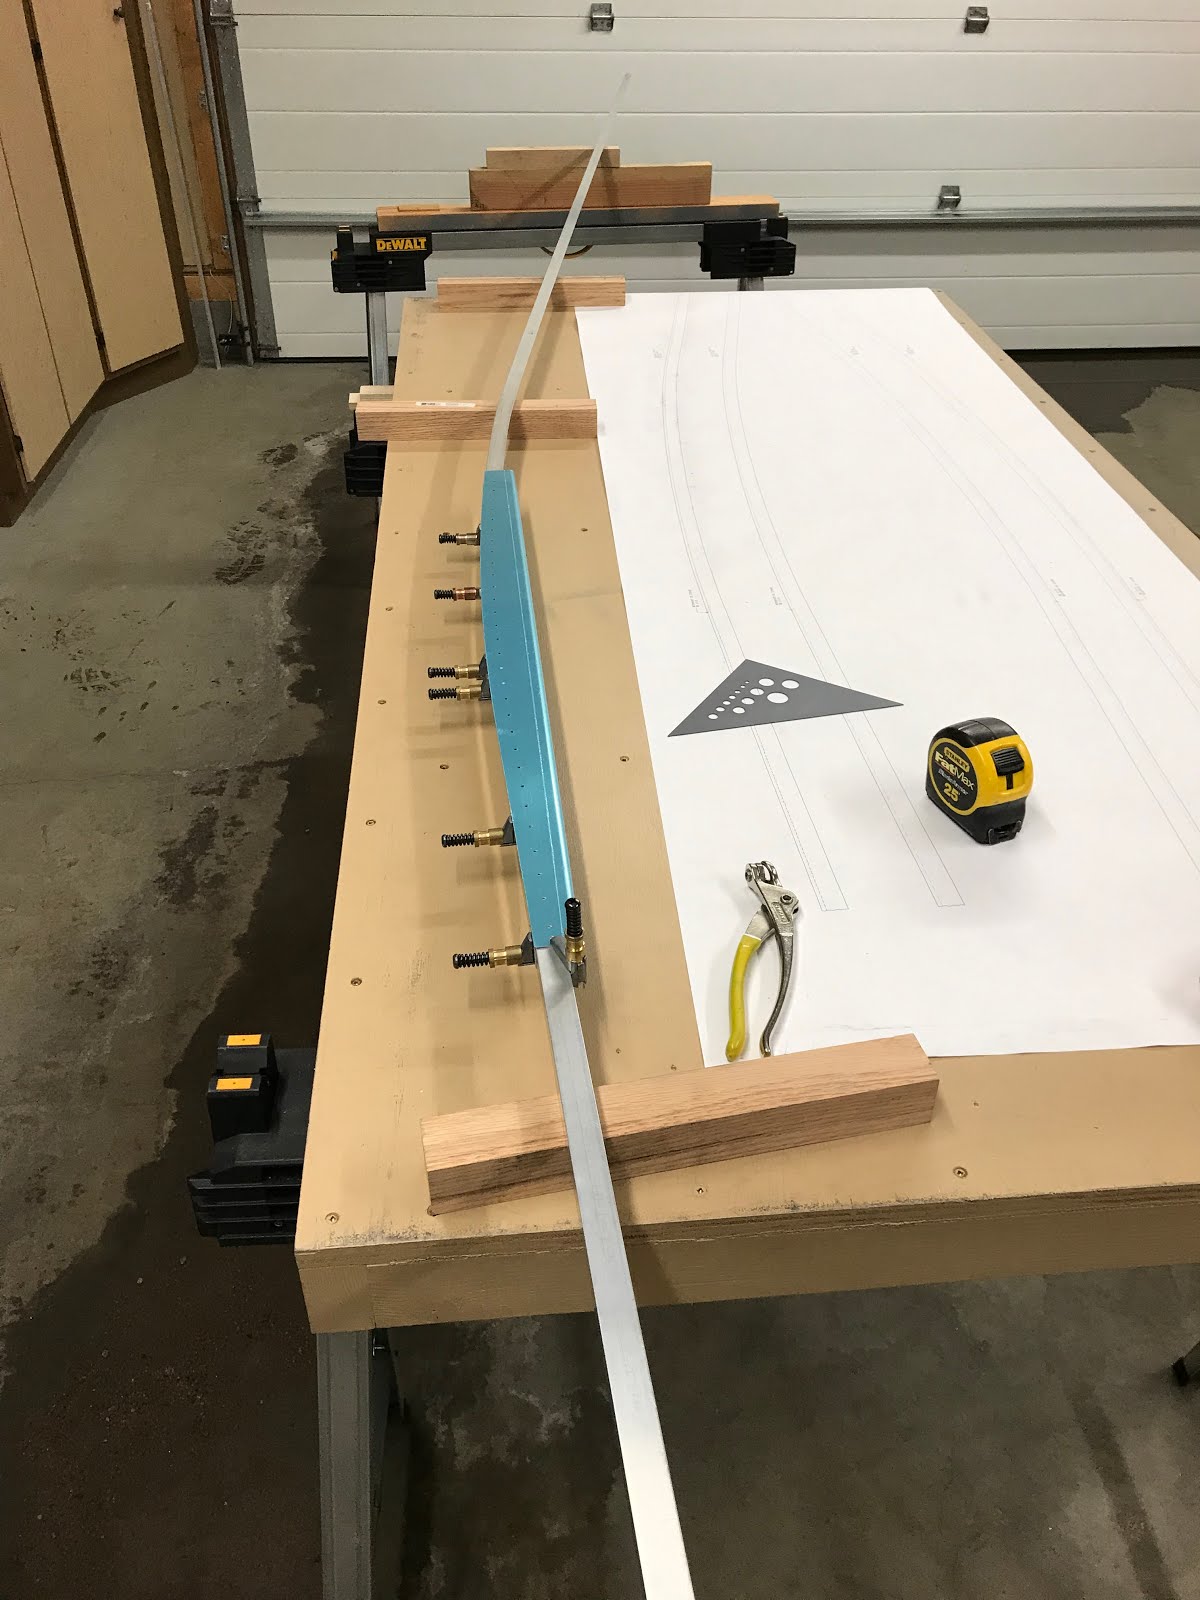
One of the benefits of working in an engineering office is that I can draft the longeron bending templates to perfect full scale and also mirror them to fit both the Left and Right sides. I scanned in my F-721B aft deck pieces and then drew out the correct bend in autoCAD to 1:1 scale.

And of course the continuous roll plotter comes in extra handy.I managed to print out a 72" long paper template.

I managed to make short work of the second longeron. It goes way more quick than the first one as you now have a feel for the correct pressure needed on the bending dies, and you are not so afraid of over bending. I managed to bend the send one to near correct in about an hour or so. Then came the not so fun tweaking. The bend of the two pieces is virtually perfect on the horizontal, but not on the vertical. this shows up when you clamp the two pieces together.
Looking great here....


But not so good here....

This is where things can get a little frustrating. Trying to flatten that unwanted separation between the longerons results in changing the bend that you want to have match the template. So lots of back and forth futzing. I spent an hour on it but was making little progress, but at least I was in the ball park.


Monday, February 18, 2019

Starting the big bend! - 9 hours

Again, I spent some time reading up on other build logs on bending the longerons before I started in. I figured out that I didn't really need to make the cuts at this exact time. But it was very important to mark things out. My reasoning is (that the fuselage up to this point is reminding me) that pieces are more exact when you can fit, check, and then cut rather than blindly cut....more so around the horizontal stabilizer. I So, I dug out my thin sharpie and went to work.


I then dug out my longeron bending dies that I have bought some time ago. One of the items everyone talks about is protecting the angle from marring so I used some gorrilla tape and lubed the dies with WD-40. That works well but a pain in the butt as it wants to remove your sharpie marks.

I drew a reference line on the dies

First pass, you will notice the gentle bend.

Second pass, Third pass. Ugh... I am being careful not to overbend as the longeron dies mention but this is painful. I've been at it for hours and only small steps. I decide I can then become a bit more aggressive with the bending. Yup, bends going well now, but there is a noticeable curl up in the longeron 90deg perpendicular to the bend i'm making, which is to be expected. I went to work taking that bend out and trying get it to lay flat on the table again. Interesting, by taking the vertical bend out is relaxes the horizontal bend i'm trying to get. Hmmm, You purposely want to overbend the longeron a bit on the horizontal. Well after a few hours, of working with the longeron. I had both the horizontal curve matching the plans and laying flat on the table.

I am the aluminum whisperer.

Now...next concern was bending the other longeron and matching it up to the plans.