Showing posts with label Fuel Tanks. Show all posts

Monday, September 25, 2017

Installed the wing fuel tanks - 2 hours

Finally the day has come. I've waited a long time to finally get these tanks installed. I kept the wings in the wing stand for installation and it proved to work very well. Installation of the tanks is not exactly that easy. I slipped the tanks up onto the wings and once I was satisfied with the fit and everything was clear, I then used the jacks to help support tanks. I then began to install all of the bolts on the z-brackets. I installed all bolts initially and then began to tighten everything up little by little to ensure straightness. Once I had the bolts installed, I then installed the screws. and more screws and more screws. After that I torqued the z-brackets. Overall I am extremely happy with the fit...Very nice!


Sunday, September 24, 2017

Priming the fuel tank back baffle - 1 hour

One of the last items on my to-do list before I install the wing tanks is to give the back baffle area some primer. My thinking is that this is an area where water, etc can ingress between the skin and spar so any primer will help mitigate corrosion.

Thursday, September 21, 2017

Started wiring the fuel tanks - 2.5 hours

Well Great news! The leak test for the tanks held for 2-days. I'm declaring them leak free!!! What a frustrating process. Such little things make for a huge problem if not checked.

Now all I needed to do was to finish and secure the wiring on the tanks before I installed them on the wings. A couple of weeks ago I had my buddy Mike who is an AME stop by and show me how to crimp terminals for when I installed the ground wire. He was able to show me how I should install the lock washer/ring terminal on the fuel sender.

Now that I was ready to complete the wiring for the positive terminal, I was able to confirm that I have the assembly/installation correct. Once I had the positive wire installed. I then taped the wiring to the back baffle in intervals. I had discussed how to secure the wiring with Mike so that it doesn't rub/chafe once installed on the wing. He had suggested using a small dab of proseal. Taping the wiring down keeps it exactly where I wanted it to be. I used a service loop on the wiring around the sender to help ensure that wiring is not pulled off the terminals in the event the wiring is pulled too much in the future.

I mixed up some proseal and dabbed some on the wiring.


Tuesday, September 19, 2017

More leak testing the tanks - 4 hours


Well I came home from work to a bit of a surprise, the tanks had lost air, but not equal for both....So it’s not the barometric pressure that has fallen. I have a leak in the tank(s). After a small bit of swearing and the five stages of grief - I then put soapy water into a spray bottle and sprayed the entire tanks down top to bottom to see where the leaks may be. I couldn’t find any spot that was leaking. I was absolutely baffled. Maybe my solution is wrong? I sprayed and sprayed again, nothing. So I went upstairs and read more blogs after blogs. I had read in other blogs some folks experience leaks through the fuel caps. So I gave the tanks a good cleaning and used duct tape over the fuel caps to eliminate them from the equation. 
 
I pumped up the tanks and left them sit....About 2 hour later, I checked them....I still have a leak. Small but it’s there. Oh dear lord. The duct tape is slightly bubbled up around the fuel cap....yup those were a leak on the last round. But it doesn’t explain why the tanks are leaking now. I used the soapy water solution everywhere again. I stopped for supper and when I came back, I noticed bubbles around the fuel supply plug! They didn’t show up right away but it took time for the bubbles to build!
 
This must be it. I was so relieved as I thought for sure I had a leak in the tank. This makes sense for a potential leak point as I was so careful not to install the blank AN fitting too tight. I didn’t want to risk breaking the seal around the fitting for that AN fitting that I torque’d it to minimum spec. Also considering that there is no soft copper tubing between the mating surfaces of the fittings the risk of leak is increased. I took the plugs off and applied a small amount of tite seal on the threads and torqued the fittings on to mid level spec range. I double checked all fittings and re-pressurized the tanks. Fingers Crossed. Its 1:30am...way past time for bed!! Grrrr, I'm not going to sleep at all!
 

Monday, September 18, 2017

Started leak testing tanks - 4 hours


Now that the fuel tanks have had a good while for the last bit of proseal to set, I am ready to leak test. I was sure to buy two leak test kits. After much research on leak testing, I’ve come to the decision that the best scenario (in my opinion) it to test both tanks at the same time. This removes the every changing barometric pressure from the equation. First step was to rig up the lines that attach the clear tubing to the manometer that I am going to make. Using some short pieces of left over soft tubing, I flared the ends so I can attach them to the vent line connection.

Using a 2x8 piece of lumber I drew out a scale and used NMD90 (loomex) wire stables to secure the clear plastic tubing to the board. The marks were made at 1” gradients. I know have a large manometer. 
 
Next I took everything to my basement storage room where everything could sit and be left untouched. I then connected the fuel tanks to the ends of the manometer using two tubing clamps each (want to make sure all connections are tight). I then used some green food coloring to dye water and poured that into the manometer. I was sure that both tubes (left and right) where at equal levels. Then taking a small hand held bicycle pump I began to pump up the tanks to pressure. There is a limit to how many inches you can pump to, I’ve decided to keep things just under the recommended limit and stuck to 23”. Now since i’ve constructed my manometer so the tubing route goes down to the floor and then up.....every inch that is shown on the scale, actually represents 2” since the pressure makes the water move 1” down on the side and 1” up on the center. 
 
 
Straight away I could see that the levels where not staying put. I suspected that my Schrader valves at the fuel drain port where leaking. I used soapy water solution to check that area and sure enough they were leaking. After doing some reading, I removed the valves and applied some tite-seal sealing compound that I have (I was going to use this stuff to close the fuel access hatches on the tanks but decided to proseal last minute, glad that I was able to use the tite-seal after all) I re-installed the valves and pumped up the tanks. I double checked with soapy water....yup no leaks. Time to leave it over night and see where things sit. 


Sunday, September 10, 2017

Installed the Fuel Senders and tank access plates - 7 hours

Big day on the fuel tanks. I was sure to test the float type fuel senders with the multi-meter and ensured the fuel senders are reading correctly. ~30ohms to ~240ohms.


Next I prepared the #22 gauge wiring by soldering the ends of the wire. Then I installed the appropriate ring terminals with the crimpers.

I had given some though to my wiring selection and I have decided that all of my ground wiring on the plane will be green. This is to help with organization of wiring and also because in my work in electrical engineering....green is always a ground.

I mixed up proseal and then applied it to the flanges of the fuel sender and the access plate. I used the cork gasket in the access plate as a sacrificial piece if I ever needed to cut into the tank. To install the screws, I applied proseal to the head of each screw. This will help ensure a good seal. The only screw that I did not do this to was the screw that hold the positive wire terminal on the fuel sender. I made sure the screw was clean to achive a good electrical contact and prosealed the entire screw head and terminal.


Wednesday, September 6, 2017

Completed the right wing tank - 5 hours

Not much to report. I received the needed pull rivets so I went to work closing the right wing tank.

Sunday, September 3, 2017

Closed the left fuel tank - 5 hours

Deciding to take a break from riveting wing skins. I decided to switch over to proseal for more punishment. I needed to close up the fuel tanks and chose the left tank to start. Following the instructions...I used a thin smear of proseal on both the tank and ribs and the rear baffle. I clecoed the entire assembly and then riveted the assembly.

Saturday, July 29, 2017

Closed up the right fuel tank - 6 hours

I gave all parts a good cleaning with wax and grease remover and MEK. Mixed up proseal and went to work. I was careful not to keep the proseal light on the back of the ribs and the z-brackets as noted in the manual.  


After all was done, I cleaned up the tank and put a proseal cap on every rivet head.


Friday, July 28, 2017

Preping the fuel tanks to close - 3.5 hours

Its time to start closing up the fuel tanks. I've been dreading this a bit since i'm not a fan of proseal or  MEK. I needed to prep the rear baffle of the fuel tanks so I went to work with my nylon brush and scored the mating surfaces of both baffles.

Next I cleaned the tank to get it ready.

After giving some thought to the process. I felt it wise to clean the primer off the z-brackets to allow a good clean surface for the MEK to adhere to. Also made sure that the holes where nicely deburred.

Saturday, July 2, 2016

Finished riveting and proseal of the rear baffle - 2 hours

Pretty self explanatory. I finished riveting the nutplates on the rear baffle of the fuel tank. After back riveting the nutplates I put a dollop of sealant on the heads. Much cleaner than when I first started on the tank access.

Monday, June 27, 2016

Aerobatic fuel pickup installation - 2.5 hours

I used a syringe to put a dollop of sealant on all the rivet exposed rivet heads on both left and right rib #1 and the shop heads of the tank attach angles.


Next I had tapped up the fittings on the aerobatic fuel pickups to ensure that no proseal whould get inside. I slathered up the fitting and installed them in the tank.

After a good cleaning in MEK I gooped up the area with proseal and torqued the AN924 jamnut on. I spread out the proseal on the nut, cleaned it up and applied a dollop of proseal to the exterior tank attach rivets.

 Next I used q-tips dipped in MEK and started the long process of cleaning proseal off the aluminum fitting threads. Some final wipes with the cloth and then I could remove the tape.


Sunday, June 26, 2016

Left rib #1 and tank attach angles - 6 hours

Big day today. I started the morning by installing the left rib #1. Once I had cleaned up the rib with MEK I had torqued the vent line to the rib fitting.

Next I needed to bend the opposite ends of the vent lines up to the high point of the tank. Took some  strength but I did it with use of my fingers to ensure that I didn't kink the line.

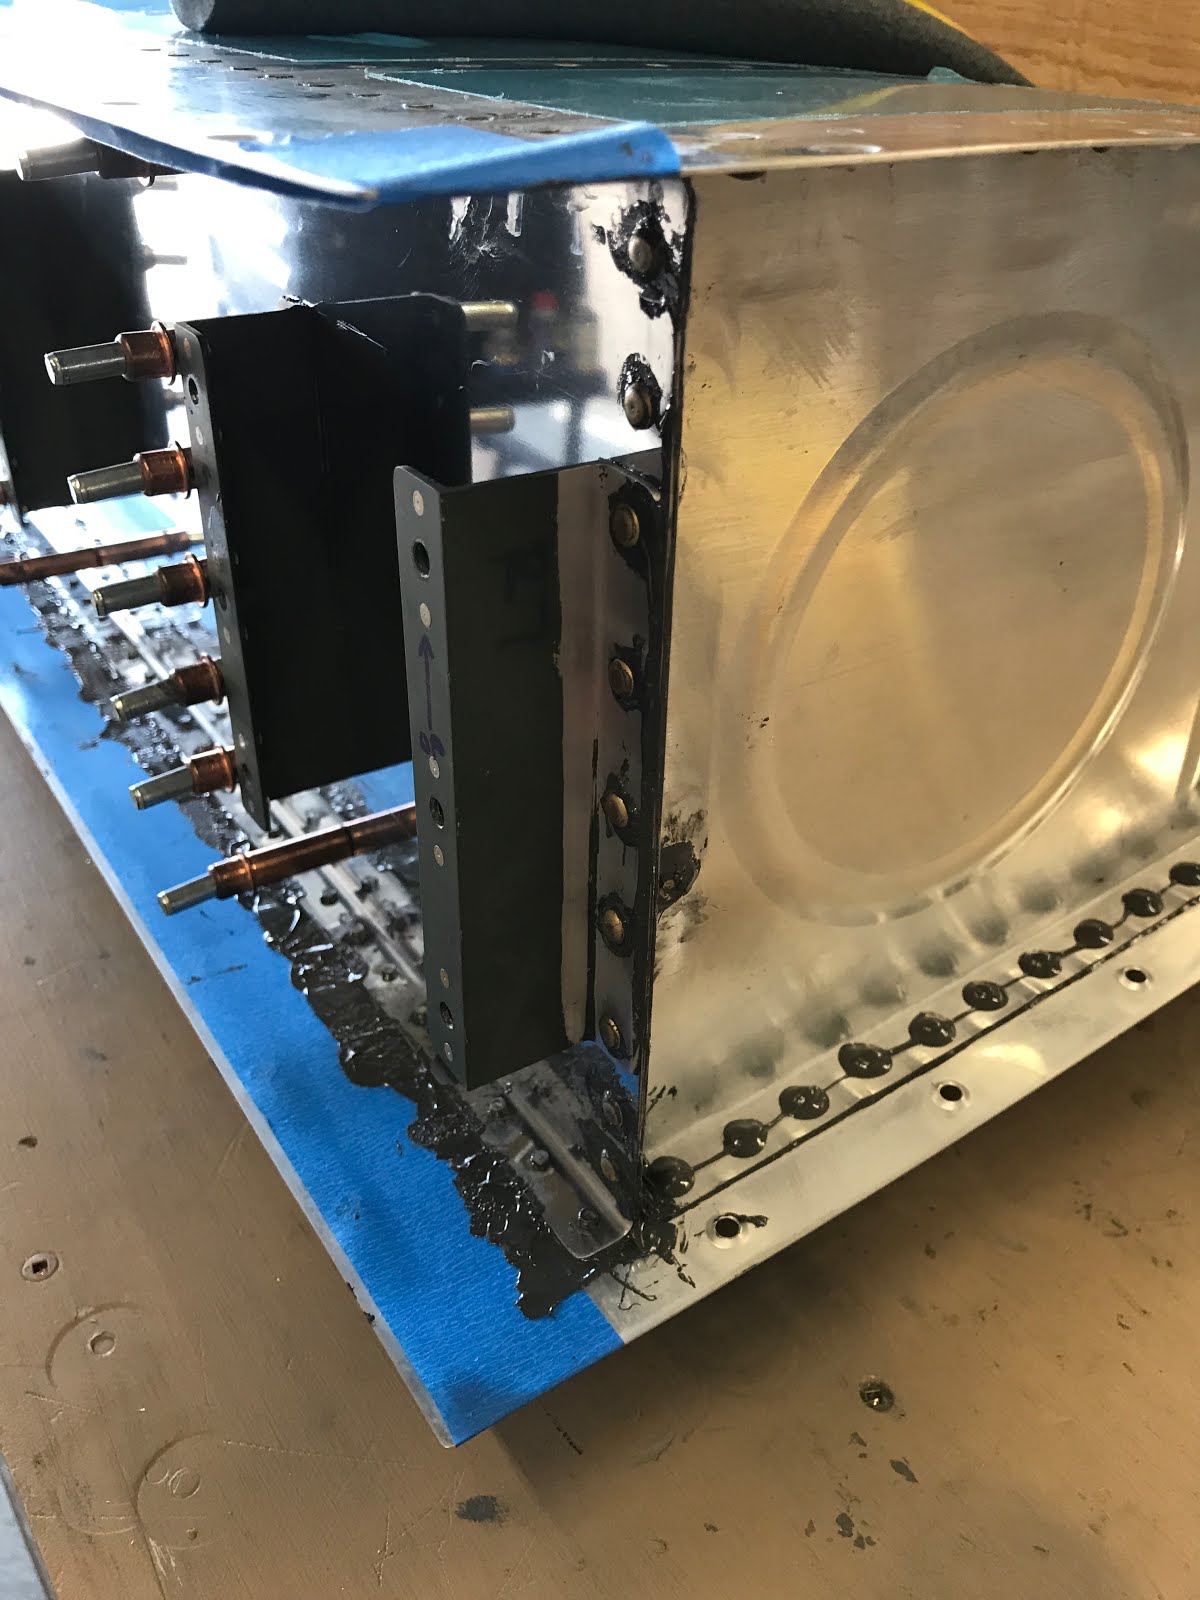
Both tanks are nearly done. All that is needed is to fit the tank attach angles. This part I am a bit worried about as in my mind it's going to be tricky.

Well straight off I can see that I will need to notch the attach angle to make room for the rivet shop heads. Little bit of grinding with the 3M wheel made short work of it.

Before I can set these in I needed some bucking partner help to arrive.

To kill some time I jumped over to the reinforcing ring on one baffle for the fuel sender. This is a bit tricky with the NAS nutplates as there is no room to get those rivets set. The squeezer was not going to work. After some head scratching I grabbed a back rivet set with a narrow collar and shaved down a side with the 3M wheel. It allowed me to make quick work of installing the nutplates by back riveting them.


  Well by the time I had that done, my friend mike arrived to lend me a hand on the attach angle installation.

He operated the gun and I operated the bucking bar. After coating all the pieces in a slathering of proseal. We set in to buck the rivets. Well...it went very well. Much better that I thought it would go.
 

Next on the agenda was to clean up the pieces so tomorrow I can install the fuel pickups.