Tuesday, October 11, 2016

Moving forward on the Ailerons - 8 hours

So I started the day by finishing backriveting the stiffeners on the aileron skins. Similar to the elevators I used a dab of Dow #3145RTV on the aft edge of the stiffeners before riveting.


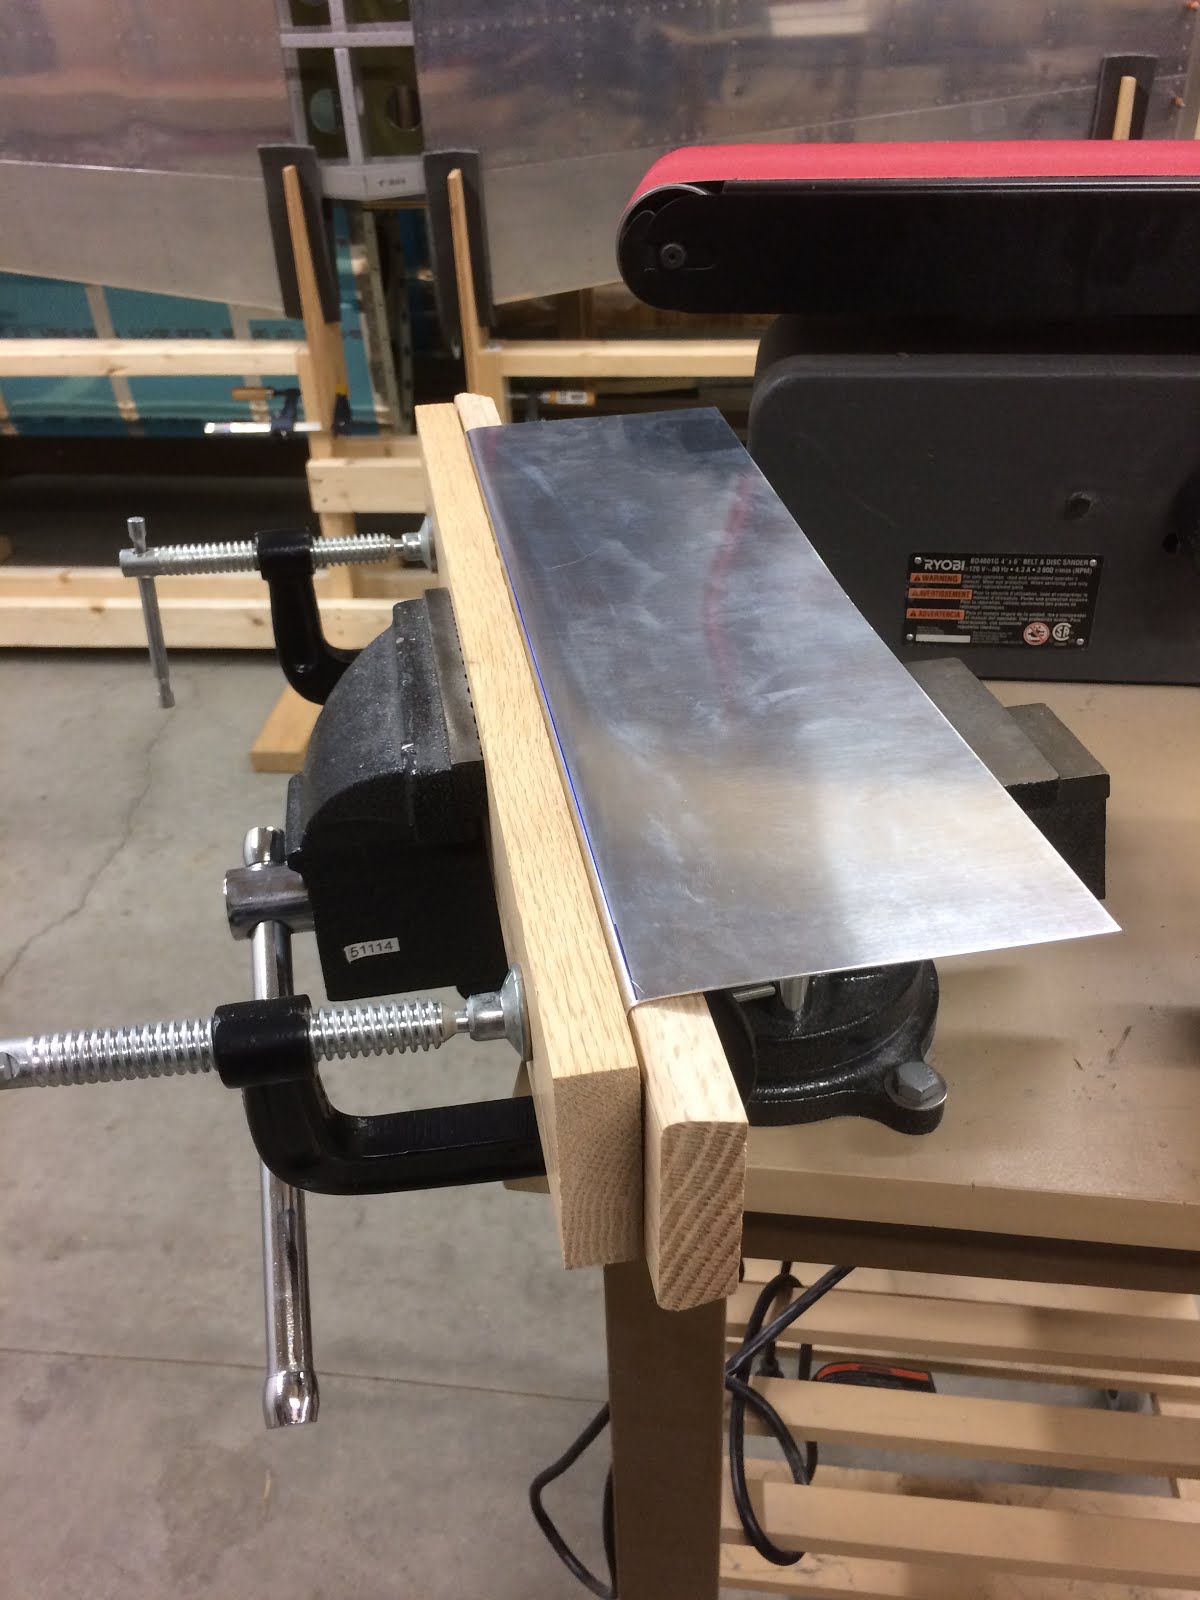
 I was now ready to bend the aileron skins. I had run to home depot and picked out the straightest 2x6's I could find and some 3/16" dowels. I taped the dowels in place and began to bend. The manual says to bend the skins such that when relaxed they touch the aileron spar, but I was having a heck of a time getting it to do that. I was at a point where the ailerons where basically toughing together in the brake and was still about an 1" away.   

So a quick call to vans support confirmed that I was in the ball park. The most important part is that there is no danger of the skin bulging when its cleco'd and its nice and straight. It only take a pound of two of pressure to close the skin the last 1" so there was no worry about too much tension. As for the straight edge....A little squeezing with my homemade trailing edge tool made sure it was nice and straight.

Once that was complete I was ready to begin batch drilling the A-408 reinforcement plates and the aileron hing brackets. Of course I did as much drilling on the drill press!

Monday, October 10, 2016

Priming and riveting the Aileron Stiffeners - 9 hours

Really big day. I had received the replacement aileron stiffener that I originally punched an extra hole on. I quickly got the replacement cut, shaped, match drilled, deburred.

Then I dimpled the aileron skins.
 
After a good cleaning, scuff, degrease, MEK i was ready to prime all the parts.

After a couple hours of cure, I just couldn't wait to start riveting stiffeners...so I went to work.
 

Sunday, October 9, 2016

Pitot plubing lines guide - 3.5 hours

I began fabricating the guide that routes the pitot plumbing under the bellcrank. Similar to many who have used this method before me, I followed suit. I had used 0.025" material and bent a braket 90 degrees. Next I needed to properly locate the bolt holes from the spar to the bracket. A littel head scratching and I then tried a paper template. Pushing the bolts through the holes marched the perfect holes and then I could easily transfer them onto my bracket.


After drilling...The fit was perfect!

Turns out that I placed the holes too close to the bend....So I had to make another angle and start again....this time giving much more space to account for the bellcrank bracket. Then, a bit more work, a cut here and cut there....bit of checking, but of file work....bang! Done.

Cutting the wing skin and forming more brackets - 3 hours

Now all that needs to be done to finish the pitot mast rough-in is to cut the hole in the wing skin.
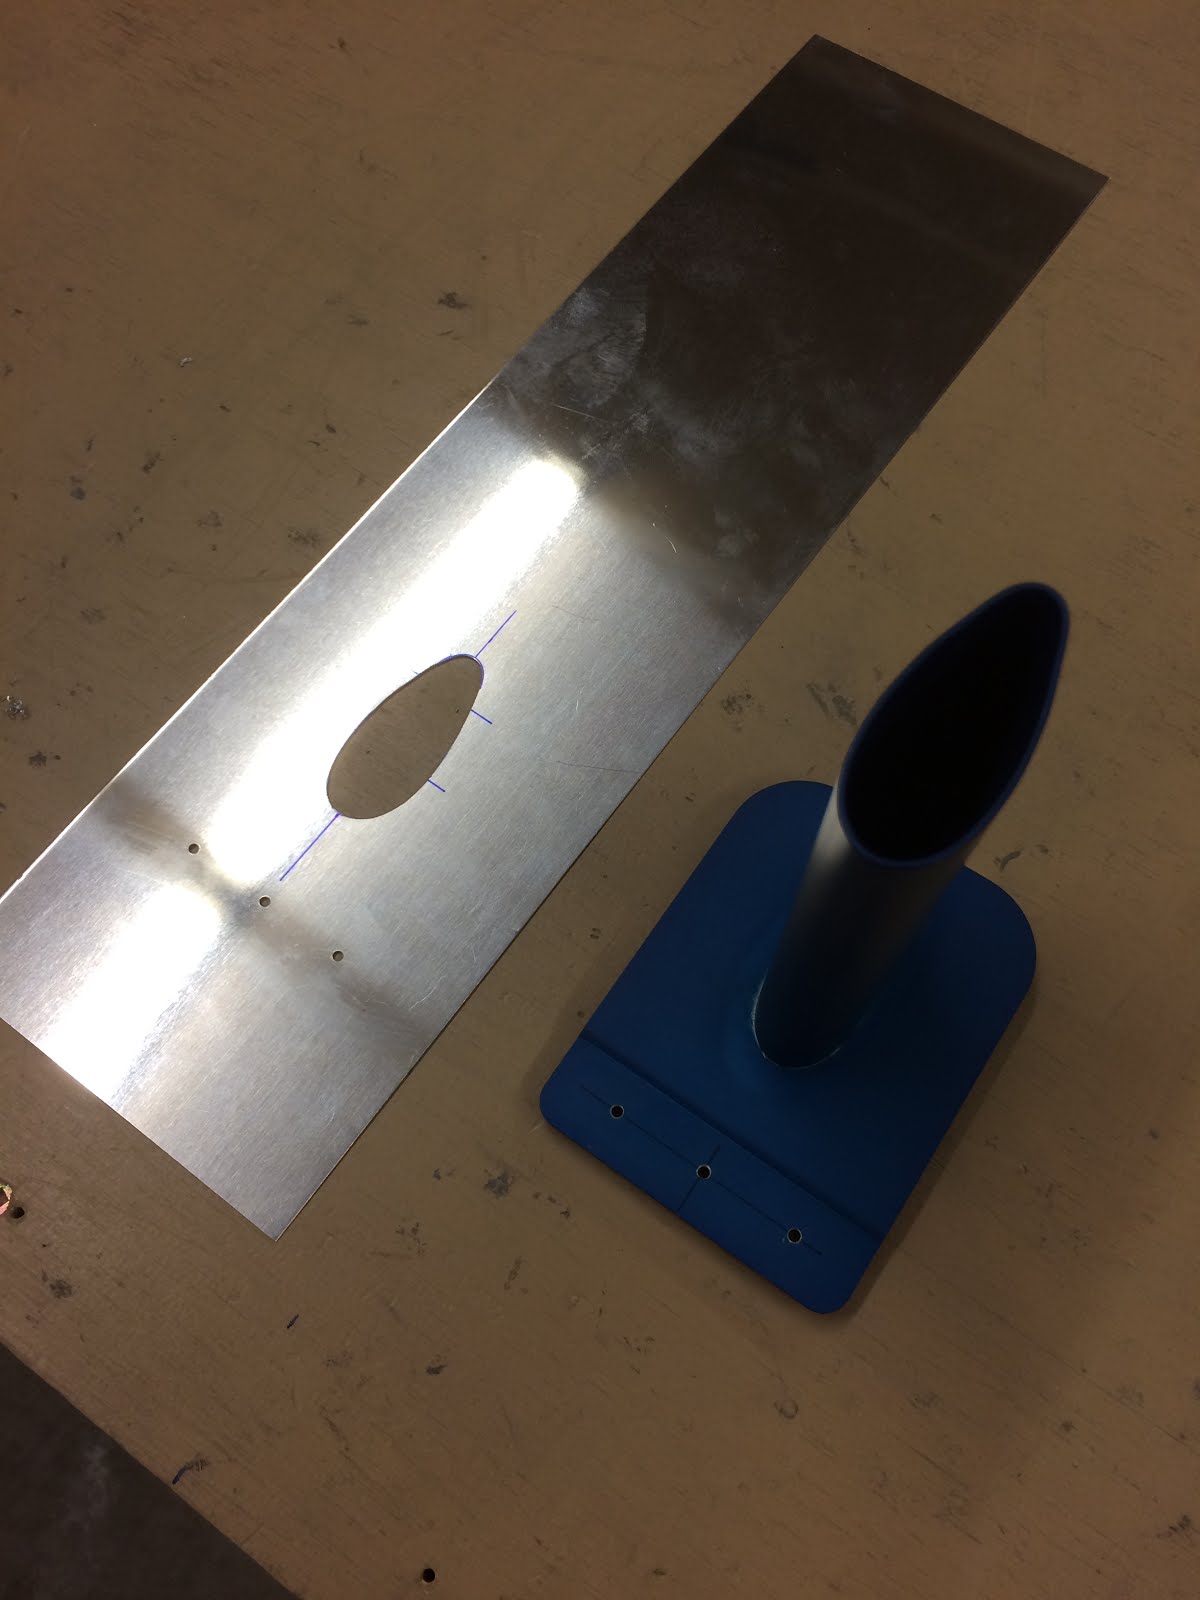
I used the handy aluminum template I had made yesterday and clecod it to the wing skin. I traced the outline of the pitot mast hole onto the skin, found the centerlines and made the initial holes with the unibit. I used the round files to work away at removing the excess material.

Once I was close to the line with the files, I broke out the dremel with sanding drums and went to work. Slowly but surely I made progress.
In the end, I am extremely pleased with the fit.


Now that the mast is done. I need to fabricate the bracket to hold/support the pitot and AOA lines around the bell crank.

Saturday, October 8, 2016

Continued working on the pitot mast - 8 hours

Next I needed to complete the cross brace. To do this I needed to make a specific oak bending block to fit between the ribs. I used the template I have made earlier to ensure the wing ribs where the correct distance apart.

I was sure to cut it to fit 0.025" material on each end of the blocks.

I then radius'd all the corners 1/8" and began to complete all my bends on the cross piece. Lots of triming, filing and sanding. Here is the near complete brace.


Now that I had the template I then set up to place the rivet line centered in the brace but staggered in the middle of the wing rib rivets.


I was now ready to clamp the assembly together and check fitment.

One of the items that I wanted to make is a proper aluminum template for the pitot mast to locate the hole in the skin. The paper template that comes with the mast is very poor. So I used some thin 0.016" thick aluminum and went to work. Best way I found was to cut the holes with a unibit, and then take down large chucks with a round file, then finish with the dremel sanding drums. 

Next I cleco'd the newly fabricated mast template to the wing assembly with the mast installed and everything cleco'd in place. I could then transfer the rivet holes for the cross bracket into the mast template.
Next step I removed the mast, and then celco'd the wing skin on to match drill the cross bracket holes in the wing skin.

I fitted the skin to the wing and very carefully drilled the rivet holes in the skin for the cross bracket.
Once the skin was removed, I could then cleco on the mast template directly onto the skin with precision alignment.

I marked the leading edge of the template and cut it inline with the leading edge of the skin. I cut the top of the mast template as well as it was excessive. I also drilled the two holes that attach the aft end of the mast to the skin.

Next I celco'd the assembly together to finish the rest of the match drilling and to drill in the nutplates that secure the cross bracket to the pitot mast angle bracket.


Little bit of final trimming to do to clear the welds on the mast.

All done. It was a long day but very productive and very precise. Many of the steps where a bit excessive, but at the end of the day I am really pleased with how well it turned out.


Thursday, October 6, 2016

Rethinking the pitot mast fit - 8 hours

After some time off from the plane building with so much other stuff going on. These last few days, I'm feeling like I need to jump back into it. Ive really been thinking about how to mount the pitot mast and support it. After all the test fitting that I have done, I realized that it is not going to work to line up the support bracket with the rivets in the wing rib. It's either too close of too far away. I will have to abandon my original method (sorta) and head in a direction similar to what JRichichi @ Vans Airforce has posted about the method he used to mount his SafeAir1 pitot mast. The difference being that I want to rivet the support brace to the wing for the entire span.

I wanted to form the support brace (bracket). Looking at the methods shown by the "Sportplane Construction Techniques" Book by Tony Bingelis. I can easily make a form out of oak and used them as bending blocks to form the aluminum. So, I when to work making the oak blocks. Then, using 0.025" material. I began to make by first bend.


It came out really nice.

Next piece that I need to bend is another angle support bracket for the pitot mast itself. This bracket gets riveted to the pitot mast, and screwed to the support brace. The idea is that if you ever need to remove the mast for some reason. Three rivets that hold the mast at the spar get drilled out, and two screws accessible from behind get removed and the mast will be able to be removed, without much hassle. To make the pitot mast support. I chose 0.032" material. Bit thicker.

Once it was bent, I cut it to clear the welds on the back side of the mast.


I then fit the assembly to the wing.


Tuesday, September 20, 2016

Match drilled and deburred Ailerons - 4 hours

Pickup where I left off yesterday, I match drilled all the stiffeners to the aileron skins. But the part that I am dreading is the deburring of the skins and stiffeners. A very slow and painful process....I plugged away. Again, Netflix to the rescue to help pass the time. After some time it was all done, and then before dimpling I scuffed everything up with scotchbrite.

I then started dimpling the stiffeners

One little slip up with the pneumatic squeezer resulted in a bad dimple....I will need to replace one stiffener. Doh!!!