
Thursday, August 15, 2019
Edge Prep of Centre Section Parts - 2.5 hours
Fairly boring evening in the garage tonight. I prep'd and deburred the edges of the center section pieces. Tomorrow I will need to deburr all the corners, nooks and crannies.


Tuesday, August 13, 2019
Primed the F-776 Bottom Skin - 2 hours
I dimpled the most forward edge of the F-776 bottom skin that was left outstanding from yesterday. (Minus the countersunk holes).
Next I prepped and primed the F-776 skin. (Washed, Cleaned, Wiped, Acid washed, cleaned and primed)


Next I prepped and primed the F-776 skin. (Washed, Cleaned, Wiped, Acid washed, cleaned and primed)


Monday, August 12, 2019
Aileron Trim Motor and More center section dimpling - 10 hours
I just got back from holidays, so I am eager to get back to the build. Fortunately I don't have to be back to work until tomorrow so I have a full day to myself. I spent the morning unpacking and cleaning, then the rest of the day was a huge build day.
I set up the aileron trim motor and installed the linkages.

I then connected the wiring to allow my to operate the trim motor as per the instructions and found/marked the centre position. I soon found out how poor my wire strippers are on aircraft tefzel wiring, so after some reading I soon found out that I will need to buy some proper (expensive) wire strippers. I will have to wait for payday to order those and I after this, I wont be doing any wiring for some time. So I'll suffer with the poor wire stripper for now.

I then set up the assembly to find the centre alignment line. This I took my time on and went back and forth a bit, but I managed to settle on an alignment. I clamped the assembly and drilled the mounting holes.
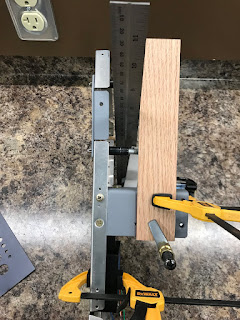


I have a lot of questions on how that trim motor should sit on the bead in the rib. The instructions say to allow the motor to distort the bead. Which raises more questions then it answers. How much distortion is ok? A bead in the rib is used to increase the rigidness of the rib, so distorting it will reduce that. If I flatten a portion of the bead, is that ok? If i build spacers, will the trim motor interfere with the aileron pushrod? Unfortunately when googling it, there is not a whole lot off build logs that delve into this area. I posted a question on the Van's Facebook group and after a bunch of responses I sort of wished I didn't.
Let's just say, in the end, I think for my build I will make a spacer to allow me to mount the trim motor and not affect the bead. When measuring the depth of the bead, it only is 1/16" so the spacer I make can be from 0.063" material. (I'd prefer to make a proper spacer, rather than use washers). I'll put this on my future order list and make this space at a later time.
Next I dimpled the baggage floors.

Unfortunately on the left baggage floor I forgot to prep the factory/pre-drilled #19 holes on the one side and when I dimpled them, the holes cracked. (If you dive back into when I did the fuel tanks, I figured out how to dimple #8 screws without cracks - garetsrv.blogspot.com/2016/03/) So I need to replace the left Baggage floor.

I moved on to the F-776 bottom skin. Quite a lot of hole and edge de-burring. But I finished the evening by dimpling the #40 holes on the DRDT. I will dimple the most forward holes (F-704 forward spar) with the pneumatic squeezer. I also choose not to dimple the holes for the F-623 corner ribs as I still have to cleco those pieces for fitting and drilling the side skins. At the end of the night, here's what it all looked like.


I set up the aileron trim motor and installed the linkages.

I then connected the wiring to allow my to operate the trim motor as per the instructions and found/marked the centre position. I soon found out how poor my wire strippers are on aircraft tefzel wiring, so after some reading I soon found out that I will need to buy some proper (expensive) wire strippers. I will have to wait for payday to order those and I after this, I wont be doing any wiring for some time. So I'll suffer with the poor wire stripper for now.

I then set up the assembly to find the centre alignment line. This I took my time on and went back and forth a bit, but I managed to settle on an alignment. I clamped the assembly and drilled the mounting holes.


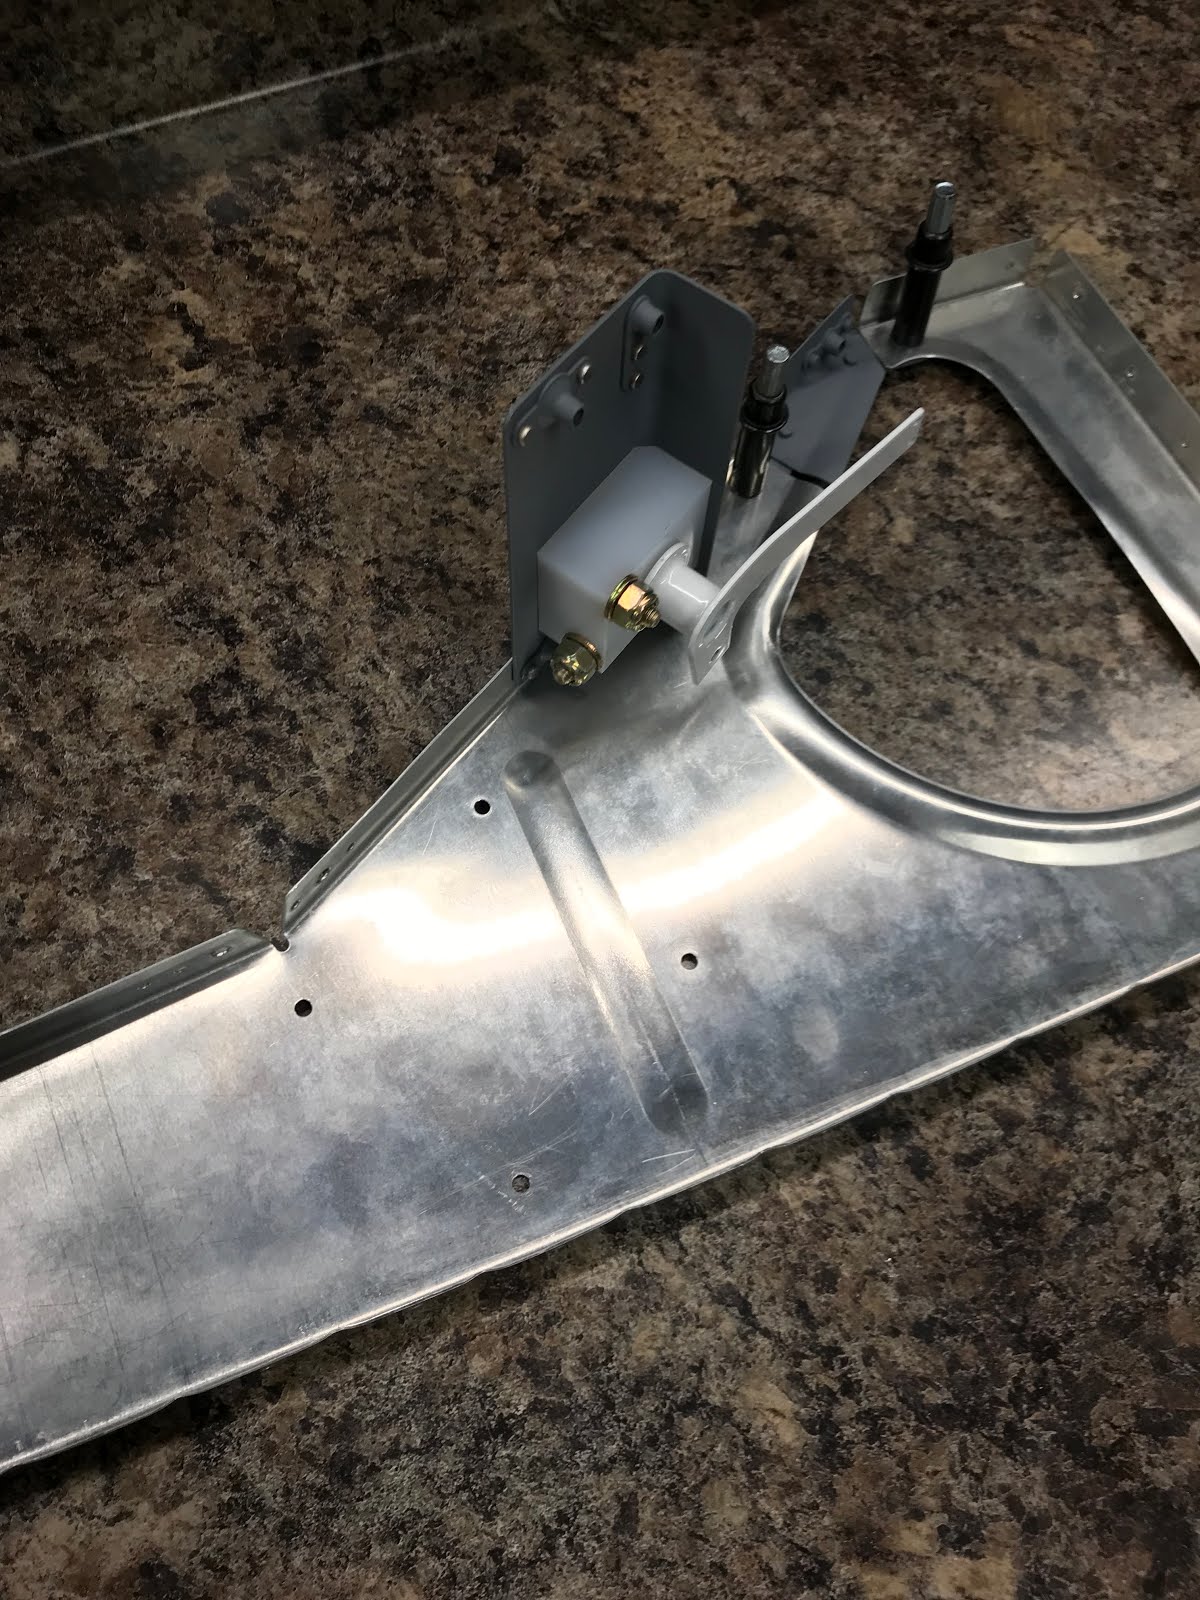
I have a lot of questions on how that trim motor should sit on the bead in the rib. The instructions say to allow the motor to distort the bead. Which raises more questions then it answers. How much distortion is ok? A bead in the rib is used to increase the rigidness of the rib, so distorting it will reduce that. If I flatten a portion of the bead, is that ok? If i build spacers, will the trim motor interfere with the aileron pushrod? Unfortunately when googling it, there is not a whole lot off build logs that delve into this area. I posted a question on the Van's Facebook group and after a bunch of responses I sort of wished I didn't.
Let's just say, in the end, I think for my build I will make a spacer to allow me to mount the trim motor and not affect the bead. When measuring the depth of the bead, it only is 1/16" so the spacer I make can be from 0.063" material. (I'd prefer to make a proper spacer, rather than use washers). I'll put this on my future order list and make this space at a later time.
Next I dimpled the baggage floors.

Unfortunately on the left baggage floor I forgot to prep the factory/pre-drilled #19 holes on the one side and when I dimpled them, the holes cracked. (If you dive back into when I did the fuel tanks, I figured out how to dimple #8 screws without cracks - garetsrv.blogspot.com/2016/03/) So I need to replace the left Baggage floor.

I moved on to the F-776 bottom skin. Quite a lot of hole and edge de-burring. But I finished the evening by dimpling the #40 holes on the DRDT. I will dimple the most forward holes (F-704 forward spar) with the pneumatic squeezer. I also choose not to dimple the holes for the F-623 corner ribs as I still have to cleco those pieces for fitting and drilling the side skins. At the end of the night, here's what it all looked like.


Sunday, August 11, 2019
A few new parts arrive
A received a few new parts in the mail that I ordered prior to going on holidays. From Cleveland - A new #8 dimple die (I had to grind down the edge of the one I have for the baggage ribs) and rudder cable fairings. From Vans - New flap mounting blocks and some seat belt attach hardware. I have to remove the seat belt brackets to rivet the center section and I do not want to reuse the old hardware.


Tuesday, July 30, 2019
Countersinking and dimpling seat and floor ribs - 3 hours
I need to drill the crotch strap brackets for nut plates. Using the same process from yesterday, these go fairly quickly. I then set up the countersink tool and countersunk the rivet holes for NAS/Opps rivets.

I then countersunk all the other rivet holes in the ribs for the nutplates. Once that was done, I could then dimple the #8 screws in the baggage ribs. (Note that the most forward #19 hole in the rib is not dimpled as that is the hole that meets the F-705A bulkhead and I decided not to dimple those holes).
Side note. I had to grind down the edge of my #8 screw female die so that it would fit in the flange. I better order a new one


I then countersunk all the other rivet holes in the ribs for the nutplates. Once that was done, I could then dimple the #8 screws in the baggage ribs. (Note that the most forward #19 hole in the rib is not dimpled as that is the hole that meets the F-705A bulkhead and I decided not to dimple those holes).
Side note. I had to grind down the edge of my #8 screw female die so that it would fit in the flange. I better order a new one


Sunday, July 28, 2019
More prep’ing for the removable floor panels - 9 hours
Nice big day in the garage. I've been thinking on how to secure the floors at the F-705 bulkhead. I see some have chosen to use flush #8 screws but I'm concerned with how narrow the F-705A flange is to accept the #8 screw. Its much more narrow than the seat and baggage ribs. I've decided to not dimple these and just use #8 round head screws. First step is to drill out the holes to a #19 hole. I cut a piece of MDF and filleted the edge with a router so it will nest nicely inside the F-705A bulkhead.

I began clamping and securing the MDF. I used clamps which will allow me to drill the web to use clecos.

I then installed clecos and removed the clamps.

With the clamps removed, I can setup up the bulkhead vertically so I can open the holes on the flange to #19.

One of the tricky holes is the very last hole at each end. Its too close for the 90deg drill, and I do not have a super long #19 drill bit. So I used a super long #30 drill bit and then used by round chainsaw file. Coincidentally my round chainsaw file makes holes about #21/#20 so I am super lucky.


I started to prep all of the F-716 seat ribs for nut plates. I drew a centre reference line down the flange of all ribs. I then use a sacrificial nut plate with a #8 screw and alight the nutplate to the centre line.


Clamp one leg, ensure straight, drill opposite leg then cleco it. Remove the clamp and drill the remaining hole. Over, and Over again. By the end of the day all of the ribs have been drilled for removable floors.
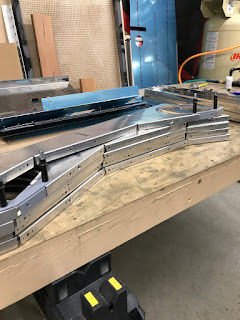


I began clamping and securing the MDF. I used clamps which will allow me to drill the web to use clecos.

I then installed clecos and removed the clamps.

With the clamps removed, I can setup up the bulkhead vertically so I can open the holes on the flange to #19.

One of the tricky holes is the very last hole at each end. Its too close for the 90deg drill, and I do not have a super long #19 drill bit. So I used a super long #30 drill bit and then used by round chainsaw file. Coincidentally my round chainsaw file makes holes about #21/#20 so I am super lucky.


I started to prep all of the F-716 seat ribs for nut plates. I drew a centre reference line down the flange of all ribs. I then use a sacrificial nut plate with a #8 screw and alight the nutplate to the centre line.


Clamp one leg, ensure straight, drill opposite leg then cleco it. Remove the clamp and drill the remaining hole. Over, and Over again. By the end of the day all of the ribs have been drilled for removable floors.


Saturday, July 27, 2019
Prep’ing for the removable floor panels - 4 hours
I de-vinyled the seat plans/floor and baggage floors. A bit tedious and its not really necessary I suppose but heck...why not.

Once I fitted the seat pans/floors to the ribs, I soon realized match drilling the holes to #19 wasn’t going to be easy or all that accurate due to how tricky the fit was turning out to be in some areas. I ended up deciding that I would open up the holes in the floors and ribs separately. I figure these are not a super critical area and if you are using #8 screws, getting it absolutely precise is not really necessary.
I picked up some MDF at Home Depot to help as a drilling guide. MDF works great in help ensuring drill bits do not wander. I opened up the holes in the seat pans/baggage floors to #19.

Next I cut the MDF into strips. This would allow me to fit all of the ribs onto the strips to open up the holes in the flanges.


I wasn’t ready to call it a night just yet so I set up the drill press to drill the Flap mounting blocks.

Just tricky getting the holes drilled perfectly perpendicular and parallel. I messed up one block a little, and the second I managed to get near perfect. I suppose I might order another....It’s bugging me its not 100% and its a cheap part.

Once I fitted the seat pans/floors to the ribs, I soon realized match drilling the holes to #19 wasn’t going to be easy or all that accurate due to how tricky the fit was turning out to be in some areas. I ended up deciding that I would open up the holes in the floors and ribs separately. I figure these are not a super critical area and if you are using #8 screws, getting it absolutely precise is not really necessary.
I picked up some MDF at Home Depot to help as a drilling guide. MDF works great in help ensuring drill bits do not wander. I opened up the holes in the seat pans/baggage floors to #19.

Next I cut the MDF into strips. This would allow me to fit all of the ribs onto the strips to open up the holes in the flanges.


I wasn’t ready to call it a night just yet so I set up the drill press to drill the Flap mounting blocks.

Just tricky getting the holes drilled perfectly perpendicular and parallel. I messed up one block a little, and the second I managed to get near perfect. I suppose I might order another....It’s bugging me its not 100% and its a cheap part.
Subscribe to:
Posts (Atom)